# up4 guide, full text
> Every page of the up4 guide (https://upfour.io/docs) in English, in navigation order, concatenated. Each page starts with its title, a one-line description and its source URL. All sources: https://upfour.io/llms.txt. For the API: https://upfour.io/docs/api/llms-full.txt.
---
# Getting started
> Create your up4 account, watch your first website and make sure an alert reaches you, in about ten minutes.
Source: https://upfour.io/docs/getting-started
In about ten minutes up4 watches your first website, and you know that an alert will reach you.
Create your account with your email address.
[Start free](https://app.upfour.io/register)
€9 starting credit, no card, about three months of light use. After that, pay as you go from €3 a month or choose a monthly plan.
- **Who:** No account needed yet
- **Time:** About ten minutes
- **Cost:** €9 starting credit, no card
You need an email address you can open and the address of one website. You create a Company and become its Owner. If a colleague invites you instead, up4 only asks for your name.
## Steps
### 1. [Create your account](https://upfour.io/docs/getting-started#account)
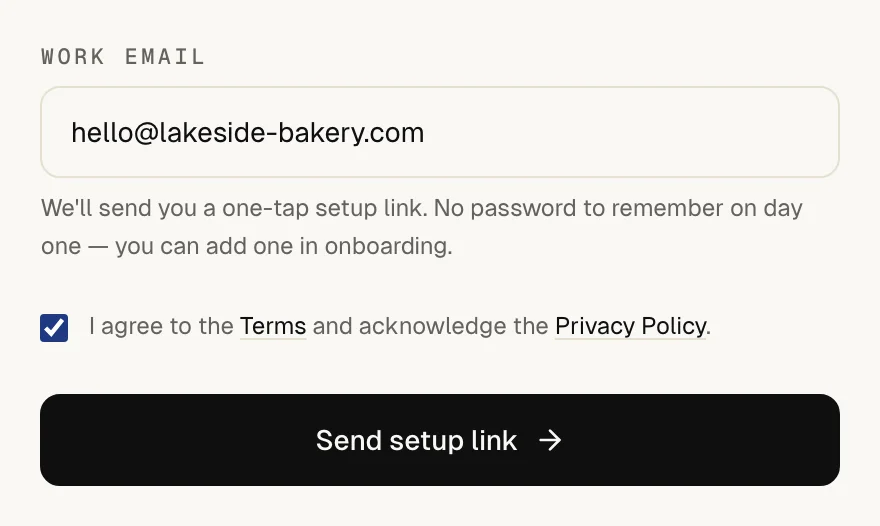
On the registration page, enter your address under **Work email**, accept the terms and the privacy policy, and select **Send setup link**.
Open the link in the email. It signs you in, so you need no password yet. The email says how long the link stays valid.
[](https://upfour.io/docs/images/walk/en/getting-started-account.webp)
### 2. [Say who you watch for](https://upfour.io/docs/getting-started#audience)
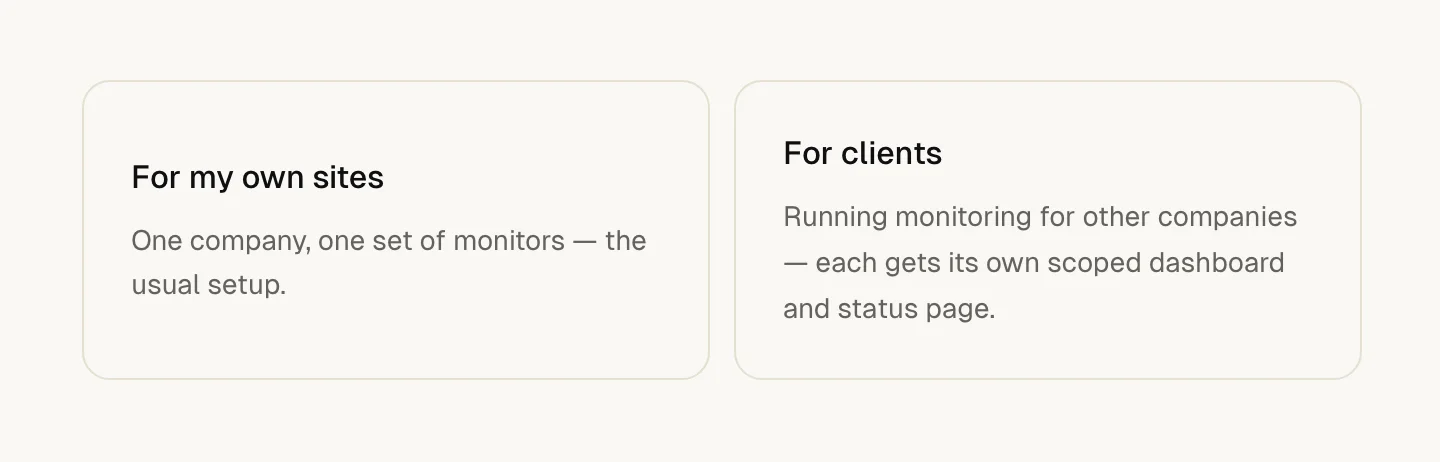
up4 may ask first. Choose **For my own sites** for your own websites. Choose **For clients** if you monitor for other companies. The second choice turns on Clients, and the next steps then ask for a client name as well.
You can turn on Clients later in the settings, whichever you choose. [Add a client](https://upfour.io/docs/add-a-client.md) shows what they are for.
[](https://upfour.io/docs/images/walk/en/getting-started-audience.webp)
### 3. [Tell up4 your name](https://upfour.io/docs/getting-started#profile)
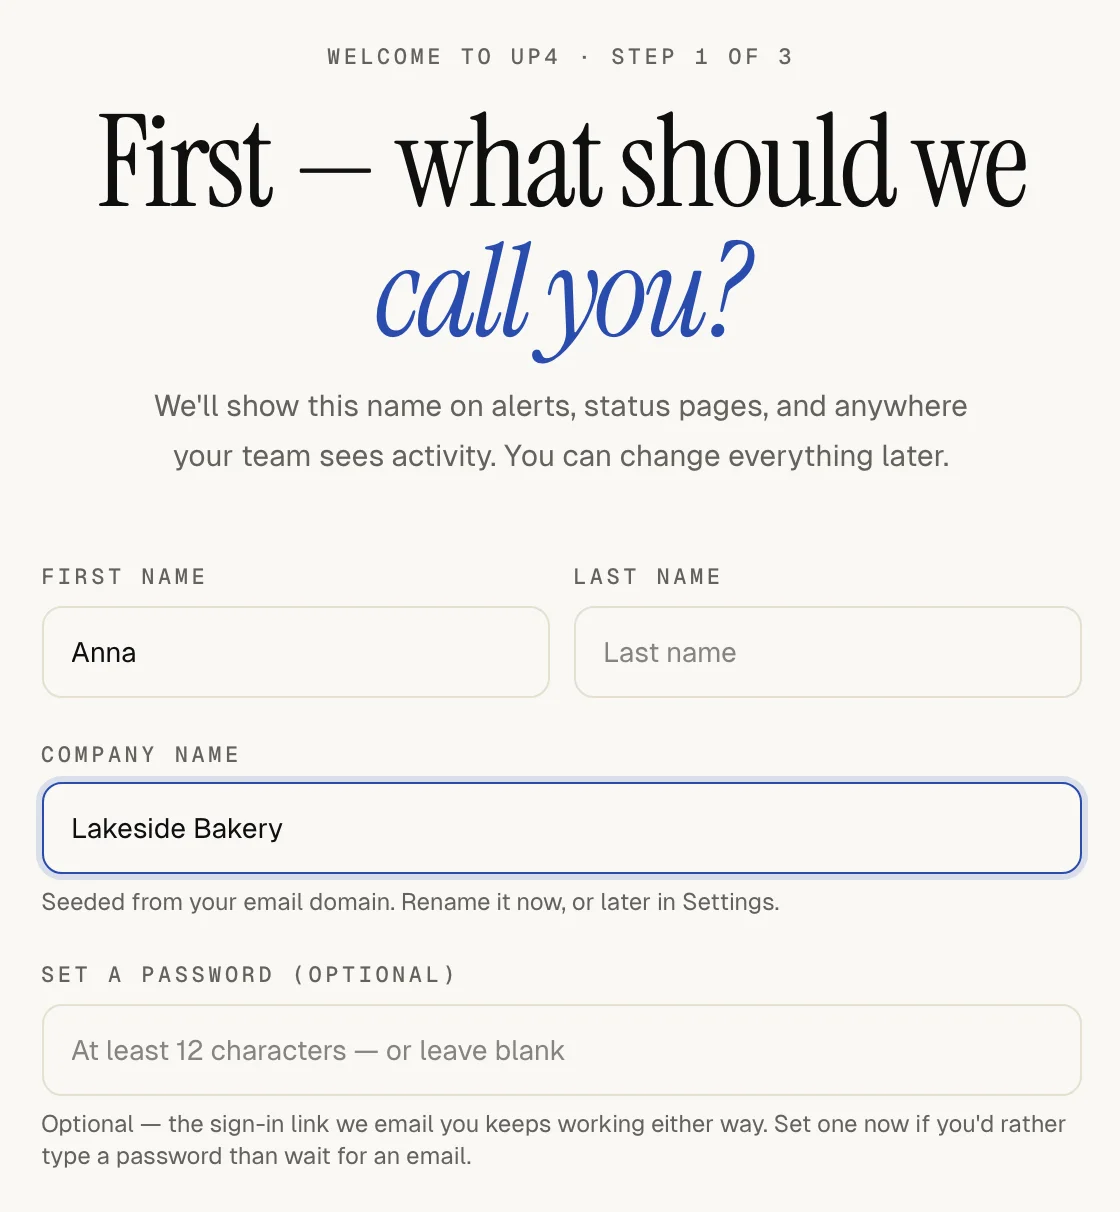
Enter your **First name** and **Last name**. Under **Company name** up4 suggests a name based on your email domain. Leave the field empty to use your own name. You can rename the Company later.
A password is optional. The sign-in link keeps working without one. Select **Continue**.
[](https://upfour.io/docs/images/walk/en/getting-started-profile.webp)
### 4. [Add your first website](https://upfour.io/docs/getting-started#website)
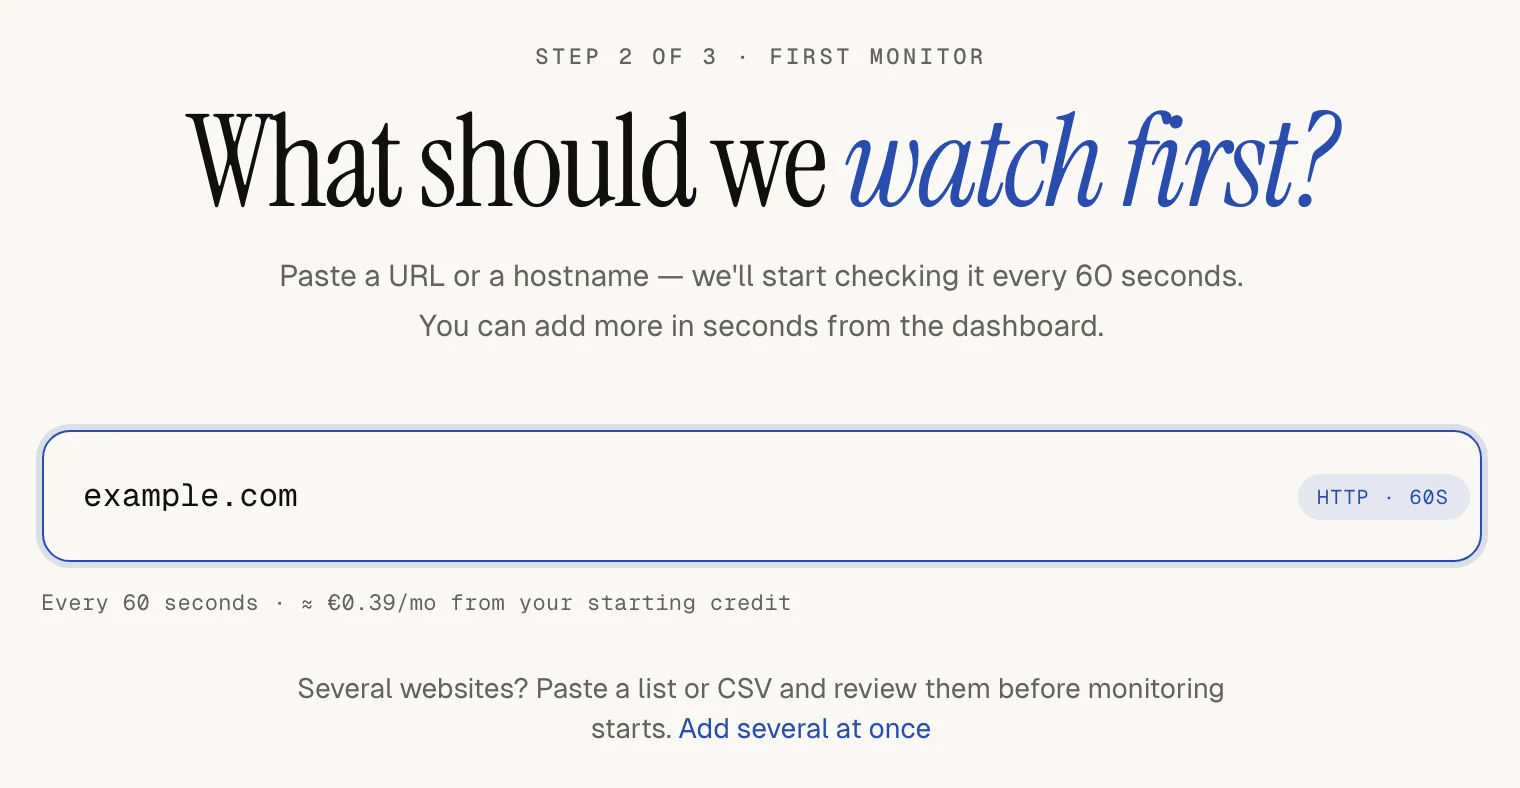
Paste the address of a website, for example `example.com`. up4 checks it every minute. A website checked that often uses about €0.39 a month. Select **Add monitor & continue**.
No website at hand? Select **Skip**. Several at once? **Add several at once** takes a list, and [Import websites](https://upfour.io/docs/import.md) covers files. All options of a single website are in [Watch a website](https://upfour.io/docs/watch-a-website.md).
[](https://upfour.io/docs/images/walk/en/getting-started-website.webp)
### 5. [Choose where alerts go](https://upfour.io/docs/getting-started#alerts)
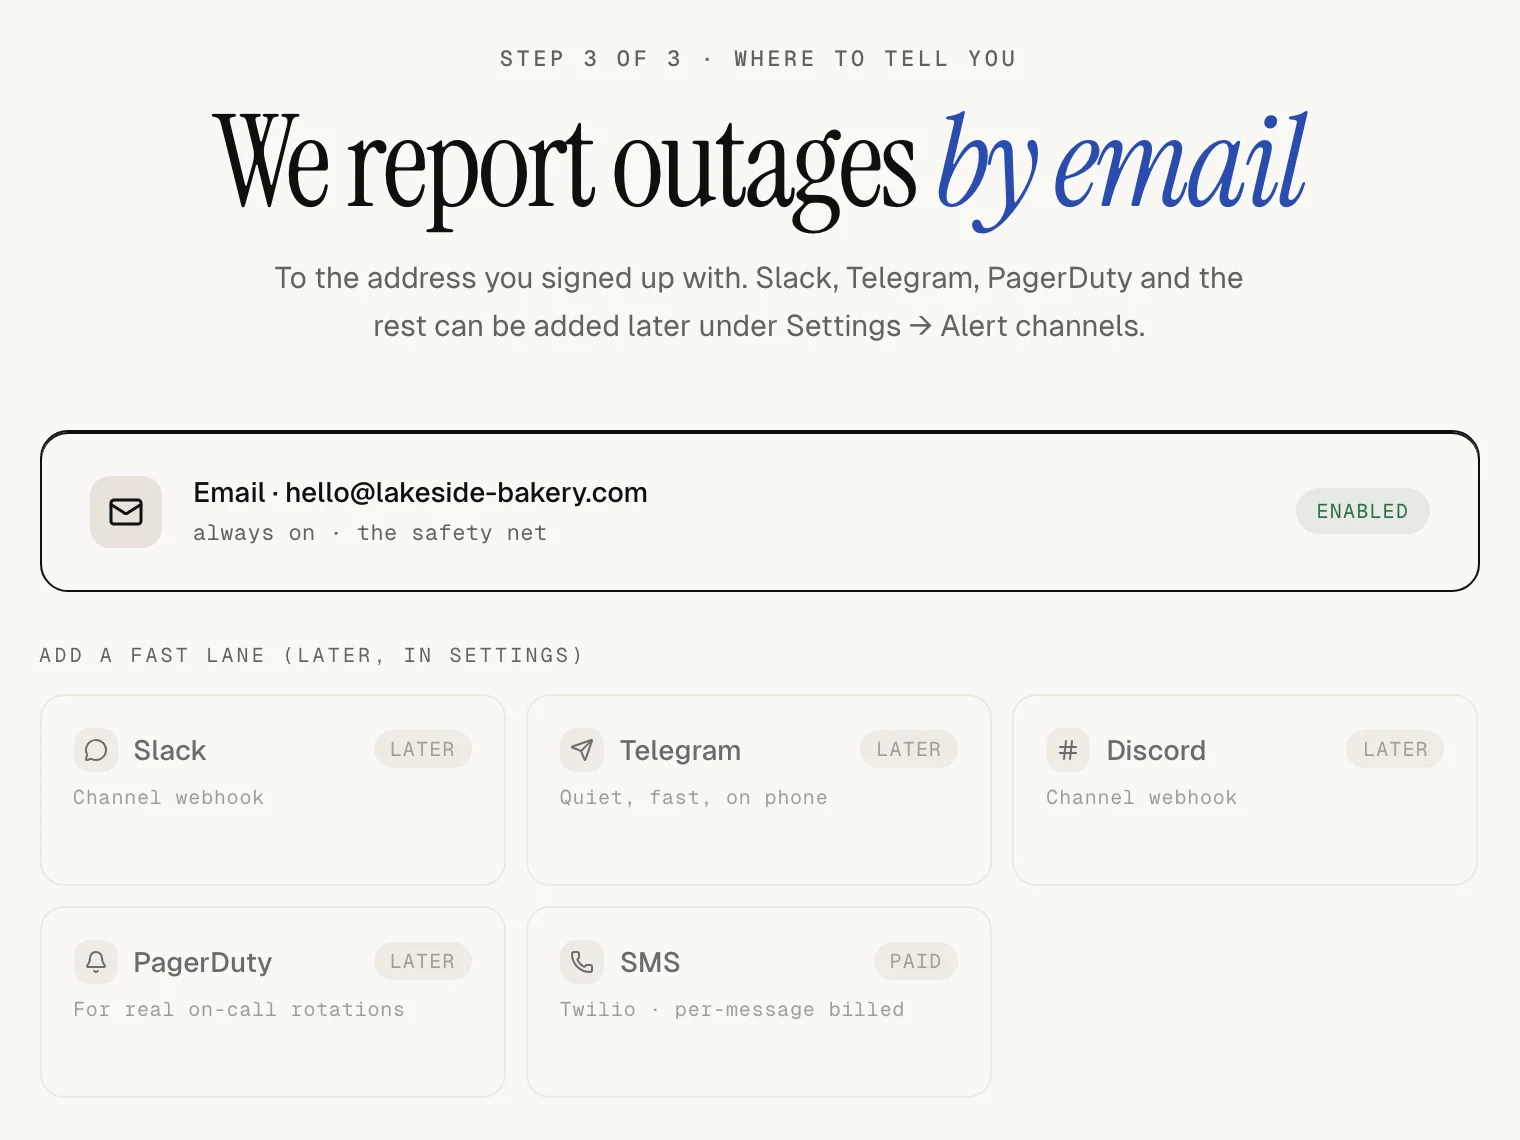
Your own email address is already selected. Slack, Telegram and the other channels can wait: [Receive alerts](https://upfour.io/docs/receive-alerts.md) shows how to add them. Select **Finish setup**.
[](https://upfour.io/docs/images/walk/en/getting-started-alerts.webp)
### 6. [Send a test alert](https://upfour.io/docs/getting-started#test)
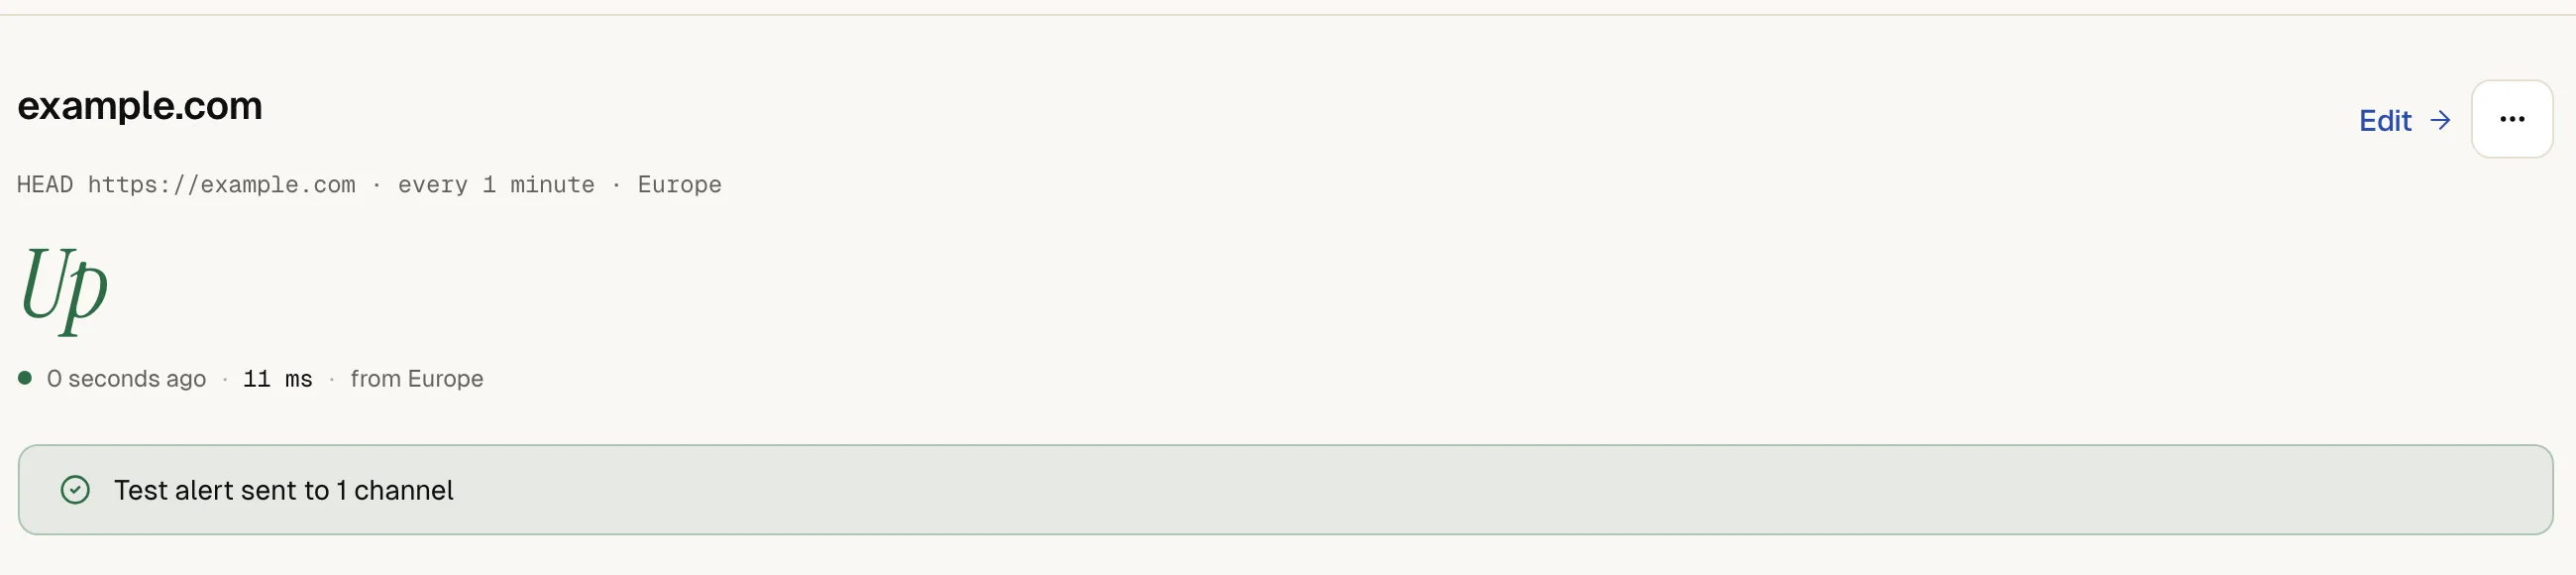
Select **Open your dashboard**. The checklist **Getting started** lists **Send a test alert** as its third step. Select **Send test alert**, choose **Send test** on the card of your email channel, and look in your inbox.
[](https://upfour.io/docs/images/walk/en/getting-started-test.webp)
## How you know it worked
The test email arrives in your inbox. Back on the dashboard, the checklist is complete: the line **All set.** takes its place and ends with “the test alert arrived”.
Once the first check has come back, the page of your website shows **up**. The first result usually arrives within a minute.
## If something is off
The setup email does not arrive.
Look in your spam folder. Then go back to the registration page and request a new link.
The monitor shows down although the site works for you.
A firewall may block up4's checkers. Allow the addresses listed under [where checks come from](https://upfour.io/ips).
The test email does not arrive.
Check the spam folder and the address of your [alert channel](https://upfour.io/docs/receive-alerts.md). More in [troubleshooting](https://upfour.io/docs/troubleshooting.md).
## What up4 does not do here
- The first website is an HTTP check. Ports, ping and DNS records are set up in the advanced form: [check a server, port or DNS record](https://upfour.io/docs/check-server-port-dns.md).
- If you skip the website in setup, your email address still becomes an alert channel. If you skip **Send a test alert**, up4 keeps checking and alerting, but you have not seen a message arrive.
- A status change needs 3 matching results, so one failed check does not alert you. [When you get alerted](https://upfour.io/docs/how/when-you-get-alerted.md) explains the timing.
- Starting credit needs no card. When it is used up before you have paid, up4 pauses your monitors and keeps your data. [Credit and plans](https://upfour.io/docs/credit-and-plans.md) shows the ways to continue, and [what costs money](https://upfour.io/docs/how/what-costs-money.md) what each check costs.
## The checklist on your dashboard
A new account lands on a dashboard with the checklist **Getting started**. Its three steps are **Add a website**, **Choose who gets alerted** and **Send a test alert**. The last one stays locked until you have chosen who gets alerted. Under **Can wait** sit **Connect a scheduled job** and **Create a status page**. Next to the checklist, the tour **How up4 works** shows in five scenes what up4 does when a website goes down. Once a monitor exists, it plays with your own website and marks what is on and what you could still switch on.
- **Skip.** **Skip** on the test alert and the cross on the two items under **Can wait** take them off the list. Skipping the test alert counts as finished.
- **Fold.** **Hide** folds the checklist and the tour into a slim banner. **Show** opens them again.
- **Hide.** The cross on the banner hides everything. When all steps are done, a line **All set.** takes the place of the checklist, with its own cross. It also disappears by itself 7 days after you finished.
- **Bring it back.** Press ⌘ K (Ctrl K on Windows and Linux), type **Getting started** and press Enter. The setting is saved for you and the Company, so it follows you to other devices.
Viewers do not see the checklist.
## Where to go next
- [Publish a status page](https://upfour.io/docs/publish-a-status-page.md) to tell your visitors when something is wrong.
- [Watch a scheduled job](https://upfour.io/docs/watch-a-scheduled-job.md) to hear about backups and imports that stop running.
- [Invite your team](https://upfour.io/docs/team-and-roles.md) and decide who can change what.
- [Add a client](https://upfour.io/docs/add-a-client.md) if you run monitoring for other companies.
- [Build an alert plan](https://upfour.io/docs/build-an-alert-plan.md) to escalate when nobody reacts.
---
# Watch a website
> Add a website to up4 in about two minutes and get an email when it stops answering.
Source: https://upfour.io/docs/watch-a-website
Afterwards up4 checks your website around the clock and emails you when it stops answering.
- **Who:** Any role except **Viewer**
- **Time:** About two minutes
- **Cost:** About €0.13 a month from your credit
The amount is for a website checked every three minutes.
**In up4:** Monitoring › New monitor · [Open in up4](https://app.upfour.io/monitors/new)
## Steps
### 1. [Enter the address](https://upfour.io/docs/watch-a-website#address)
Type the address of the page you want to watch, for example `example.com`. up4 adds `https://` for you.
If another monitor already watches that address, up4 names it and warns that a second one doubles the cost and opens two incidents for one outage. The button then reads **Create anyway**.
[](https://upfour.io/docs/images/walk/en/watch-a-website-address.webp)
### 2. [Choose how often up4 checks](https://upfour.io/docs/watch-a-website#interval)
Pick a value under **How often**. Shorter intervals notice an outage sooner and cost more:
- Every three minutes, the default: about €0.13 a month.
- Every minute: about €0.39 a month.
- Every ten seconds: about €2.33 a month.
[](https://upfour.io/docs/images/walk/en/watch-a-website-interval.webp)
### 3. [Choose who gets alerted](https://upfour.io/docs/watch-a-website#recipients)
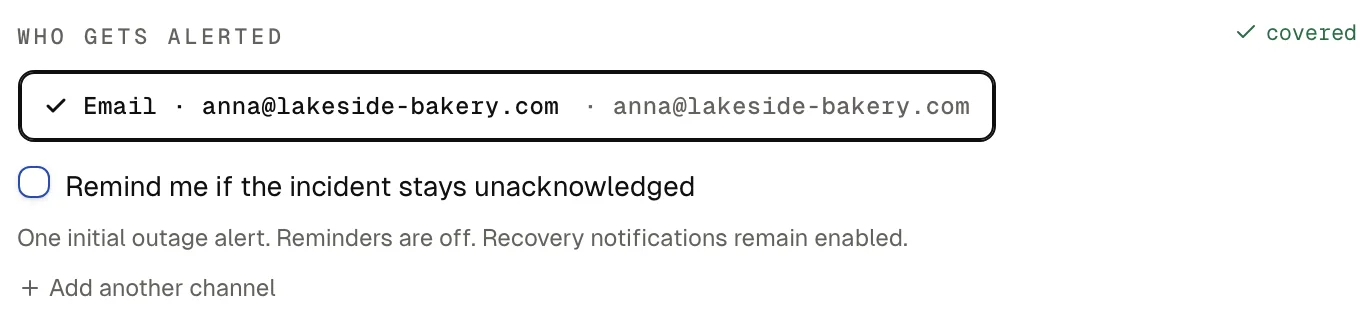
Under **Who gets alerted**, choose who hears about an outage. The first time, select **Email me at your address**: up4 sets up an email channel for your own address and selects it. Once that channel exists, it is selected for you.
Add a colleague or another [alert channel](https://upfour.io/docs/receive-alerts.md) if someone else should hear about outages too. Without a recipient the monitor still runs, but nobody is alerted.
[](https://upfour.io/docs/images/walk/en/watch-a-website-recipients.webp)
### 4. [Check the summary and create the monitor](https://upfour.io/docs/watch-a-website#create)
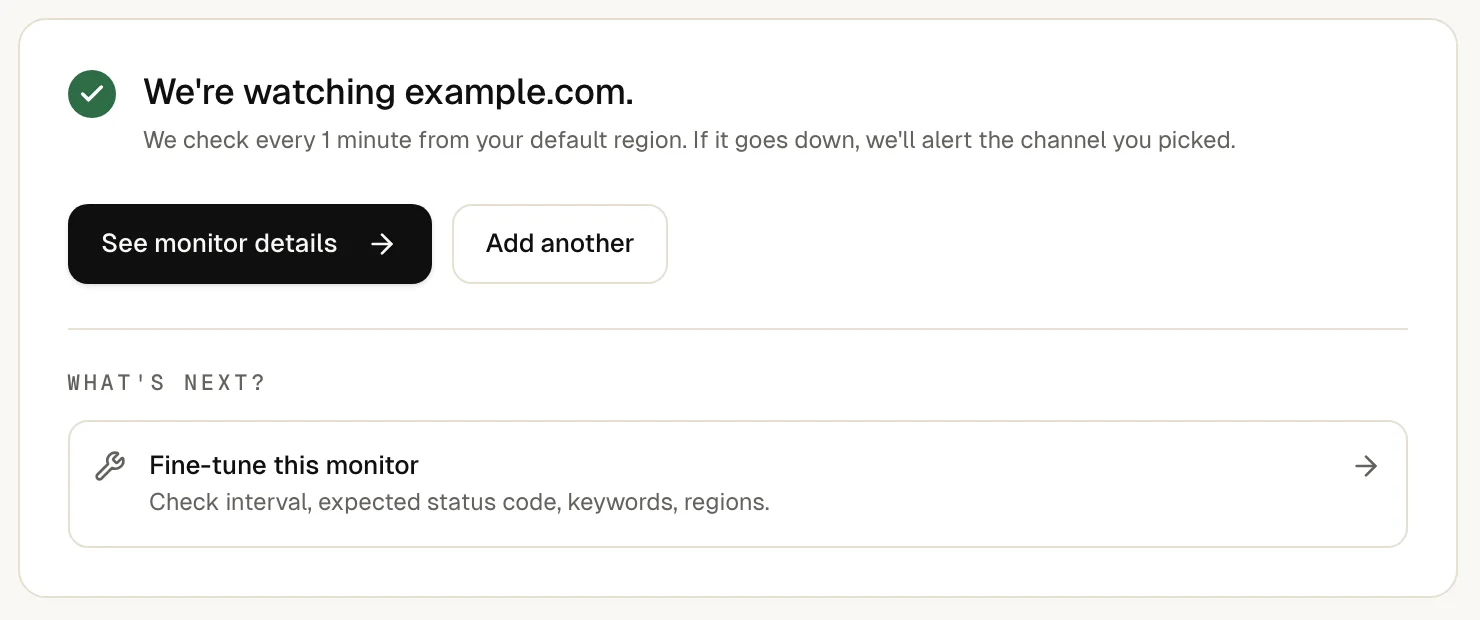
The box **In plain words** repeats what will run, who is alerted and what it costs. If it reads right, select **Create monitor**.
[](https://upfour.io/docs/images/walk/en/watch-a-website-create.webp)
## How you know it worked
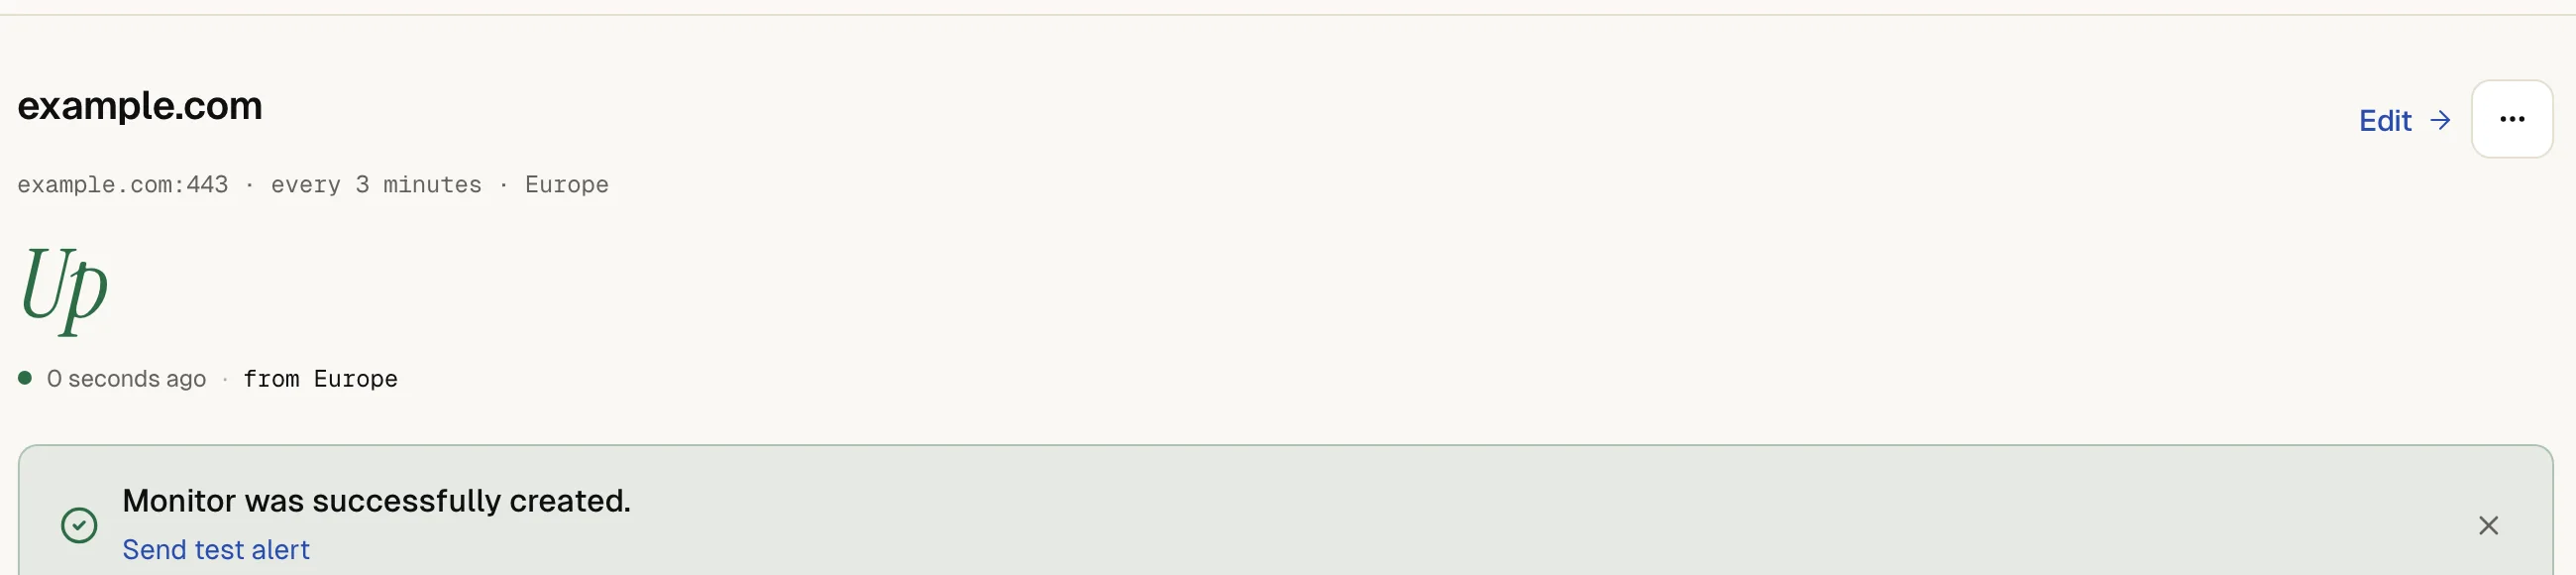
up4 confirms with **We're watching example.com.** and adds “If it goes down, we'll alert the channel you picked.”
Select **See monitor details**. The monitor page shows **Pending** until the first result arrives, usually within a minute, then **Up**.
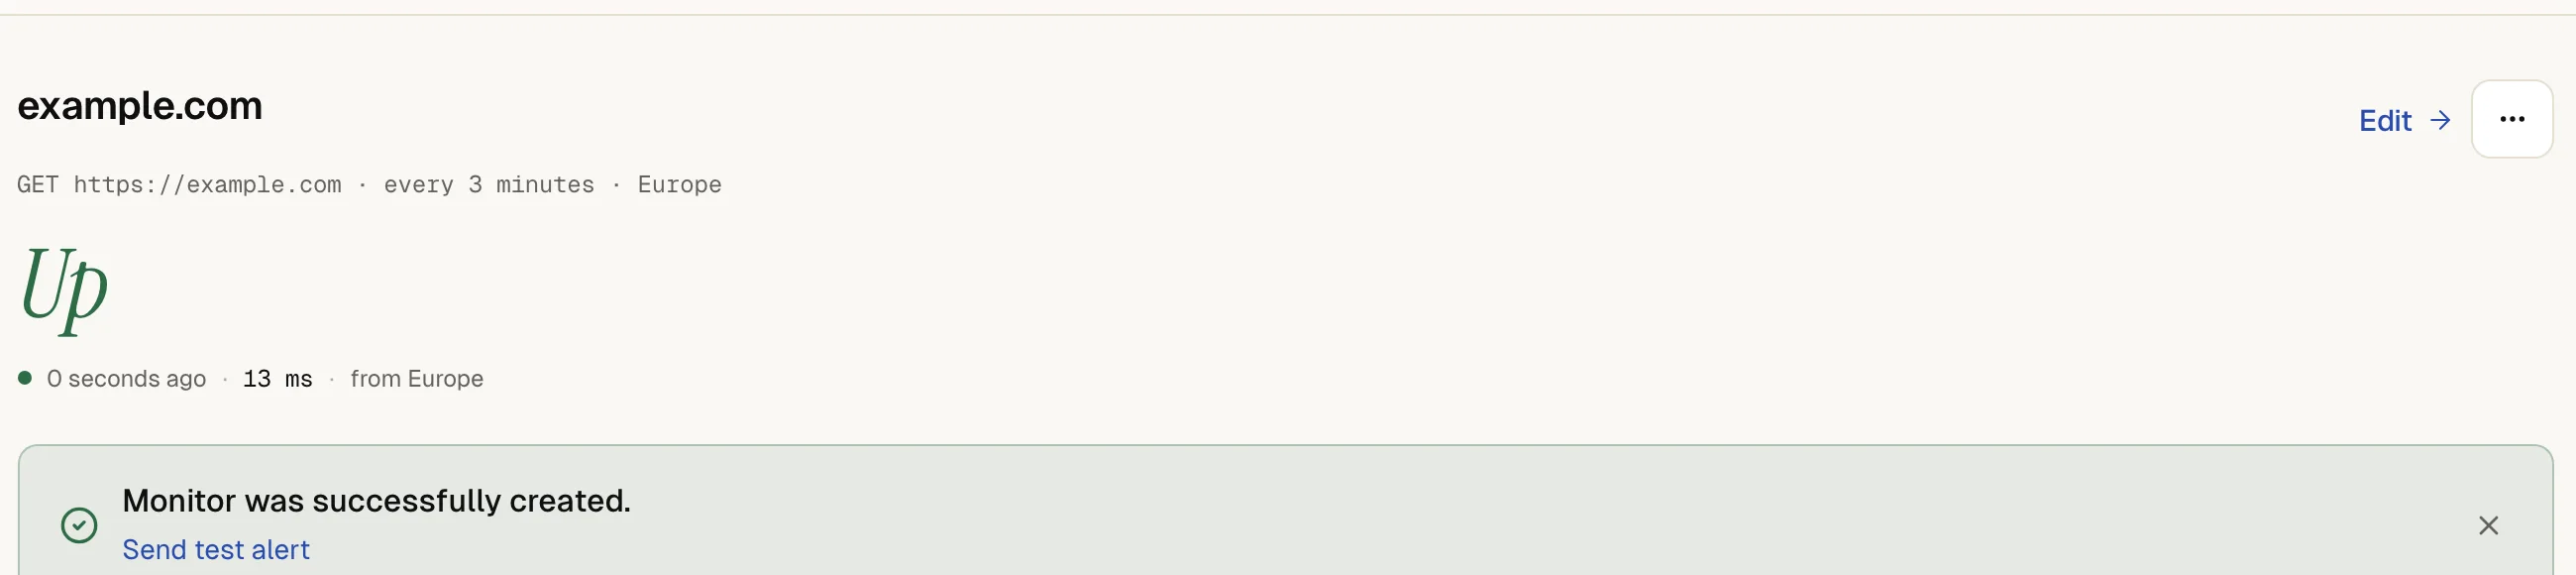
To see an alert arrive without waiting for an outage, select **Send test alert** in the green banner “Monitor was successfully created.” The banner only appears right after you create the monitor. Later, open the monitor, press ⌘ K (Ctrl K on Windows and Linux) and choose **Send test alert**.
## If something is off
The address is refused.
Enter a domain with its ending, such as `example.com`, without spaces.
The monitor shows “Down” although the site works for you.
A firewall may block up4's checkers. Allow the addresses listed under [where checks come from](https://upfour.io/ips).
No test email arrives.
Look in your spam folder, then check the address in your [alert channels](https://upfour.io/docs/receive-alerts.md).
## What up4 does not do here
- This form checks from one region, your default. Choose more regions with **Use advanced setup**.
- A website counts as up when it answers without an error. To make sure a page shows the right content, [check for a keyword](https://upfour.io/docs/check-page-content.md).
- up4 does not sign in to pages behind a login form.
- A status change needs 3 matching results, so a single failed check does not alert you. How fast the email arrives depends on your interval and your mail provider. [When you get alerted](https://upfour.io/docs/how/when-you-get-alerted.md).
[Per API POST /v1/monitors](https://upfour.io/docs/api/monitors#post_monitors)
| In the app | API field |
| --- | --- |
| URL to watch · The address up4 requests. A missing https:// is added for you. | `url` |
| Name · The name shown in lists and alerts. | `name` |
| Check every · How often up4 checks. Shorter intervals notice an outage sooner and cost more. | `interval_seconds` |
[Full reference](https://upfour.io/docs/api/monitors#post_monitors)
---
# Check page content
> Get an alert when a page loads but a text is missing, an error text appears or the status code is not the one you expect.
Source: https://upfour.io/docs/check-page-content
Afterwards up4 alerts you when a page still loads but no longer shows what it should.
- **Who:** Any role except **Viewer**
- **Time:** About three minutes
- **Cost:** About €0.13 a month from your credit
You need the address of the page. The amount is for one check every three minutes. A text check costs the same as any other check.
**In up4:** Monitoring › New monitor › Advanced · [Open in up4](https://app.upfour.io/monitors/new/advanced)
## Steps
### 1. [Enter the page address](https://upfour.io/docs/check-page-content#address)
Keep the monitor type on HTTP(s). Under **URL to watch**, enter the full address of the page that shows the text, for example `https://example.com/shop`. The check reads only this page.
[](https://upfour.io/docs/images/walk/en/check-page-content-address.webp)
### 2. [Choose what counts as down](https://upfour.io/docs/check-page-content#condition)
Under **Counts as down when**, choose one condition:
- **The page is missing a text**: alerts when the text is gone. Use it for something every healthy page shows, such as a button label.
- **The page contains a text**: alerts when the text appears. Use it for an error message that arrives inside a normal page.
- **The status code is other than…**: alerts when the page answers with any other status code than the one you name.
The default, **It stops responding or returns an error**, treats every answer outside the 2xx range as down. A monitor has one condition. For two conditions on one page, create two monitors.
[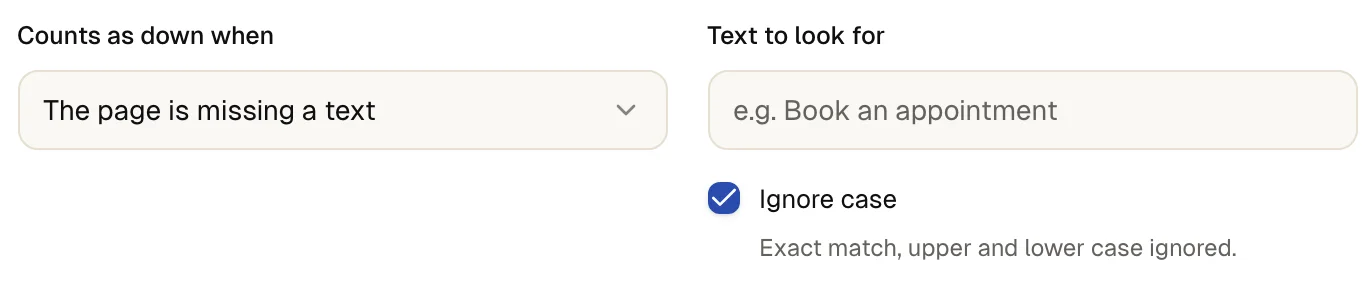](https://upfour.io/docs/images/walk/en/check-page-content-condition.webp)
### 3. [Enter the text or the status code](https://upfour.io/docs/check-page-content#value)
For a text, type it into **Text to look for**, for example `Add to cart`. up4 looks for exactly these characters in the page source. **Ignore case** is on, so `ADD TO CART` matches too. Turn it off when capitalization matters.
For a status code, enter a number from 100 to 599 under **Expected status code**. up4 compares it with the final answer, after redirects. To expect the redirect itself, such as 301, turn off **Follow redirects** in step 4.
[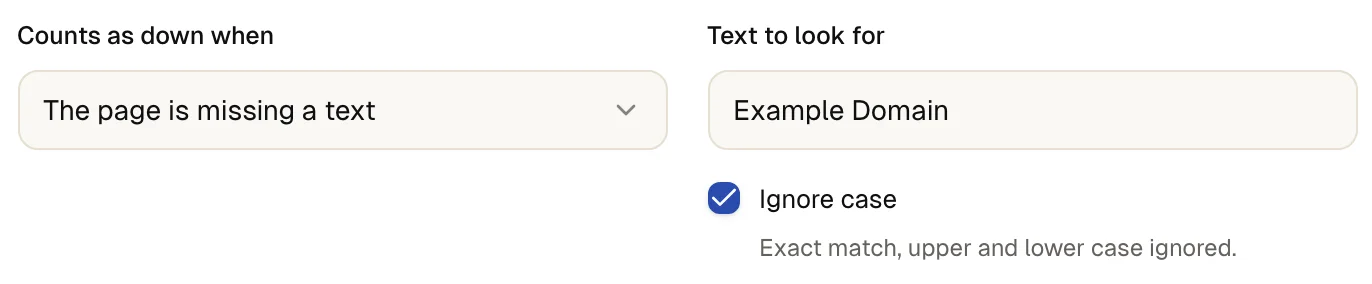](https://upfour.io/docs/images/walk/en/check-page-content-value.webp)
### 4. [Set up the request if the page needs it](https://upfour.io/docs/check-page-content#request)
Scroll to the card **Everything else** and open **Request**. Change only what the page needs:
- **Method**: GET, HEAD, POST, PATCH, PUT or OPTIONS. Text checks always use GET, because a HEAD answer has no page to read.
- **Request body**: appears for POST, PUT and PATCH, up to 8 KB. up4 sends it as form data unless you add a Content-Type header. These methods need an interval of at least 1 minute.
- **Headers**: up to 20 name and value pairs, sent with every check, 8 KB in total. Use them for an access token. Values are stored encrypted.
- **Basic authentication**: user name and password for pages behind HTTP basic authentication. The password is stored encrypted and never shown again.
- **Follow redirects** is on by default. **Keep cookies when redirecting** is off by default; turn it on for sites that set a cookie before they show the page.
- **Timeout**: how long up4 waits for the whole answer. The default is 30 seconds, the longest is 1 minute.
- **Proxy**: a host and a port, if the check must go through your proxy.
[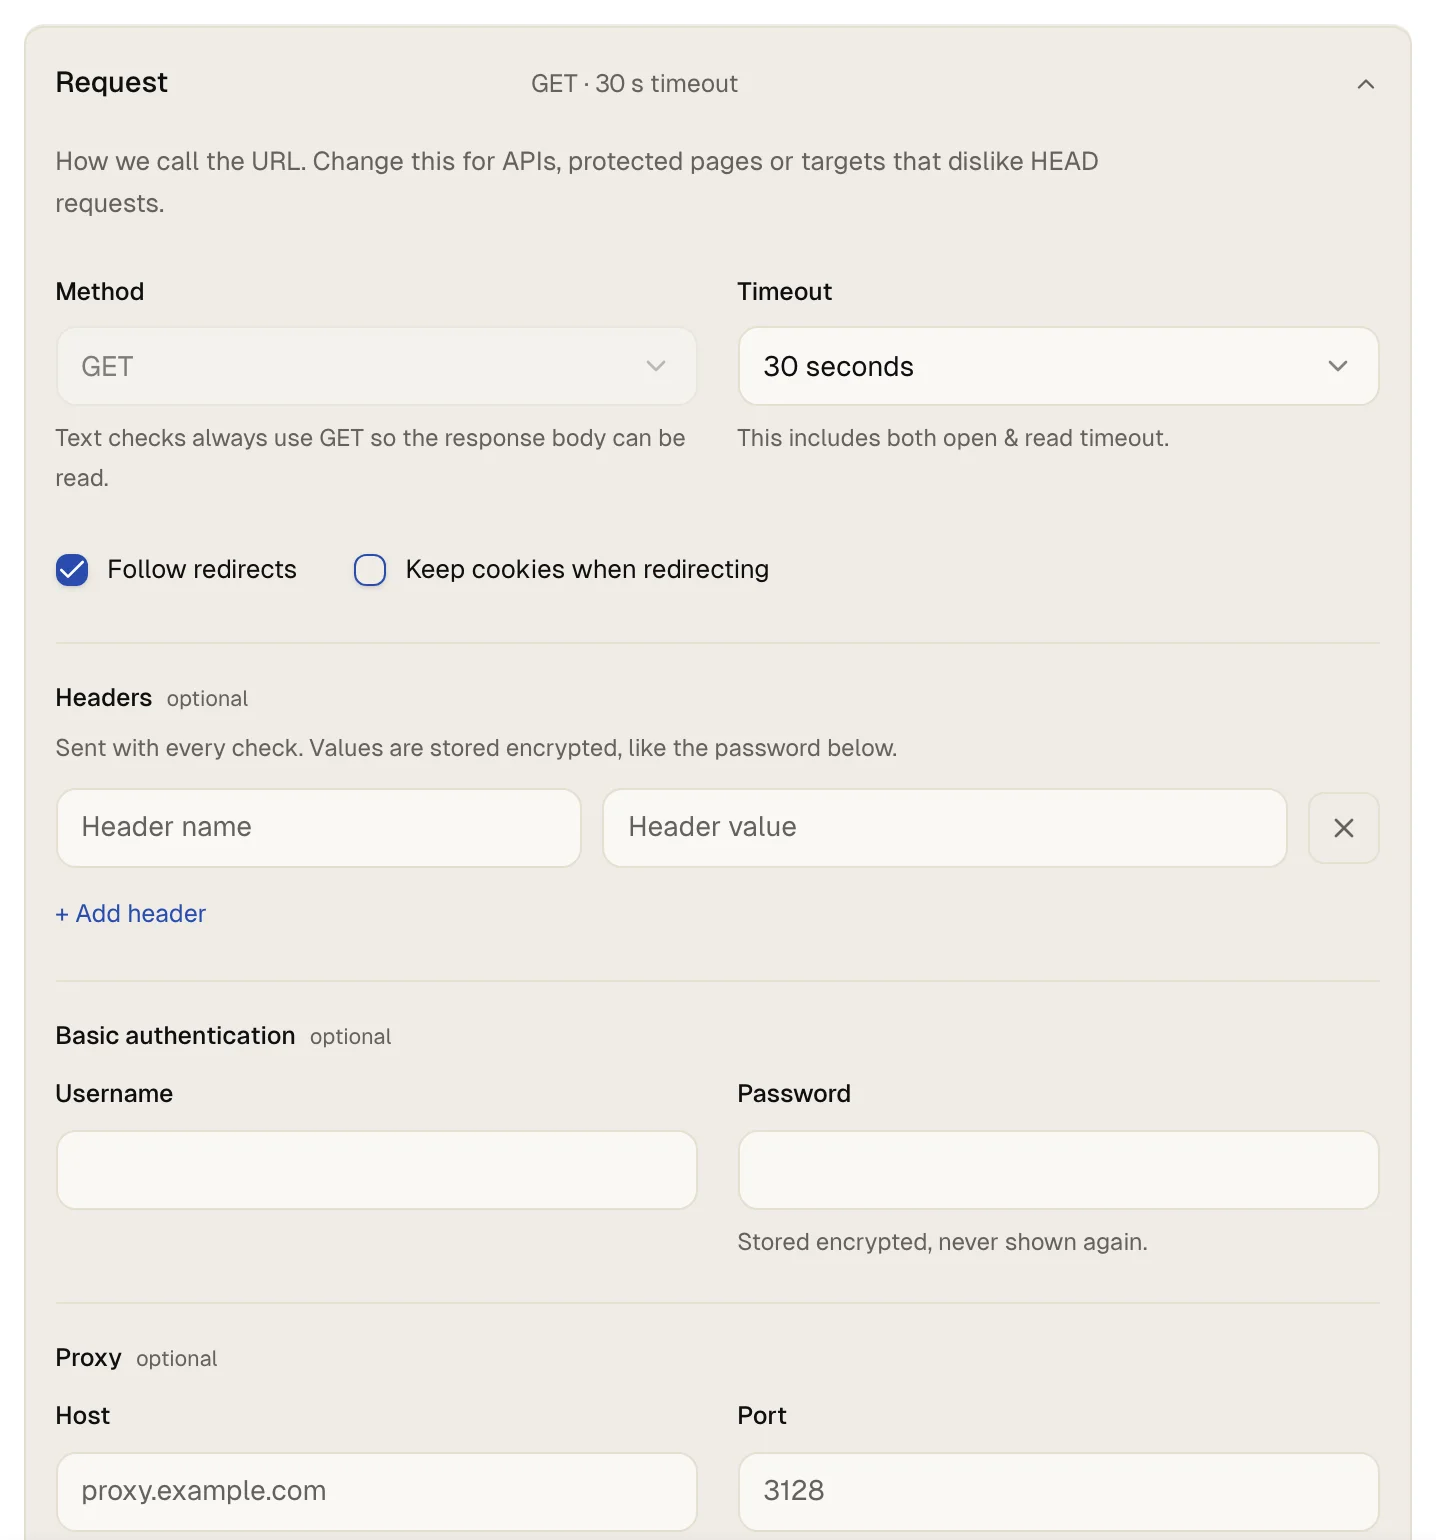](https://upfour.io/docs/images/walk/en/check-page-content-request.webp)
### 5. [Run a test](https://upfour.io/docs/check-page-content#test)
Select **Check now**. On a wide screen the button sits in the panel on the right, on a narrow one under the address. up4 runs one real check with the settings you have not saved yet and says what it found, for example **“Add to cart” is on the page.** When the text is missing, the result says so and adds that this would count as down.
[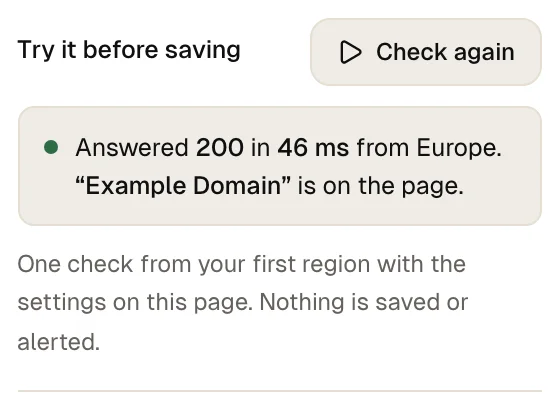](https://upfour.io/docs/images/walk/en/check-page-content-test.webp)
### 6. [Create the monitor](https://upfour.io/docs/check-page-content#create)
Select **Create & start**. Starts checking right after you create it.
[](https://upfour.io/docs/images/walk/en/check-page-content-create.webp)
## How you know it worked
The monitor page shows **up** after the first check. If the text later disappears, the monitor goes down after 3 matching results. The alert names the cause: Required keyword not found, or Forbidden keyword found (absence check) for the other condition.
To see a failure on purpose before you save, enter a text that is not on the page and select **Check again**. Put your real text back before you create the monitor.
## If something is off
The text is on the page, but the check says it is missing.
up4 reads the page source the server sends and runs no scripts, so text added by JavaScript is not there. A tag inside the phrase, such as `Add to cart`, also breaks the match. Look at the page source in your browser, and copy the text from there.
The check fails with (search is case-sensitive).
**Ignore case** is off. Turn it on, or type the text exactly as the page writes it.
A redirect counts as down.
With **Follow redirects** off, a 301 or 302 is the final answer. Turn the option on, or choose **The status code is other than…** and name that code.
The page shows a login, a cookie wall or a bot check to up4 only.
Add a header or basic authentication, or allow the addresses listed under [where checks come from](https://upfour.io/ips). More in [troubleshooting](https://upfour.io/docs/troubleshooting.md).
## What up4 does not do here
- A text check needs a 2xx answer. A page that answers 404 or 500 counts as down, whatever it says. To expect such a code, use **The status code is other than…**.
- up4 reads only the first 1 MiB of a page. A text further down is not found, and the alert says that the text is not in the first 1 MiB.
- The match is a plain search for your characters. up4 supports no regular expressions and no wildcards, and it reads the source, not the rendered page.
- up4 does not sign in through a login form. It can send headers and basic authentication.
- A single failed check does not alert you. A status change needs 3 matching results. [When you get alerted](https://upfour.io/docs/how/when-you-get-alerted.md) explains the rest.
- How often up4 checks, from where, and how a check runs are explained in [checks and regions](https://upfour.io/docs/how/checks-and-regions.md).
[Per API POST /v1/monitors](https://upfour.io/docs/api/monitors#post_monitors)
| In the app | API field |
| --- | --- |
| Counts as down when · What counts as up: a successful answer, an exact status code, or a word that must or must not appear. | `alert_type` |
| Text to look for · The word or phrase to look for in the page. Capitals are ignored while Ignore case is on. | `keyword` |
| Ignore case · On by default: capitalization is ignored. | `keyword_case_insensitive` |
| Expected status code · The status code the page must answer with, for example for a redirect you want to keep. | `expected_status_code` |
| HTTP method · The method up4 sends with every check. A keyword check cannot use HEAD, because HEAD returns no page. | `http_method` |
| Request body · Data sent with POST, PUT and PATCH checks, up to 8 KB. | `request_body` |
| Headers · Sent with every check. Up to 20 headers; values are stored encrypted. | `request_headers` |
| Username · User name for basic authentication. | `auth_username` |
| Password · Password for basic authentication. Stored encrypted and never returned. | `auth_password` |
| Follow redirects · Whether up4 follows redirects to the final page. Off, the redirect itself is the answer. | `follow_redirects` |
| Keep cookies when redirecting · Keeps cookies set during a redirect chain, for sites that set a cookie before they show the page. | `keep_cookies` |
| Request timeout · How long up4 waits for an answer before the check counts as failed. | `request_timeout_s` |
| Proxy · Send the check through your proxy. The port goes into the proxy port field. | `proxy_host` |
[Full reference](https://upfour.io/docs/api/monitors#post_monitors)
---
# Check a server, port or DNS record
> Get an alert when a server stops answering ping, a port stops accepting connections or a DNS record changes.
Source: https://upfour.io/docs/check-server-port-dns
Afterwards up4 alerts you when a server stops answering, a port stops accepting connections or a DNS record changes.
- **Who:** Any role except **Viewer**
- **Time:** About three minutes
- **Cost:** About €0.13 a month from your credit
You need a host name or IP address; the target must be reachable from the internet. These checks cost the same as a website check; the amount is for one check every three minutes.
**In up4:** Monitoring › New monitor › Advanced · [Open in up4](https://app.upfour.io/monitors/new/advanced)
## Steps
### 1. [Choose the check type](https://upfour.io/docs/check-server-port-dns#type)
Under **Monitor type**, choose one:
- **TCP Port**: does a server accept connections on one port? Use it for a mail, database or game server.
- Ping: does a host answer an ICMP echo request? It tells you whether the machine is reachable on the network, nothing more.
- DNS: does a name resolve, and to what you expect? Use it to catch a changed or deleted record.
For a website, use [Watch a website](https://upfour.io/docs/watch-a-website.md) instead.
[](https://upfour.io/docs/images/walk/en/check-server-port-dns-type.webp)
### 2. [Enter the target](https://upfour.io/docs/check-server-port-dns#target)
Under **Host name or IP address**, or **Domain to look up** for DNS, enter only the host, for example `mail.example.com` or an IP address. Leave out `https://`, paths and ports. A TCP monitor has its own port field.
Addresses inside private networks, such as `192.168.1.10` or `localhost`, are refused. up4's checkers reach the public internet only.
[](https://upfour.io/docs/images/walk/en/check-server-port-dns-target.webp)
### 3. [Set what the type needs](https://upfour.io/docs/check-server-port-dns#settings)
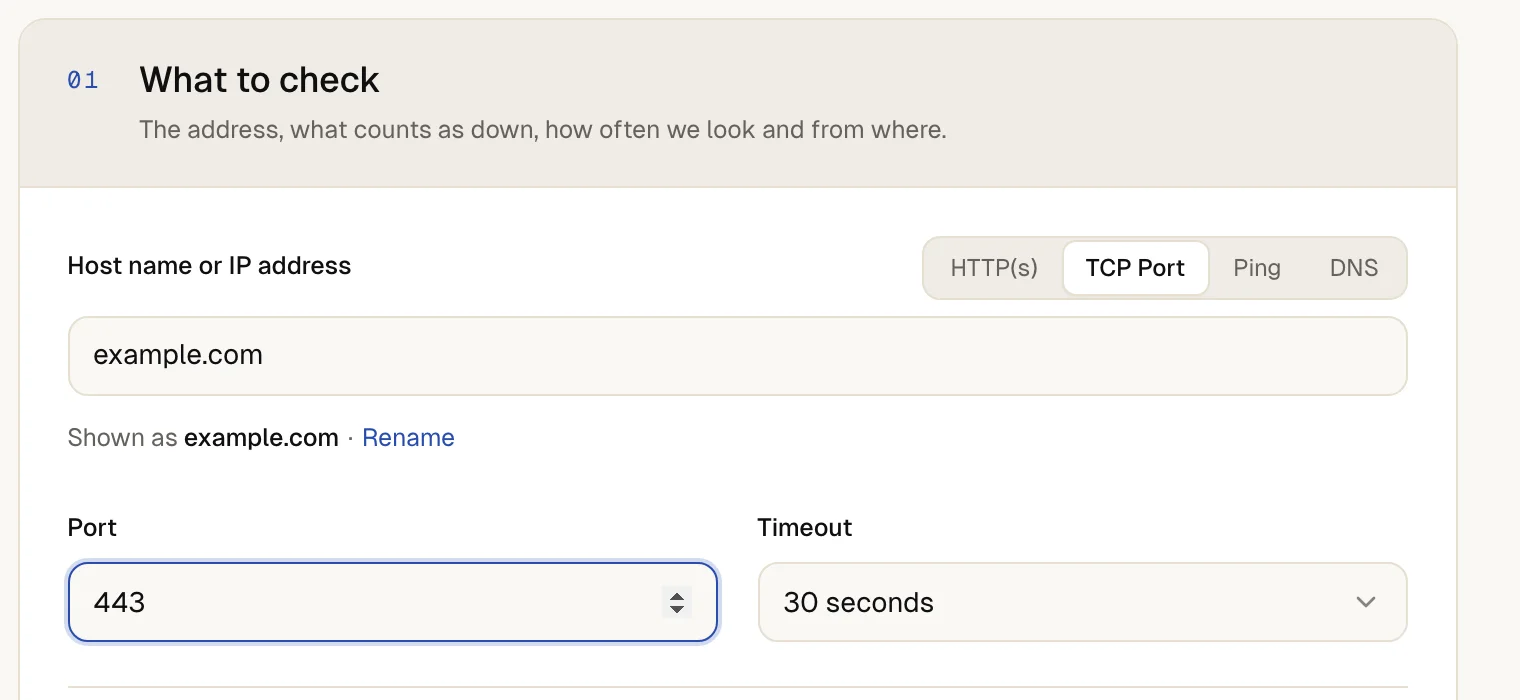
- **TCP Port:** enter the **Port**, from 1 to 65535, and choose a **Timeout**.
- **Ping:** choose the **IP version** and a **Timeout**. **Both IPv4 and IPv6** pings one address, the first public one the name resolves to. **IPv4 only** and **IPv6 only** fix the version.
- **DNS:** choose the **Record type**: A, AAAA, CNAME, MX, NS or TXT. Optionally enter an **Expected answer** and a **DNS server**. Without a DNS server, up4 asks a public resolver.
This is what counts as up:
| Type | Counts as up when |
| --- | --- |
| **TCP Port** | The server accepts the connection before the timeout. up4 closes it at once. It sends nothing and reads nothing. |
| Ping | The host answers one echo request in time. |
| DNS | The lookup returns at least one record. With an expected answer, one of the records must equal it. Capitalization and a trailing dot do not matter. |
[](https://upfour.io/docs/images/walk/en/check-server-port-dns-settings.webp)
### 4. [Choose how often and from where](https://upfour.io/docs/check-server-port-dns#cadence)
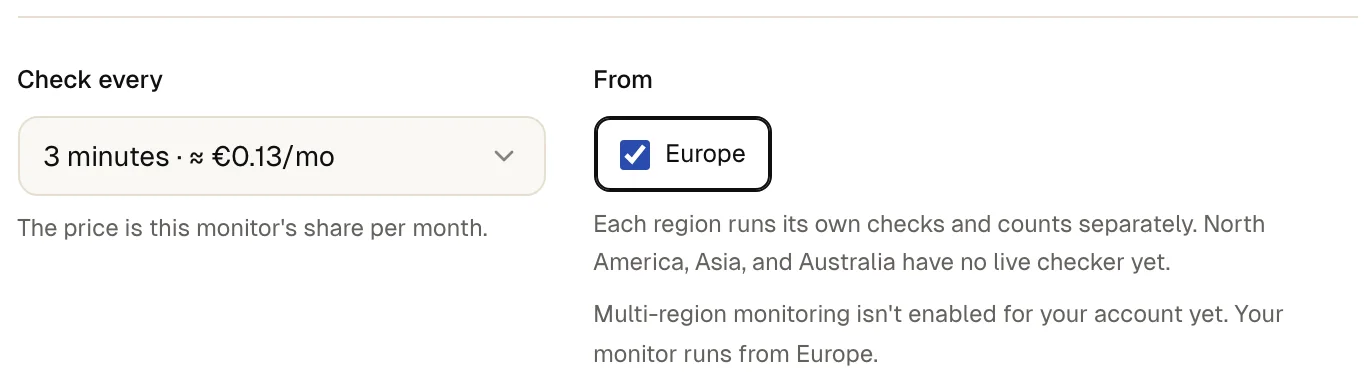
Pick **Check every** and **From**. A shorter interval notices an outage sooner and costs more. [Checks and regions](https://upfour.io/docs/how/checks-and-regions.md) explains both.
[](https://upfour.io/docs/images/walk/en/check-server-port-dns-cadence.webp)
### 5. [Run a test](https://upfour.io/docs/check-server-port-dns#test)
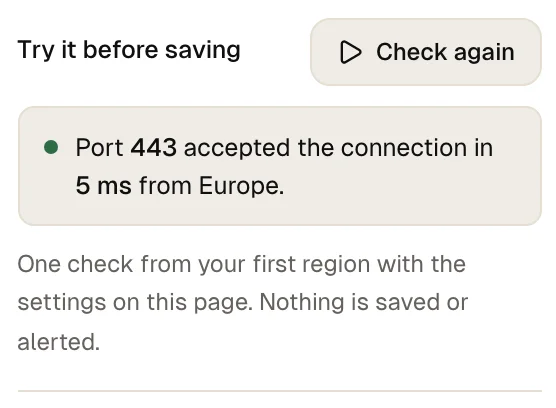
Select **Check now**. On a wide screen the button sits in the panel on the right, on a narrow one under the address. up4 runs one real check with the settings you have not saved yet. The result says that the port accepted the connection, that the host answered or that the record resolved, and how long it took.
[](https://upfour.io/docs/images/walk/en/check-server-port-dns-test.webp)
### 6. [Create the monitor](https://upfour.io/docs/check-server-port-dns#create)
Select **Create & start**. Starts checking right after you create it.
[](https://upfour.io/docs/images/walk/en/check-server-port-dns-create.webp)
## How you know it worked
The monitor page shows **up** after the first check, with the response time of the connection, the echo or the lookup.
If a check later fails, the alert names the cause, for example Connection refused, Address not found (DNS), No DNS record found or DNS record does not match the expected value. A status change needs 3 matching results.
## If something is off
Ping shows down, but the server works.
Many servers and firewalls drop ping on purpose. Check a port the server serves with **TCP Port** instead.
The port is open for you, but the check fails.
A firewall may allow only some addresses. Allow the addresses listed under [where checks come from](https://upfour.io/ips). More in [troubleshooting](https://upfour.io/docs/troubleshooting.md).
The DNS check says the record does not match.
up4 compares the whole record. For MX, enter the mail server name without the priority. For TXT, enter the complete text of one record. A resolver may also keep serving the old record until its cache expires.
The form refuses the host.
Enter a public host name or IP address, with no scheme, path or port. The DNS server follows the same rule and only takes a host.
## What up4 does not do here
- A port check only tests whether the connection opens. up4 does not speak the protocol, read a greeting or check a certificate on that port. A monitor watches one port; create one monitor per port.
- Ping sends one echo request per check and waits a few seconds for the answer, whatever you choose under **Timeout**. A longer timeout does not extend that wait.
- The IP version applies to ping only. For DNS, the record type decides: A answers with IPv4, AAAA with IPv6.
- Without an expected answer, any answer counts as up. An A or AAAA check also stays up when the name has only the other kind of address, and a CNAME check stays up for a name without a CNAME record, because it returns the name itself. Set an expected answer to be sure.
- If you leave the DNS server empty, up4 asks the public resolver 8.8.8.8 over UDP on port 53\. A custom server must be public and takes a plain host or IP address. The port cannot be changed.
- A DNS check tells you what a DNS server answers. It does not tell you whether the server behind the answer works.
- A single failed check does not alert you. [When you get alerted](https://upfour.io/docs/how/when-you-get-alerted.md) explains the rest.
[Per API POST /v1/monitors](https://upfour.io/docs/api/monitors#post_monitors)
| In the app | API field |
| --- | --- |
| Monitor type · The kind of check: a website, a port, a DNS record or a ping. | `monitor_type` |
| Host · The server up4 connects to. | `tcp_host` |
| Port · The port up4 connects to, from 1 to 65535. | `tcp_port` |
| Host name or IP address · For a ping monitor the host or IP address goes into the address field. | `url` |
| IP version · Applies to ping monitors only. | `ip_version` |
| Domain to look up · The domain name up4 looks up. | `dns_query` |
| Record type · The record type to look up: A, AAAA, CNAME, MX, NS or TXT. | `dns_type` |
| Expected answer · A value the answer must contain. Empty only checks that the name resolves. | `dns_expected` |
| DNS server · The DNS server up4 asks. Empty uses a public one. | `dns_server` |
| Request timeout · How long up4 waits for an answer before the check counts as failed. | `request_timeout_s` |
[Full reference](https://upfour.io/docs/api/monitors#post_monitors)
---
# Watch a scheduled job
> Create a scheduled job in up4, call its check-in URL from cron, a script or CI, and get alerted when a run stays away.
Source: https://upfour.io/docs/watch-a-scheduled-job
Afterwards up4 expects a check-in from your cron job, backup or worker and alerts you when a run stays away or reports a failure.
- **Who:** Any role except **Viewer**
- **Time:** About five minutes
- **Cost:** €3 per million check-ins
You need access to the place where the job runs. Each accepted check-in is charged.
**In up4:** Monitoring › Scheduled jobs › New scheduled job · [Open in up4](https://app.upfour.io/heartbeats/new)
## Steps
### 1. [Name the job](https://upfour.io/docs/watch-a-scheduled-job#name)
Enter a name under **Name**, for example `Daily database backup`. The name appears in alerts, so use one your team recognizes.
[](https://upfour.io/docs/images/walk/en/watch-a-scheduled-job-name.webp)
### 2. [Say how often it checks in](https://upfour.io/docs/watch-a-scheduled-job#interval)
Under **Expect a check-in every**, enter a number and pick seconds, minutes, hours or days. Match the schedule the job really runs on. The shortest interval is 30 seconds.
[](https://upfour.io/docs/images/walk/en/watch-a-scheduled-job-interval.webp)
### 3. [Add a grace period](https://upfour.io/docs/watch-a-scheduled-job#grace)
Under **with a grace period of**, enter how long up4 waits after the interval before it calls the run missed. A backup that takes 20 to 40 minutes needs a grace period that covers that spread.
[](https://upfour.io/docs/images/walk/en/watch-a-scheduled-job-grace.webp)
### 4. [Create the job](https://upfour.io/docs/watch-a-scheduled-job#create)
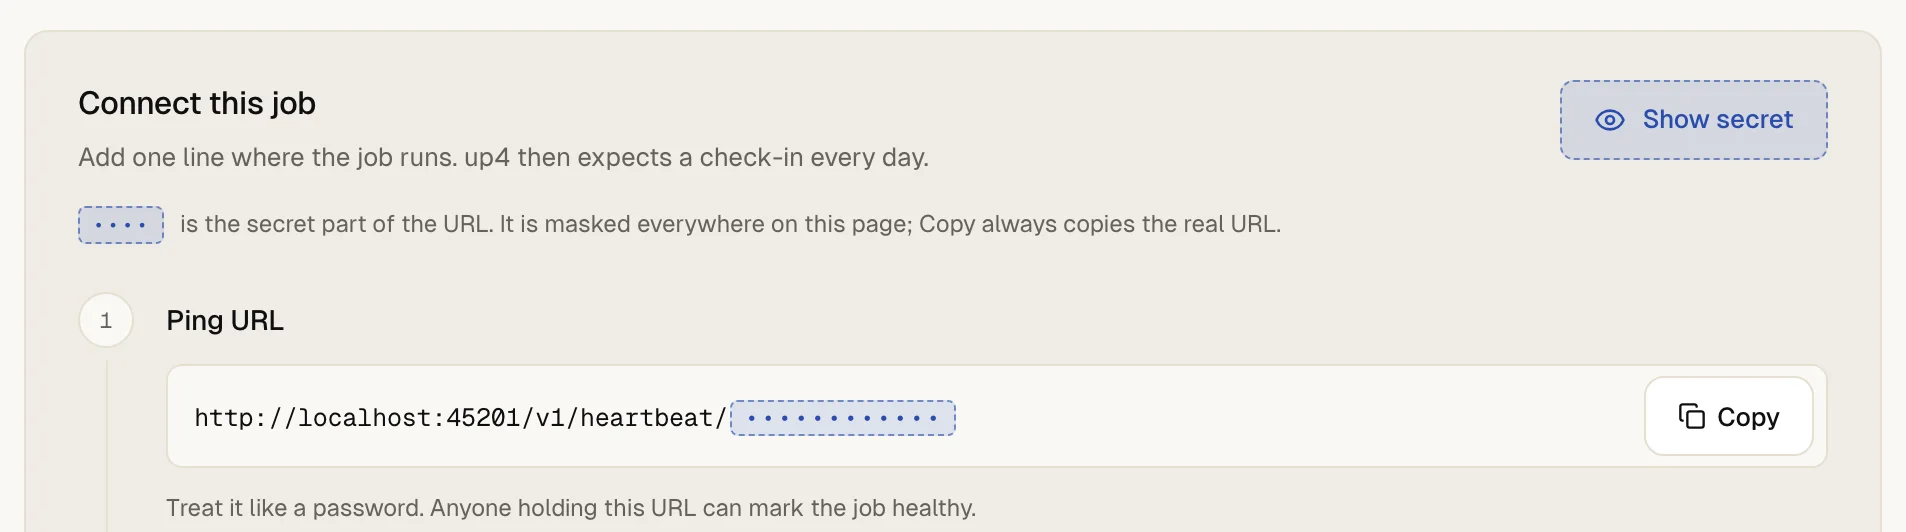
Select **Create**. up4 opens the job on the **Connect this job** block with its check-in URL.
[](https://upfour.io/docs/images/walk/en/watch-a-scheduled-job-create.webp)
### 5. [Copy the check-in URL](https://upfour.io/docs/watch-a-scheduled-job#url)
Select **Copy** next to the URL. Part of it is masked on screen; **Show secret** reveals it, and Copy always copies the whole URL. Treat it like a password: anyone who holds it can mark the job healthy. It stays the same when you save the job again.
[](https://upfour.io/docs/images/walk/en/watch-a-scheduled-job-url.webp)
### 6. [Call the URL when the job succeeds](https://upfour.io/docs/watch-a-scheduled-job#call)
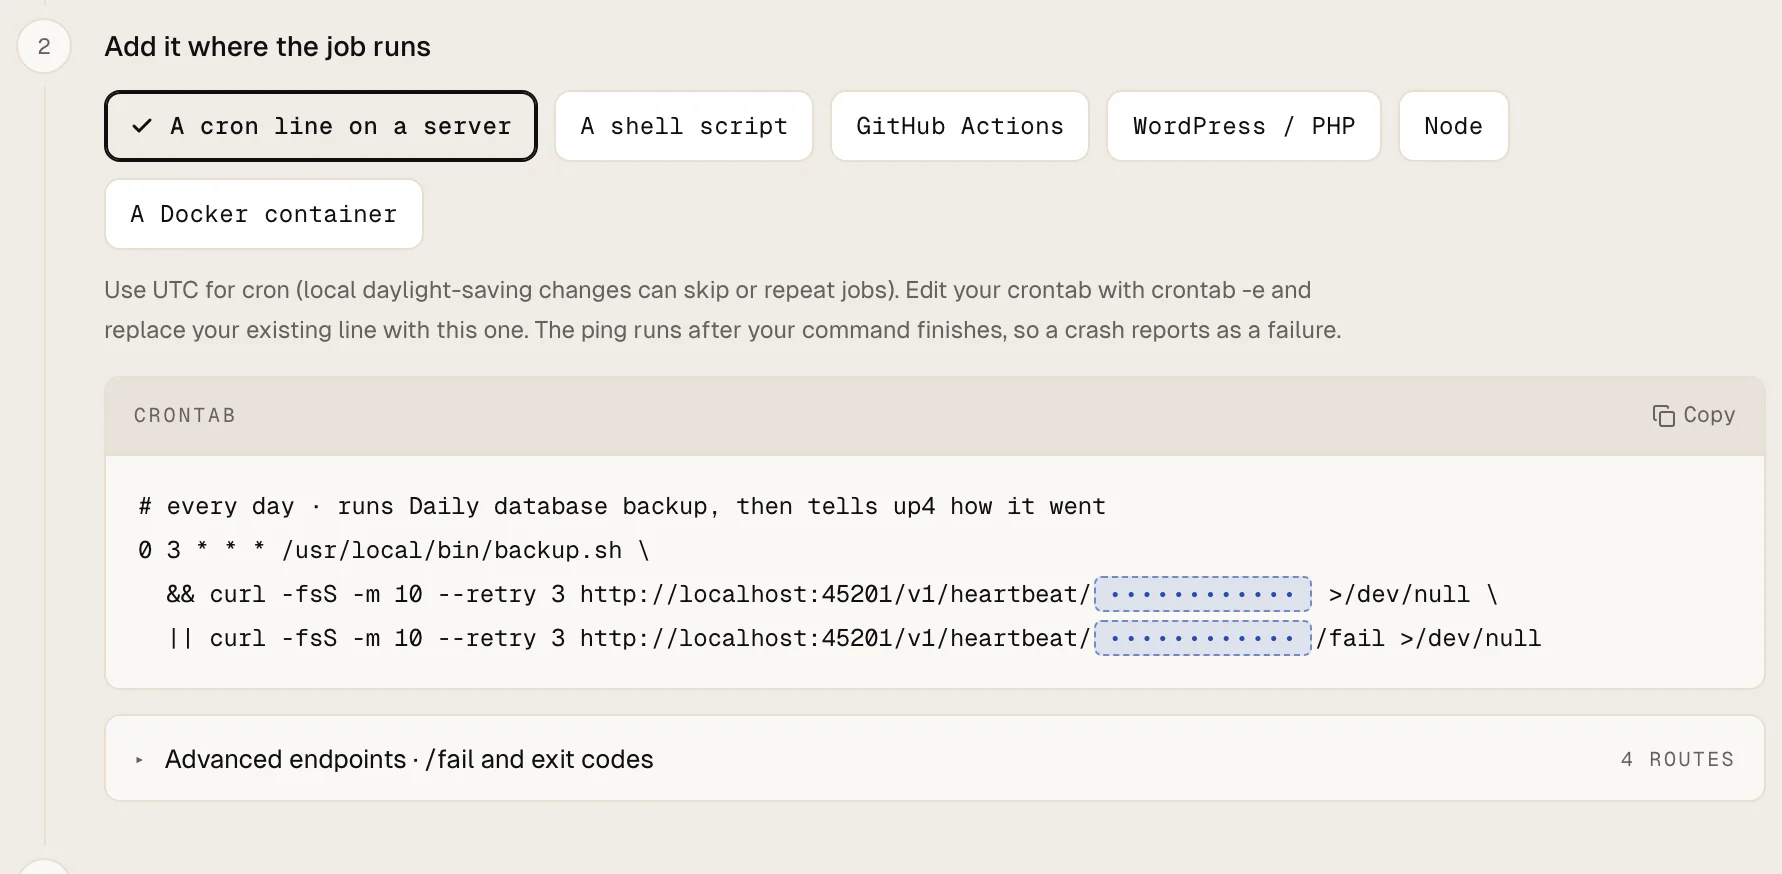
Add the call to the end of the job, after the work. This crontab line runs the job and reports success, or the failure signal if the job exits with an error:
```
0 3 * * * /usr/local/bin/backup.sh \
&& curl -fsS -m 10 --retry 3 https://app.upfour.io/v1/heartbeat/YOUR-SLUG >/dev/null \
|| curl -fsS -m 10 --retry 3 https://app.upfour.io/v1/heartbeat/YOUR-SLUG/fail >/dev/null
```
Replace the address with the one you copied. Use UTC in crontab times, because local daylight saving changes can skip or repeat runs. The block also has ready snippets under **A shell script**, GitHub Actions, WordPress / PHP, Node and **A Docker container**. They all use the same URL: `HEAD`, `GET` and `POST` work.
Adding `/fail` to the URL reports a failed run at once, with no waiting. A number from 1 to 255 instead of `fail`, such as an exit code, counts as a failure too. The block lists both routes under **Advanced endpoints · /fail and exit codes**.
[](https://upfour.io/docs/images/walk/en/watch-a-scheduled-job-call.webp)
### 7. [Run the job once](https://upfour.io/docs/watch-a-scheduled-job#first)
The deadline starts with the first check-in, so a job that has never checked in does not alert. Run it by hand or open the URL in a browser tab. The page listens and updates by itself.
[](https://upfour.io/docs/images/walk/en/watch-a-scheduled-job-first.webp)
## How you know it worked
The job page shows **First check-in received**, and in the list the job changes from **Waiting** to **On time**.
From then on up4 counts from the last check-in it received.
## What happens when a check-in is late
| When | What you see and what up4 does |
| --- | --- |
| A check-in arrives inside the interval | The job shows **On time**. Nothing else happens. |
| The interval has passed, the grace period has not | The job shows **Late**. Nobody is alerted yet. |
| Interval and grace have both passed | The job shows **Missed**. up4 opens an incident and alerts once. It looks for overdue jobs every 30 seconds. |
| The job reports a failure | The job turns down at once, with an incident and an alert, without waiting for the interval. |
| The next successful check-in arrives | The job is on time again, the incident closes and up4 sends one recovery notice. |
The alert goes to the alert channels of your Company. A job that belongs to a Client also uses that Client's channels. [Set up alert channels](https://upfour.io/docs/receive-alerts.md). To pause a job during planned work, open the **Actions** menu on its page and select **Pause**: a paused job never alerts, rejects check-ins and costs nothing. **Resume** in the same menu turns it back on.
## If something is off
The job stays on Waiting.
No check-in has arrived. Run the call by hand and compare your line with the one in the setup block. Read what `curl` prints: a refused call names the reason.
The job shows Missed although it ran.
The call came too late or not at all. Raise the grace period for runs that vary in length, or check that the job's server can reach the URL.
The job shows Paused and its check-ins are refused.
Someone paused it. Select Resume in the Actions menu on the job page.
## What up4 does not do here
- A check-in shows that your job called the URL, not that it did its work correctly. Call it after the work succeeds and report failures with the failure signal.
- Scheduled jobs have no Alert plan, no On-call rotation and no channel choice per job. Every alert goes to the channels described above.
- While your Company's billing is paused, up4 acknowledges check-ins but ignores them, and no job counts as late. In grace mode a shared daily allowance of stored check-ins applies: further check-ins only keep the job alive.
- The job page keeps a raw log of check-ins with time and source address. How long up4 keeps it is described in [data and privacy](https://upfour.io/docs/how/data-and-privacy.md).
[Per API POST /v1/heartbeats](https://upfour.io/docs/api/heartbeats#post_heartbeats)
The check-in itself needs no key: send `HEAD`, `GET` or `POST` to `/v1/heartbeat/{slug}`, with `/fail` or an exit code from 1 to 255 appended for a failure. The create response contains the full URL. The [scheduled jobs reference](https://upfour.io/docs/api/heartbeats.md) and the [backup recipe](https://upfour.io/docs/api/recipes/backup-heartbeat.md) cover pause, resume, the check-in log and the missed and recovered webhooks.
| In the app | API field |
| --- | --- |
| Name | `name` |
| Expect a check-in every · Whole seconds; the form turns seconds, minutes, hours or days into seconds. | `expected_interval_seconds` |
| with a grace period of · Whole seconds, zero or more. | `grace_period_seconds` |
| Group | `heartbeat_group_id` |
| Client | `client_id` |
| Metadata | `metadata` |
[Full reference](https://upfour.io/docs/api/heartbeats#post_heartbeats)
---
# Plan maintenance
> Keep alerts quiet during planned work with a weekly maintenance window or a one-off pause, and announce maintenance on your status page.
Source: https://upfour.io/docs/plan-maintenance
Afterwards up4 stays quiet while you do planned work, and your status page can tell visitors about it in advance.
- **Who:** Any role except **Viewer**
- **Time:** About ten minutes
- **What you need:** A monitor for the weekly window
To announce the work you also need a [status page](https://upfour.io/docs/publish-a-status-page.md).
## Choose how to plan it
| Your situation | Use |
| --- | --- |
| The same quiet time every week, such as a nightly backup | A weekly window on the monitor, described first. |
| One piece of work on one monitor, with no announcement | Open the monitor's **Actions** menu, choose **Pause**, then **Until…**. Checks stop now and resume by themselves at the time you pick, up to 90 days ahead. A paused monitor runs no checks. |
| Work you want to announce, once or repeating, for several components | Maintenance on a status page, described second. It can pause the affected monitors for you. |
**In up4:** Monitoring › Edit › Everything else › Maintenance window · [Open in up4](https://app.upfour.io/monitors)
## Mute alerts on a weekly schedule
### 1. [Open the monitor and select Edit](https://upfour.io/docs/plan-maintenance#edit)
Open the monitor from **Monitoring** and select **Edit**.
### 2. [Open the maintenance row](https://upfour.io/docs/plan-maintenance#row)
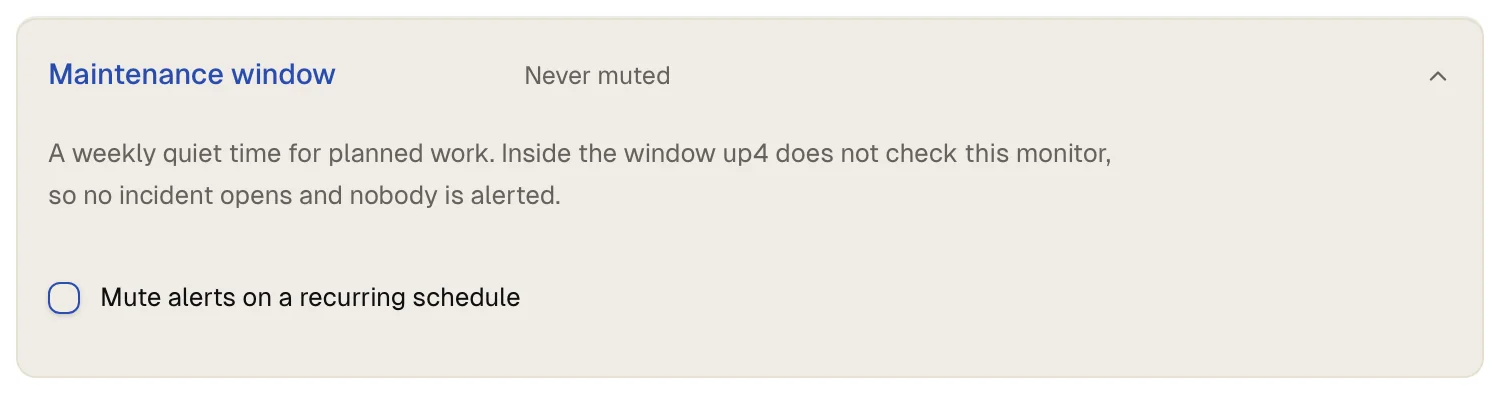
Under **Everything else**, open the row **Maintenance window**.
[](https://upfour.io/docs/images/walk/en/plan-maintenance-row.webp)
### 3. [Switch the window on](https://upfour.io/docs/plan-maintenance#toggle)
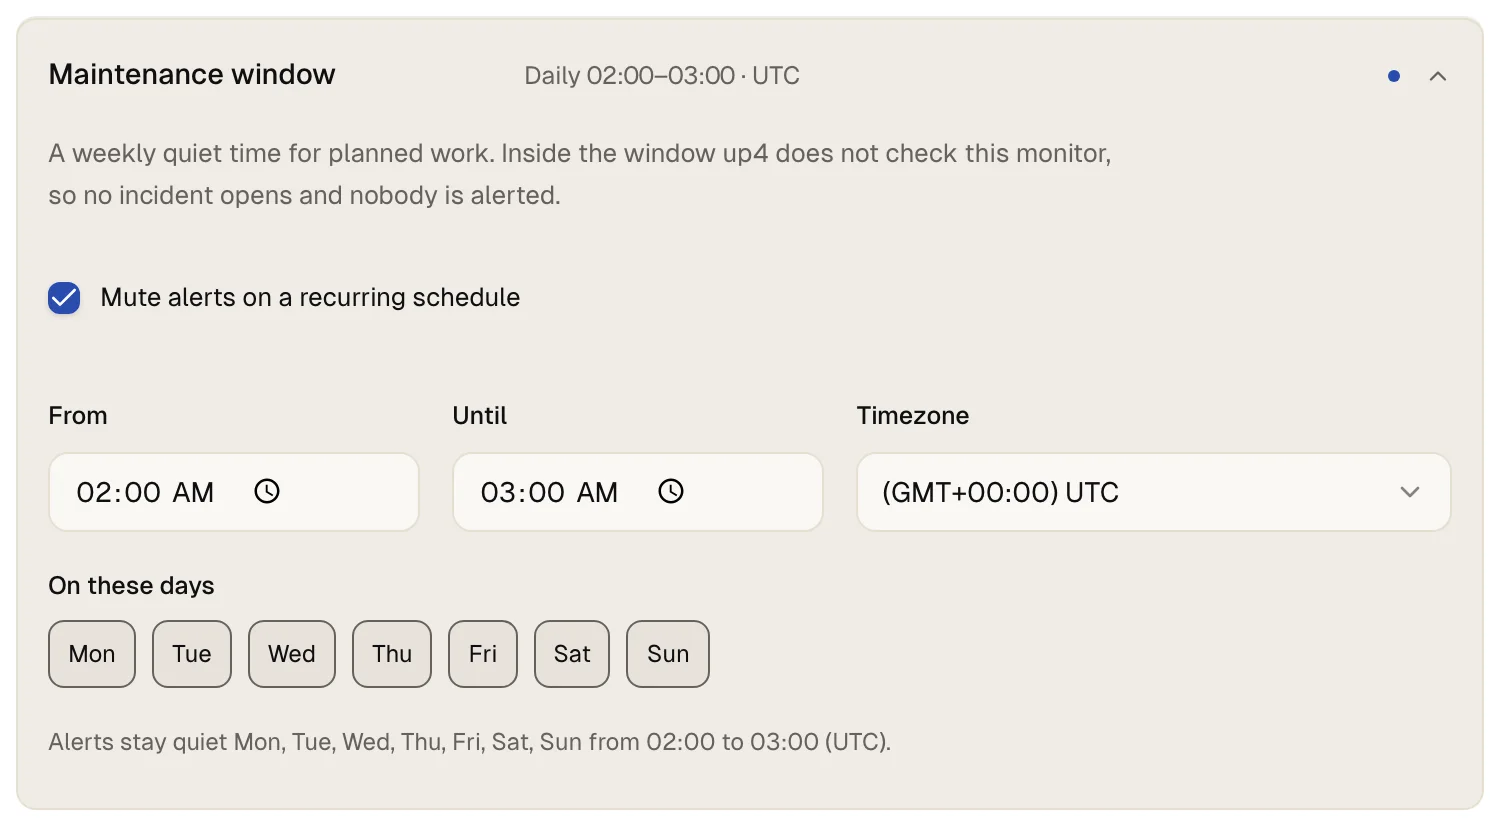
Tick **Mute alerts on a recurring schedule**. up4 fills in 02:00 to 03:00 on all seven days.
[](https://upfour.io/docs/images/walk/en/plan-maintenance-toggle.webp)
### 4. [Set the times and the time zone](https://upfour.io/docs/plan-maintenance#times)
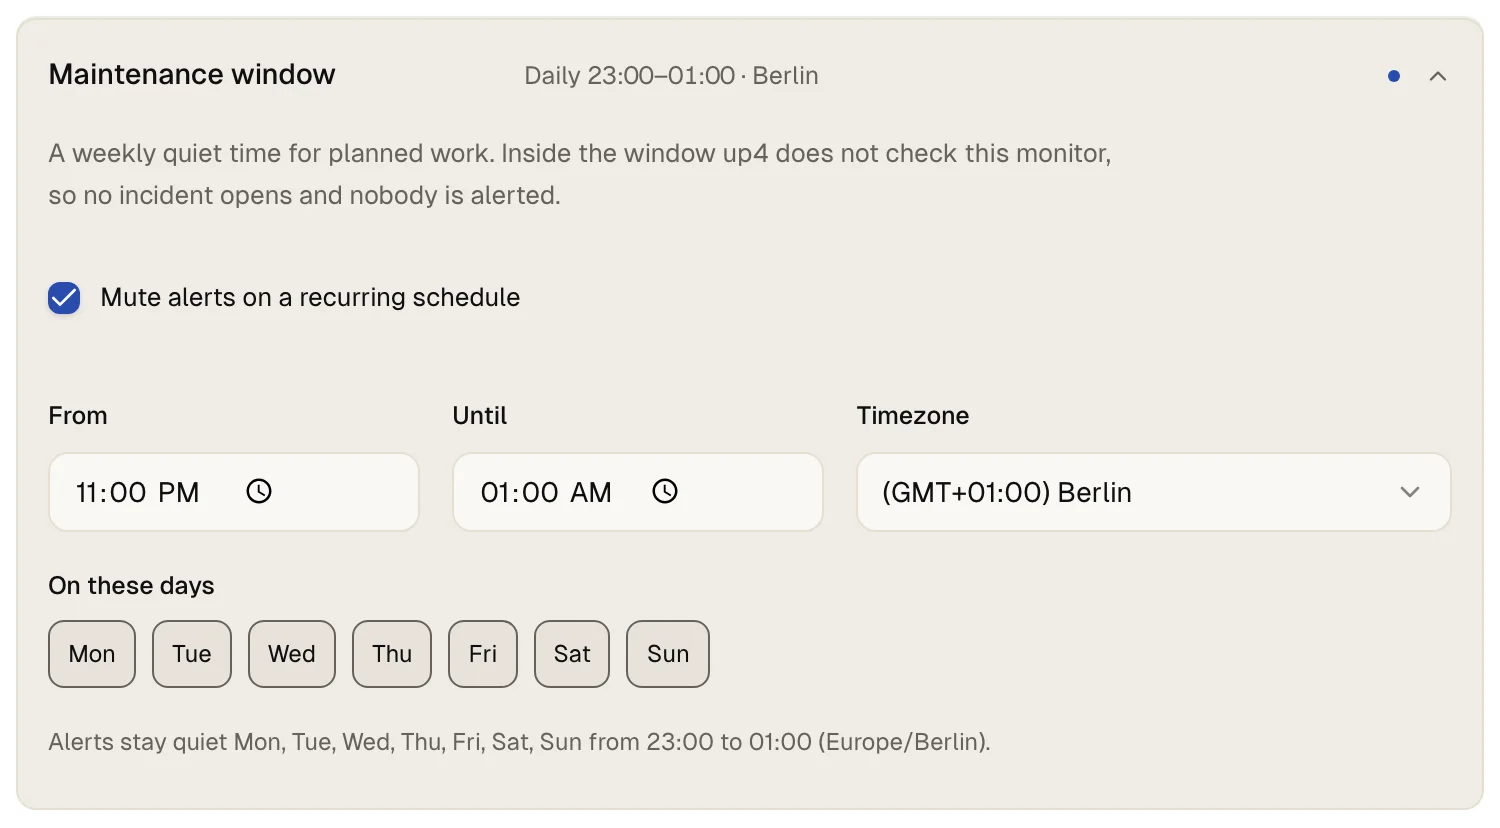
Enter the start under **From** and the end under **Until**, then pick the **Timezone** the times are meant in. A window can run past midnight, for example from 23:00 to 01:00.
[](https://upfour.io/docs/images/walk/en/plan-maintenance-times.webp)
### 5. [Pick the days](https://upfour.io/docs/plan-maintenance#days)
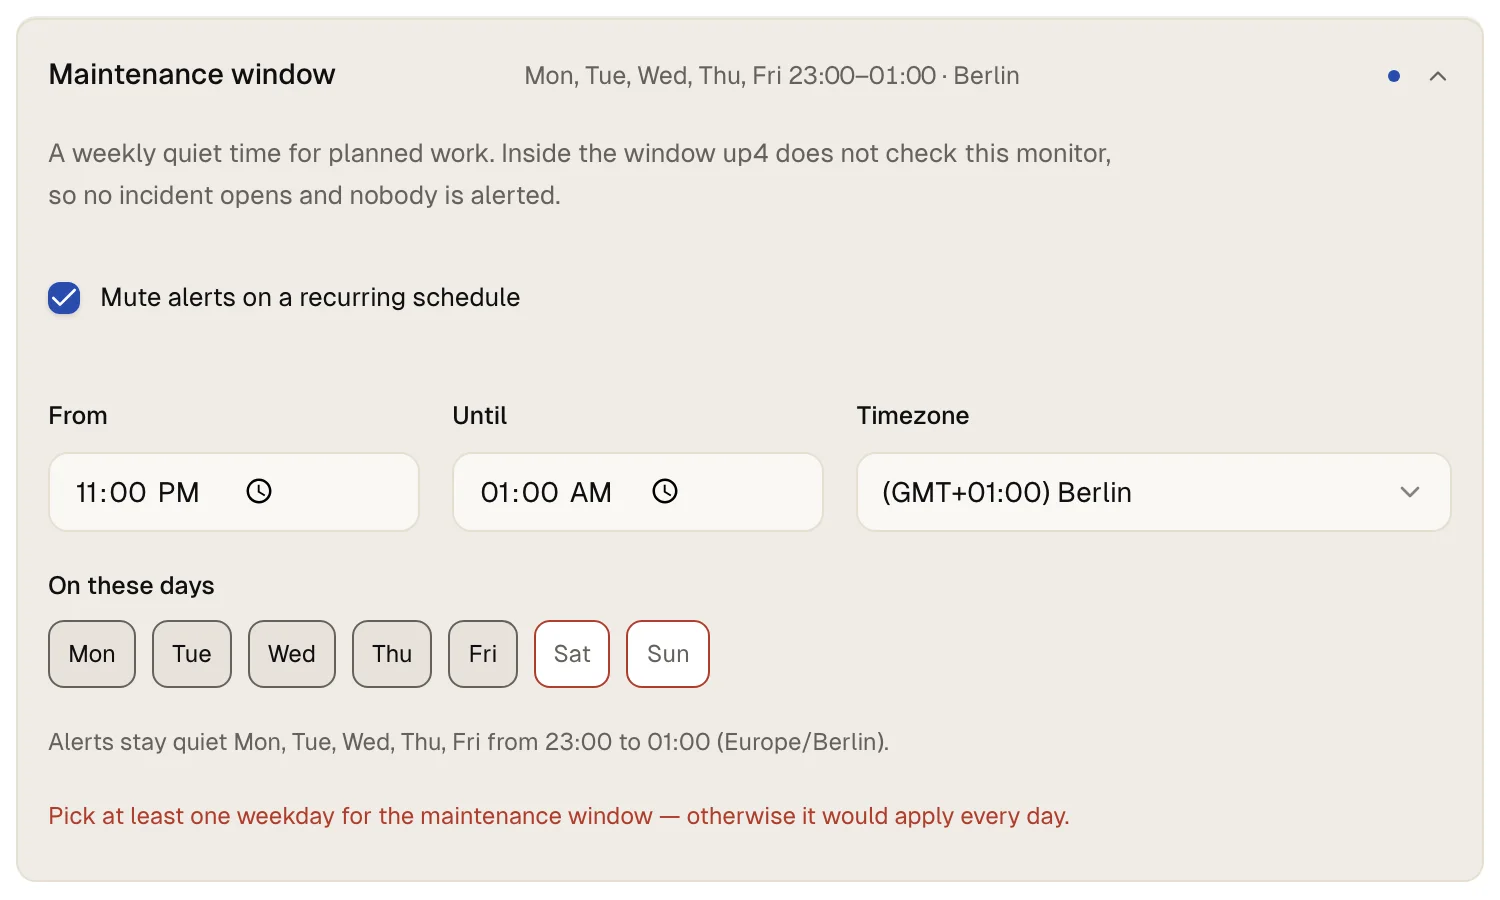
Under **On these days**, tick every weekday on which the window starts. You need at least one day: with none ticked, the form does not save and asks you to pick one. The sentence below the days repeats what you set.
[](https://upfour.io/docs/images/walk/en/plan-maintenance-days.webp)
### 6. [Save](https://upfour.io/docs/plan-maintenance#save)
Select **Save changes**.
## How you know it worked
Open the monitor's page. Under **Check & settings**, open **Check**. There is a row **Maintenance** with your window in one sentence: the days, the times and the time zone.
Inside the window up4 does not run this monitor's checks. No result is stored, nobody is alerted and no incident opens. Outside the window the monitor behaves as before.
**In up4:** Status pages › Maintenance › Schedule maintenance · [Open in up4](https://app.upfour.io/status-pages)
## Announce maintenance on a status page
### 1. [Open the maintenance tab](https://upfour.io/docs/plan-maintenance#tab)
Open your status page from **Status pages**, go to the tab **Maintenance** and select **Schedule maintenance**.
### 2. [Describe the work](https://upfour.io/docs/plan-maintenance#describe)
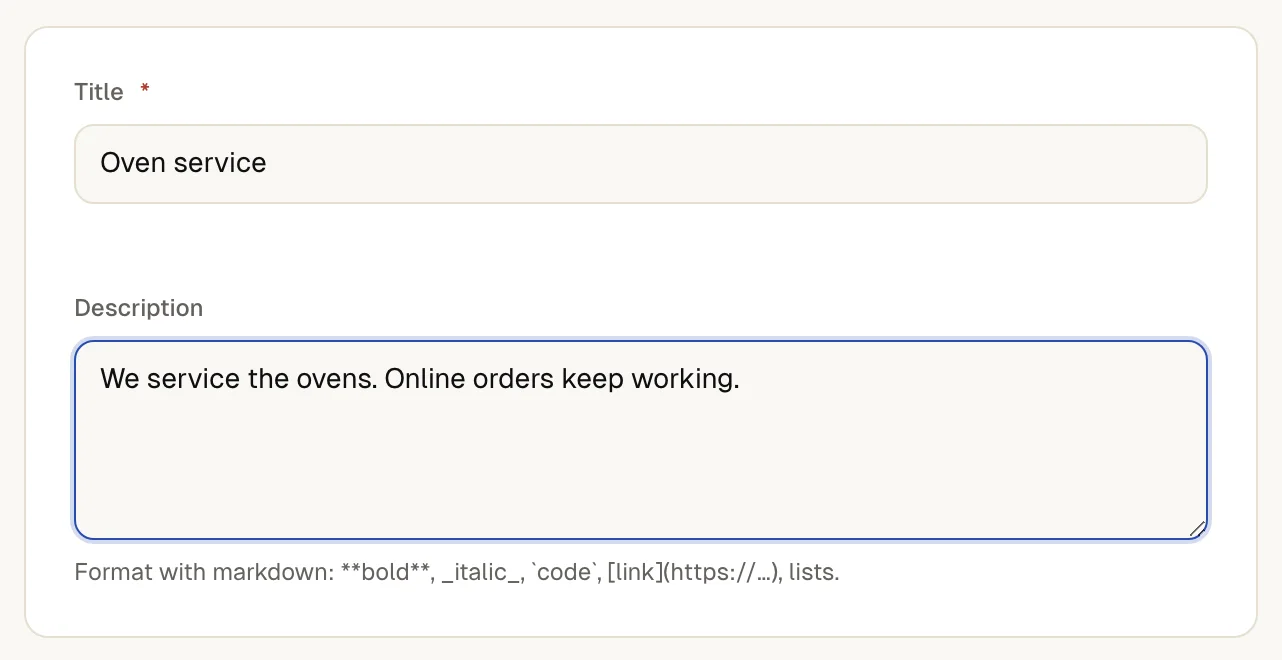
Enter a **Title** and a **Description**. The description accepts markdown.
[](https://upfour.io/docs/images/walk/en/plan-maintenance-describe.webp)
### 3. [Set the window](https://upfour.io/docs/plan-maintenance#window)
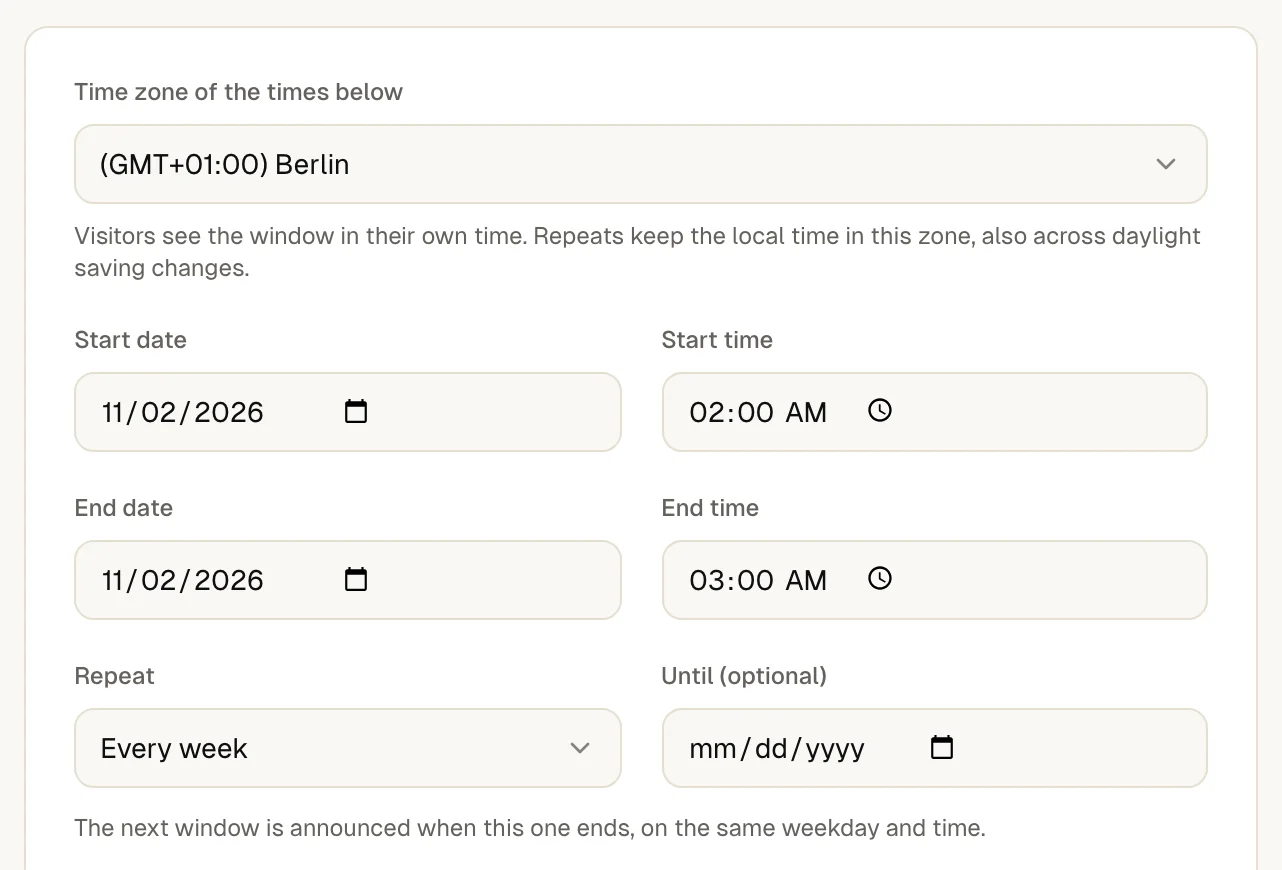
Enter **Start date**, **Start time**, **End date** and **End time**. The page's time zone is preselected. Visitors see the window in their own time.
To repeat the window, set **Repeat** to **Every week** or **Every month**, and optionally an end date under **Until (optional)**. Repeats keep the local time, also across daylight saving changes.
[](https://upfour.io/docs/images/walk/en/plan-maintenance-window.webp)
### 4. [Choose what happens to checks](https://upfour.io/docs/plan-maintenance#checks)
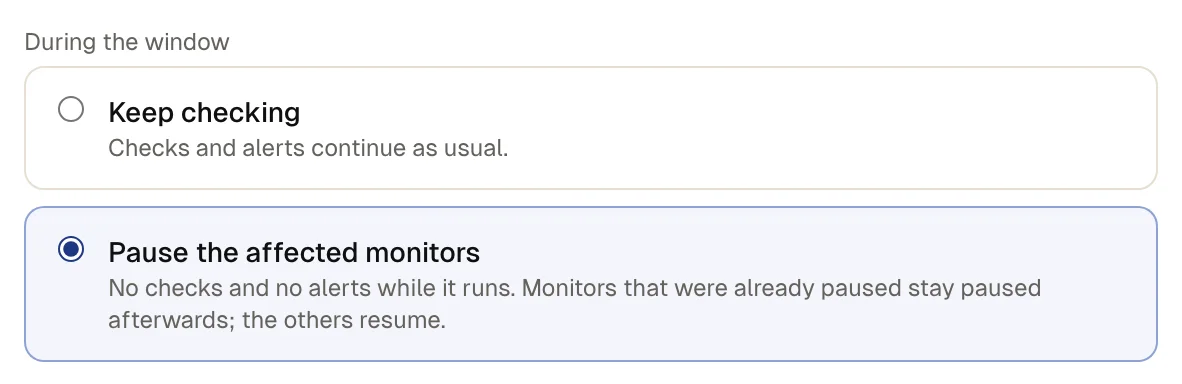
Under **During the window**, pick **Keep checking** or **Pause the affected monitors**. Keep checking leaves checks and alerts as they are. Pause the affected monitors pauses the monitors behind the components you pick next when the window starts and resumes them when it ends. Monitors you had paused yourself stay paused.
[](https://upfour.io/docs/images/walk/en/plan-maintenance-checks.webp)
### 5. [Choose the components](https://upfour.io/docs/plan-maintenance#components)
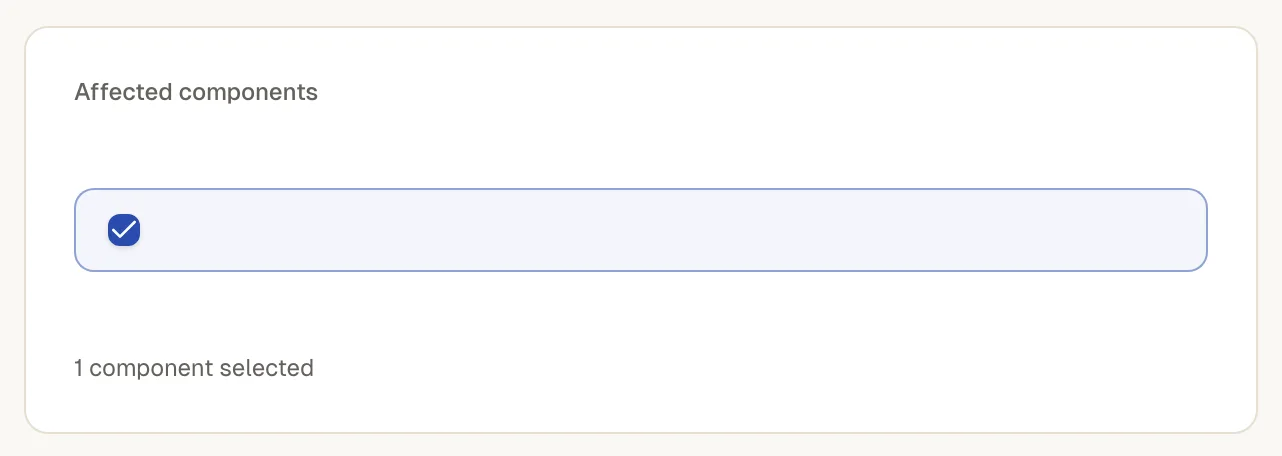
Tick the **Affected components** as your visitors know them. Pausing applies to the monitors among them.
[](https://upfour.io/docs/images/walk/en/plan-maintenance-components.webp)
### 6. [Decide who is told and schedule it](https://upfour.io/docs/plan-maintenance#notify)
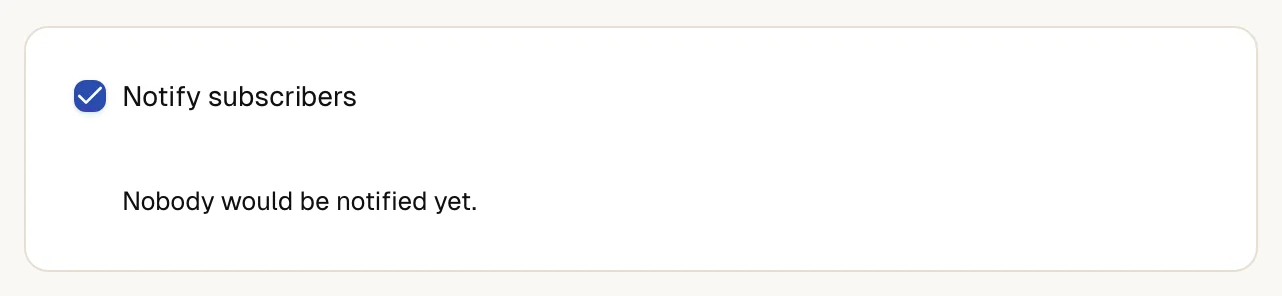
Leave **Notify subscribers** ticked to mail your subscribers, and choose a **Reminder to subscribers** if you want one. Select **Schedule maintenance**. If subscribers would be mailed, up4 asks you to confirm first. Without subscribers there is nothing to confirm.
[](https://upfour.io/docs/images/walk/en/plan-maintenance-notify.webp)
## How you know it worked
The window is listed under **Maintenance** as **scheduled**, and visitors see it on your status page until it starts. With **Start the window automatically** and **End the window automatically** ticked, which is the default, it starts and ends by itself.
## If something is off
The weekly window does not save.
You need at least one weekday, because a window without days would apply every day.
Alerts still arrive at the planned time.
Check the time zone of the window, and that the day you ticked is the day the window starts. A window from 23:00 to 01:00 belongs to the day it starts on.
Subscribers received nothing.
The mail goes to subscribers who follow maintenance and only if Notify subscribers was ticked. See [publish a status page](https://upfour.io/docs/publish-a-status-page.md).
## What up4 does not do here
- The weekly window repeats on the ticked weekdays. It does not take single dates. For a single date use a pause until a time, or maintenance on a status page.
- A monitor's weekly window and a status page maintenance are separate settings. Setting one does not set the other, and the weekly window is not announced to visitors.
- Inside a weekly window up4 does not check the monitor, so it cannot notice a real outage there. Keep windows as short as the work.
- Deleting a maintenance window removes it from the status page. Subscribers who were already told about it get no cancellation.
[Per API PATCH /v1/monitors/{monitorID}](https://upfour.io/docs/api/monitors#patch_monitors_monitorID)
| In the app | API field |
| --- | --- |
| From · HH:MM, in the window's time zone. | `maintenance_from` |
| Until | `maintenance_to` |
| Timezone · An IANA zone such as Europe/Berlin. | `maintenance_timezone` |
| On these days · Three-letter day codes; an empty list means every day. | `maintenance_weekdays` |
[Full reference](https://upfour.io/docs/api/monitors#patch_monitors_monitorID)
[Per API POST /v1/status-pages/{pageID}/updates](https://upfour.io/docs/api/status-pages#post_status_pages_pageID_updates)
| In the app | API field |
| --- | --- |
| Title · Send the entry as a maintenance update with status scheduled. | `title` |
| Start date · One timestamp; the app joins start date and start time. | `starts_at` |
| End date · One timestamp; the app joins end date and end time. | `ends_at` |
| Repeat · none, weekly or monthly. | `recurrence` |
| During the window · none keeps checking, pause_checks pauses the affected monitors. | `monitor_mode` |
| Affected components | `affected_resource_ids` |
| Notify subscribers | `notify_subscribers` |
[Full reference](https://upfour.io/docs/api/status-pages#post_status_pages_pageID_updates)
---
# Receive alerts
> Connect an alert channel such as email, Slack, SMS or PagerDuty, send a test and route a monitor's alerts to it.
Source: https://upfour.io/docs/receive-alerts
Afterwards the right place hears about it when a monitor goes down, and again when it is back.
- **Who:** Any role except **Viewer**
- **Time:** About five minutes
- **What you need:** An account with the service
That is the service you want to alert, for example a Slack channel to post into. up4 charges nothing per channel or message.
**In up4:** Alerting › Channels · [Open in up4](https://app.upfour.io/notification-channels)
## Steps
### 1. [Add a channel](https://upfour.io/docs/receive-alerts#add)
Select **\+ Add channel**. In **Create alert channel**, give the channel a **Name** you will recognize later and pick a **Type**.
In agency mode you can also set **Belongs to client (optional)**. The channel then appears only when you work in that client's scope, so alerts for that client reach the client's own contact.
[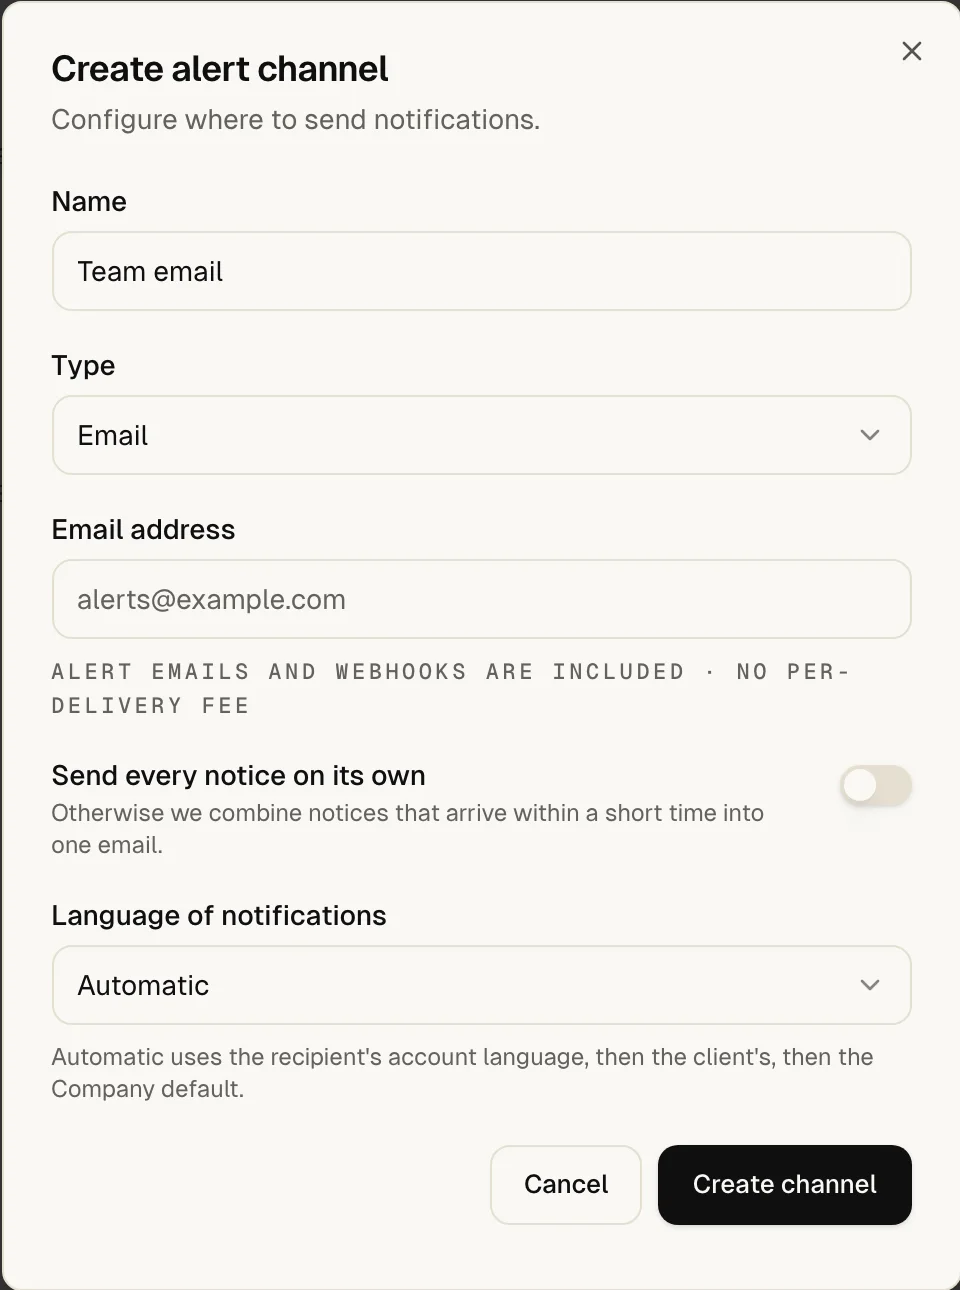](https://upfour.io/docs/images/walk/en/receive-alerts-add.webp)
### 2. [Enter what the service needs](https://upfour.io/docs/receive-alerts#settings)
Each type asks for different details. Slack, Teams, Discord, Zapier and Grafana give you a URL; Telegram, PagerDuty, Datadog, New Relic, Jira, ntfy and Pushover give you keys or tokens. Most forms link to the page where you find them.
| Channel type | You enter |
| --- | --- |
| Email | **Email address** |
| SMS | A Twilio account of your own: **Twilio Account SID**, **Twilio Auth Token**, **Sender number (From)** and **Recipient number (To)** |
| **Phone call** | The same Twilio details, with **Caller number (From)** instead of the sender number |
| Webhook | **Webhook URL**, optionally a **Signing secret** |
| Slack | **Slack Webhook URL**, optionally a **Channel override** |
| Telegram | **Bot Token** and **Chat ID** |
| Microsoft Teams | **Teams Webhook URL** |
| Discord | **Discord Webhook URL** |
| PagerDuty | **Routing Key** |
| Zapier | **Zapier Webhook URL** |
| Datadog | **API Key** and **Region** |
| New Relic | **License Key**, **Account ID** and **Region** |
| Jira | **Jira Base URL**, **Email**, **API Token**, **Project Key** and **Issue Type** |
| Grafana | **Grafana Webhook URL** |
| ntfy | **ntfy server** and **Topic**, optionally an **Access token** |
| Pushover | **Application API token** and **User or group key** |
Select **Create channel**. up4 then asks **Which monitors should alert Team email?** Tick monitors there, or select **Skip** and choose them later. You can edit a channel later; secret fields stay hidden and keep their value while you leave them empty.
[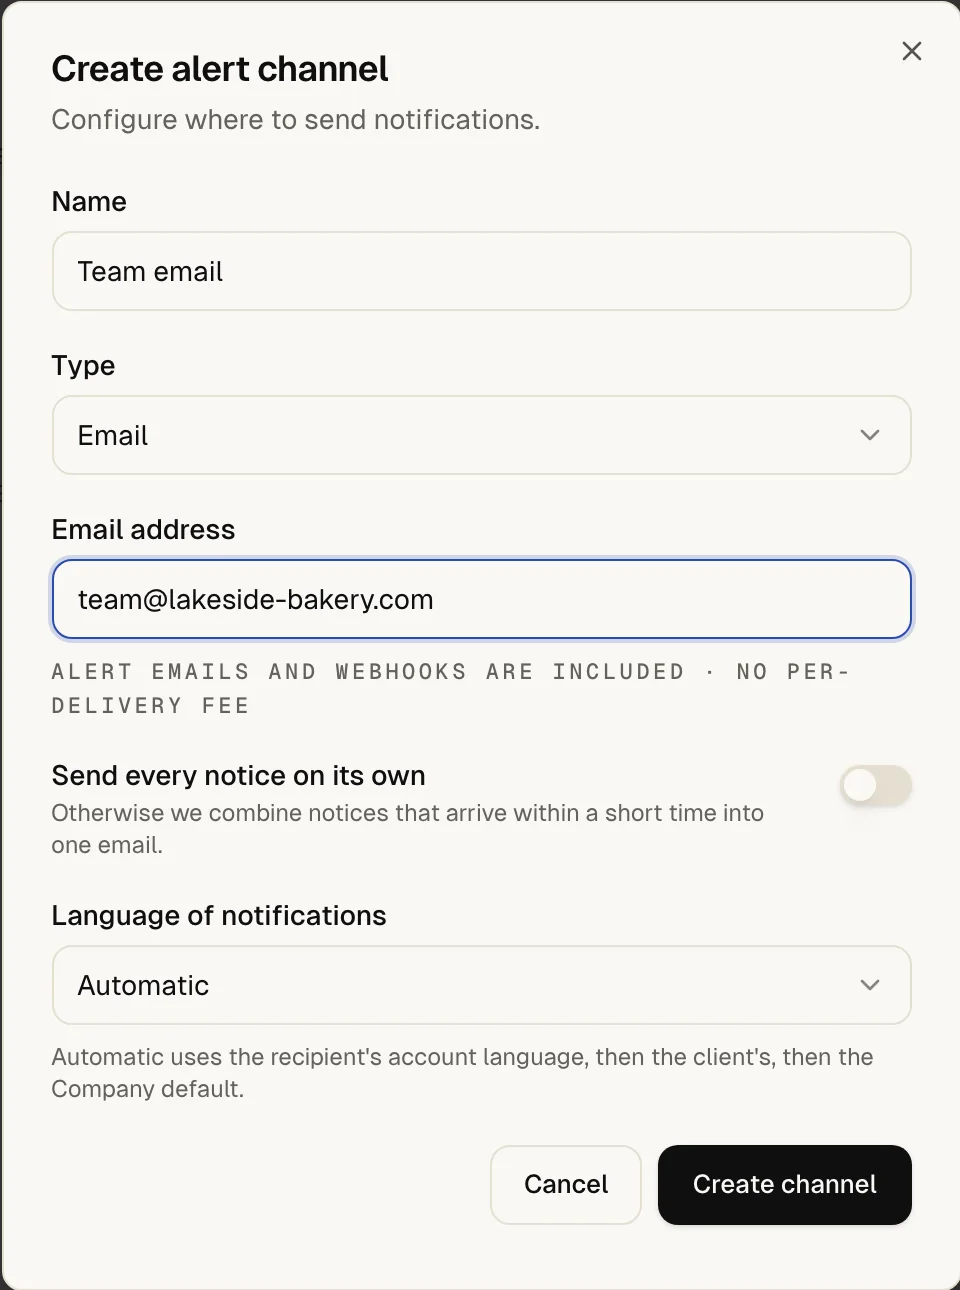](https://upfour.io/docs/images/walk/en/receive-alerts-settings.webp)
### 3. [Send a test](https://upfour.io/docs/receive-alerts#test)
On the card of the new channel select **Send test**. The message is labeled as a test, so nobody mistakes it for an outage.
Once a channel has delivered a message, its card shows **delivering** and **Send test** moves into the row menu of the card, the three dots at its top right.
[](https://upfour.io/docs/images/walk/en/receive-alerts-test.webp)
### 4. [Choose who gets alerted for a monitor](https://upfour.io/docs/receive-alerts#route)
Open the monitor's edit page: select the monitor, then **Edit**. In the card **Who hears about it** select one or more channels under **Alert channels**. While you create a monitor the same question reads **Who gets alerted**, and the marker **covered** appears as soon as somebody is selected.
Channels you select here are direct recipients: each gets one alert when the outage is confirmed. To add reminders and further people in steps, choose an [alert plan](https://upfour.io/docs/build-an-alert-plan.md) under **Alert plan** on the edit page. The plan works on top of the direct recipients.
[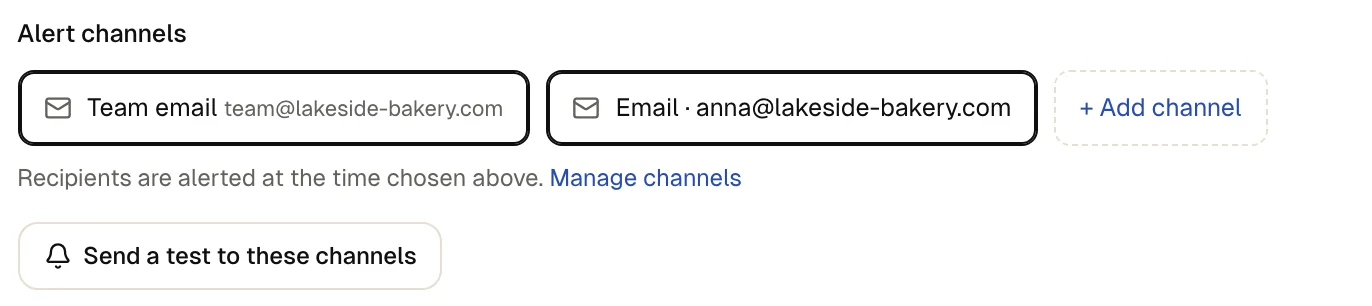](https://upfour.io/docs/images/walk/en/receive-alerts-route.webp)
### 5. [Choose when to alert](https://upfour.io/docs/receive-alerts#mode)
The question **When should we alert you?** has two answers:
- **Right away**: **As soon as three checks confirm the outage. One alert per outage, and an all-clear when it's over.**
- **Skip short blips**: **Only after 3 minutes of downtime in total. Shorter blips stay in the history.**
**Either way, status, incidents and status pages show the outage right away.** The rules behind both are on [When you get alerted](https://upfour.io/docs/how/when-you-get-alerted.md). Then select **Save changes** to keep the channels and this setting.
[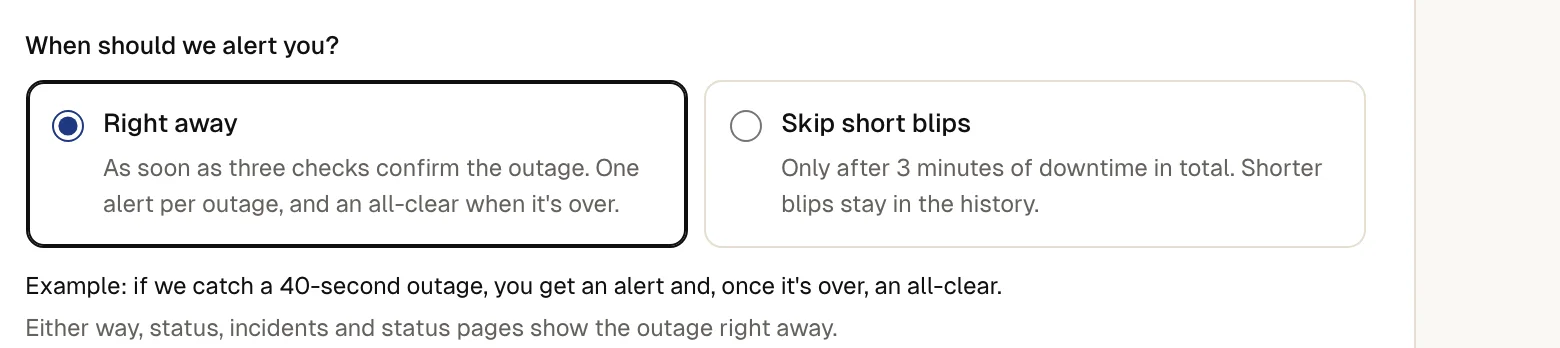](https://upfour.io/docs/images/walk/en/receive-alerts-mode.webp)
### 6. [Optionally turn on reminders](https://upfour.io/docs/receive-alerts#reminders)
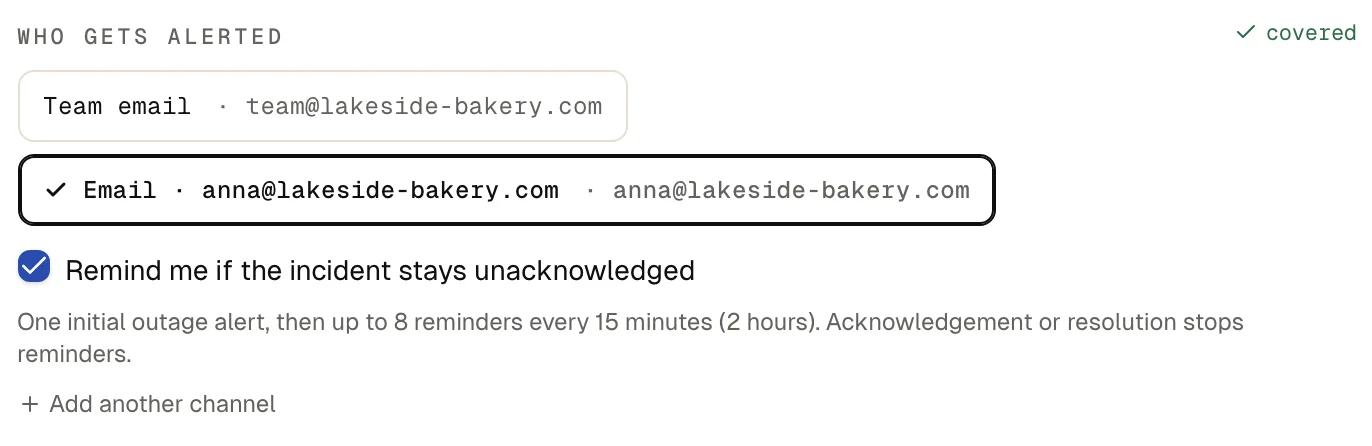
Open the form for a new monitor. When no alert plan is selected and one of the selected channels delivers to your own email address, the form offers **Also send reminders while the incident is unacknowledged**. With it on, the form says: **After the outage alert, up to 8 reminders every 15 minutes (2 hours). They stop once someone acknowledges the incident or it is resolved.**
The edit page of an existing monitor does not offer this; choose an alert plan there. When you create the monitor with reminders on, up4 creates an alert plan called _Just me_ for it. You can edit it with the other plans.
[](https://upfour.io/docs/images/walk/en/receive-alerts-reminders.webp)
## How you know it worked
The test arrives in the service you chose. The toast reads **Test sent to “Team email”. It is clearly labelled as a test.** For a phone call it reads **Test call requested. Receipt is confirmed only after pressing 1.**.
On the form for a new monitor the marker **covered** shows. On the edit page of a monitor, **Send a test to these channels** runs the same test for the channels saved for it. On the monitor page the command palette offers **Send test alert**, and so does the banner right after you create the monitor.
After a real outage the same channels get an all-clear when it is over. A recovery notice goes only to a channel that heard about the outage.
## If something is off
The test fails with The provider could not deliver the test..
Check the URL, token or key you entered against the service's own page. Webhook URLs must use HTTPS.
No test email arrives.
Look in your spam folder. Email notices that arrive close together are combined into one message unless you turn on **Send every notice on its own** for that channel.
The form warns that nobody is alerted.
**Nobody is alerted when this monitor goes down. Pick a channel or an alert plan.** Select a channel under **Who gets alerted**. More in the [symptom index](https://upfour.io/docs/troubleshooting.md).
## What up4 does not do here
- SMS and Phone call run through your own Twilio account. Twilio bills messages, calls and numbers to you; up4 never resells them. **Requires a voice-capable Twilio sender number and an international recipient number. One call per monitor incident and alert-plan step, up to 55 seconds. Add a later step for another attempt. Scheduled jobs, recovery messages and repeat cycles of the same step do not trigger calls.**
- Pressing 1 during a call acknowledges the incident and stops the alert plan.
- Webhook, Zapier, PagerDuty, Datadog, New Relic, Grafana and Jira alerts also carry the monitor's **Metadata**, so the receiving system can route by it. Chat, email, SMS and push alerts stay as they are.
- A webhook channel signs a request only when you set a signing secret, with an HMAC-SHA256 in `X-Up4-Signature: sha256=` over the raw body. Subscriptions created through the API are always signed in a different format, described in the [webhooks guide](https://upfour.io/docs/api/webhooks.md).
- A slowdown warning is a separate, optional message. It is not sent to Phone call, SMS, PagerDuty, Jira or Grafana channels.
- Chat, email, SMS and push channels have a language setting. **Automatic uses the recipient's account language, then the client's, then the Company default.**
- Paused monitors and monitors inside a maintenance window do not alert. A confirmed outage needs 3 matching results first.
- A missed check-in of a [scheduled job](https://upfour.io/docs/watch-a-scheduled-job.md) goes to the channels that fit the job's Company, client or team. Scheduled jobs do not use alert plans and never place a call.
- up4 does not promise a delivery time. Arrival depends on the channel and the service behind it.
[Per API POST /v1/notification_channels](https://upfour.io/docs/api/notification-channels#post_notification_channels)
| In the app | API field |
| --- | --- |
| Name | `name` |
| Type · email, sms, voice, webhook, slack, telegram, msteams, discord, pagerduty, zapier, datadog, newrelic, jira, grafana, ntfy or pushover | `type` |
| Email address | `config.email` |
| Webhook URL | `config.url` |
| Signing secret | `config.secret` |
| Slack Webhook URL · Slack, Microsoft Teams, Discord, Zapier and Grafana use this key for their URL | `config.webhook_url` |
| Bot Token | `config.bot_token` |
| Chat ID | `config.chat_id` |
| Routing Key | `config.routing_key` |
| Send every notice on its own | `config.send_individually` |
[Full reference](https://upfour.io/docs/api/notification-channels#post_notification_channels)
---
# Build an alert plan
> Chain alert channels into steps with waiting times, so an unanswered outage reaches the next person until someone acknowledges.
Source: https://upfour.io/docs/build-an-alert-plan
Afterwards an outage nobody answers climbs a ladder: first one set of channels, then the next after a wait, until someone acknowledges.
- **Who:** Any role except **Viewer**
- **Time:** About five minutes
- **What you need:** At least one [alert channel](https://upfour.io/docs/receive-alerts.md)
For a plan with several steps, one channel per person or service you want to reach.
**In up4:** Alerting › Alert plans · [Open in up4](https://app.upfour.io/escalation-policies/new)
## Steps
### 1. [Start a new plan](https://upfour.io/docs/build-an-alert-plan#new)
Select **Create alert plan** (**New alert plan** once you have a plan) and give it an **Alert plan name**. A name that says what it protects works best. The form tells you what is still missing, starting with the name.
[](https://upfour.io/docs/images/walk/en/build-an-alert-plan-new.webp)
### 2. [Choose who the first step alerts](https://upfour.io/docs/build-an-alert-plan#first-step)
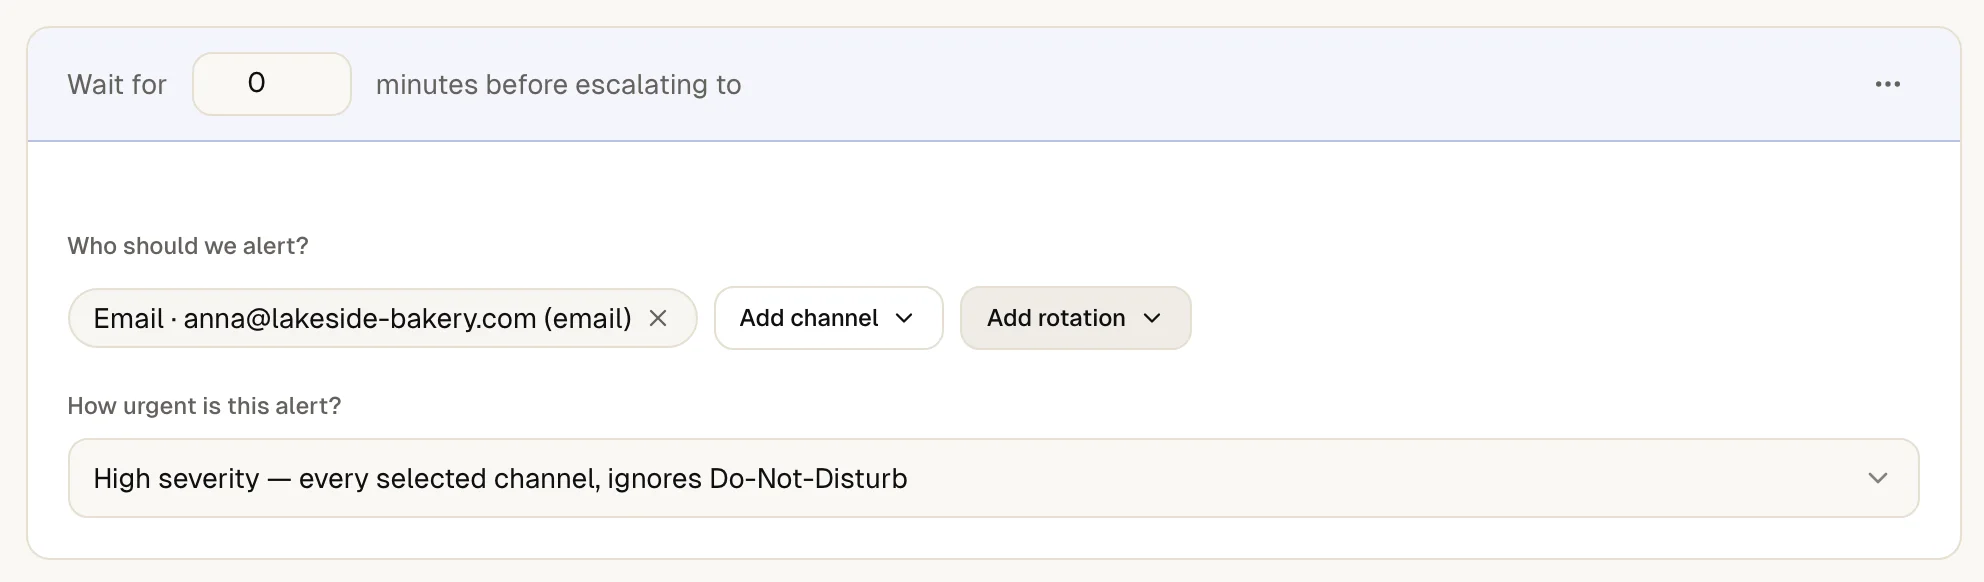
Under **Who should we alert?** select **Add channel** and pick one or more channels. Then answer **How urgent is this alert?**:
- **High severity — every selected channel, ignores Do-Not-Disturb**
- **Phone calls only**
- **SMS only — text message via Twilio**
- **Low severity — email only, respects Do-Not-Disturb**
To reach whoever is on call instead of a fixed channel, select **Add rotation** and pick a rotation. **A rotation reaches whoever is on call when the step fires, on their own alert channels.** How to set one up: [set up on-call](https://upfour.io/docs/set-up-on-call.md).
The first step can fire the moment the incident opens. If you enter a wait for it, up4 holds it back for that long.
[](https://upfour.io/docs/images/walk/en/build-an-alert-plan-first-step.webp)
### 3. [Add the next step and set its wait](https://upfour.io/docs/build-an-alert-plan#next-step)
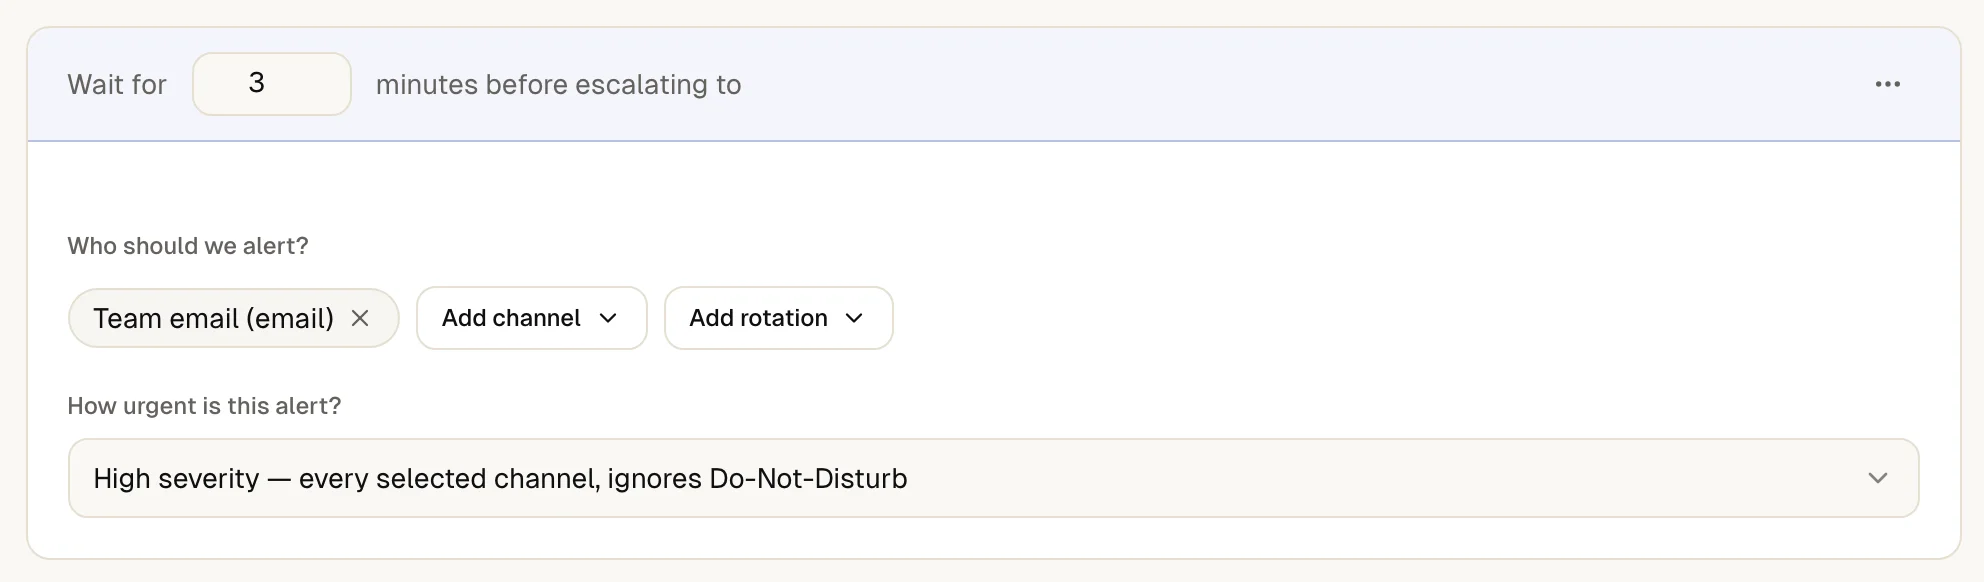
Select **Add escalation step**. Under **Wait for** enter how many minutes up4 waits for an acknowledgement before it alerts this step. Every step after the first waits at least 1 minute.
Pick the channels of the new step the same way as for the first one. Typical shape: a chat message to the team first, then a phone call to one person after a few minutes, then the wider channel.
[](https://upfour.io/docs/images/walk/en/build-an-alert-plan-next-step.webp)
### 4. [Decide whether the plan repeats](https://upfour.io/docs/build-an-alert-plan#repeat)
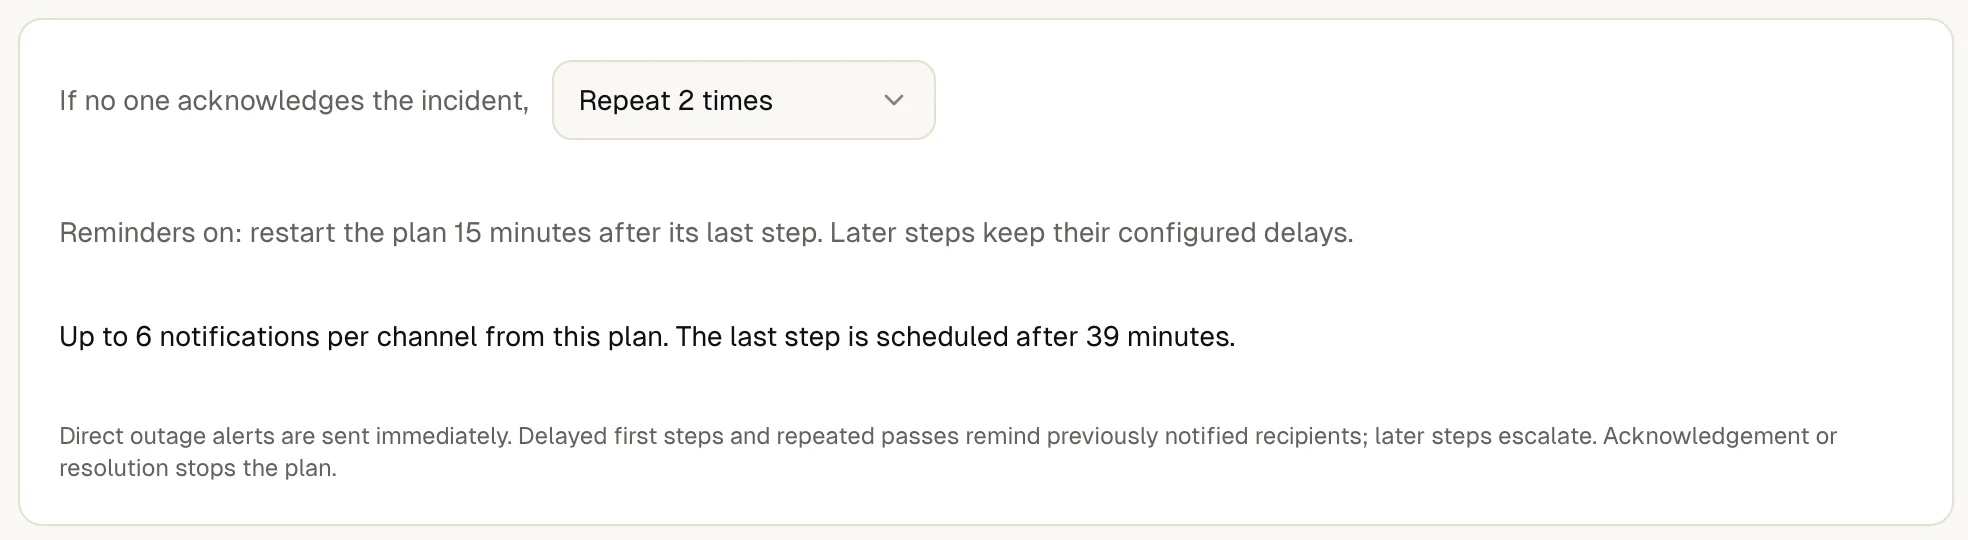
Under **Reminders after the last step** choose **don't repeat** or repeat up to 8 times. A repeat starts the plan again from its first step after the interval the form shows underneath.
[](https://upfour.io/docs/images/walk/en/build-an-alert-plan-repeat.webp)
### 5. [Create the plan](https://upfour.io/docs/build-an-alert-plan#create)
Select **Create plan**. A plan does nothing until a monitor uses it, so the page asks **Which monitors should use Critical services?**
[](https://upfour.io/docs/images/walk/en/build-an-alert-plan-create.webp)
### 6. [Attach the plan to monitors](https://upfour.io/docs/build-an-alert-plan#attach)
Select the monitors that should use the plan, then **Apply to 2 monitors**. Choose **Not now** to decide later. The list of plans then counts them under **Attached**.
You can also open the edit page of a monitor and choose the plan under **Alert plan**. Channels you also select under **Alert channels** stay direct recipients. **Pages people in steps until someone acknowledges, on top of the channels above.**
[](https://upfour.io/docs/images/walk/en/build-an-alert-plan-attach.webp)
### 7. [Test the plan](https://upfour.io/docs/build-an-alert-plan#test)
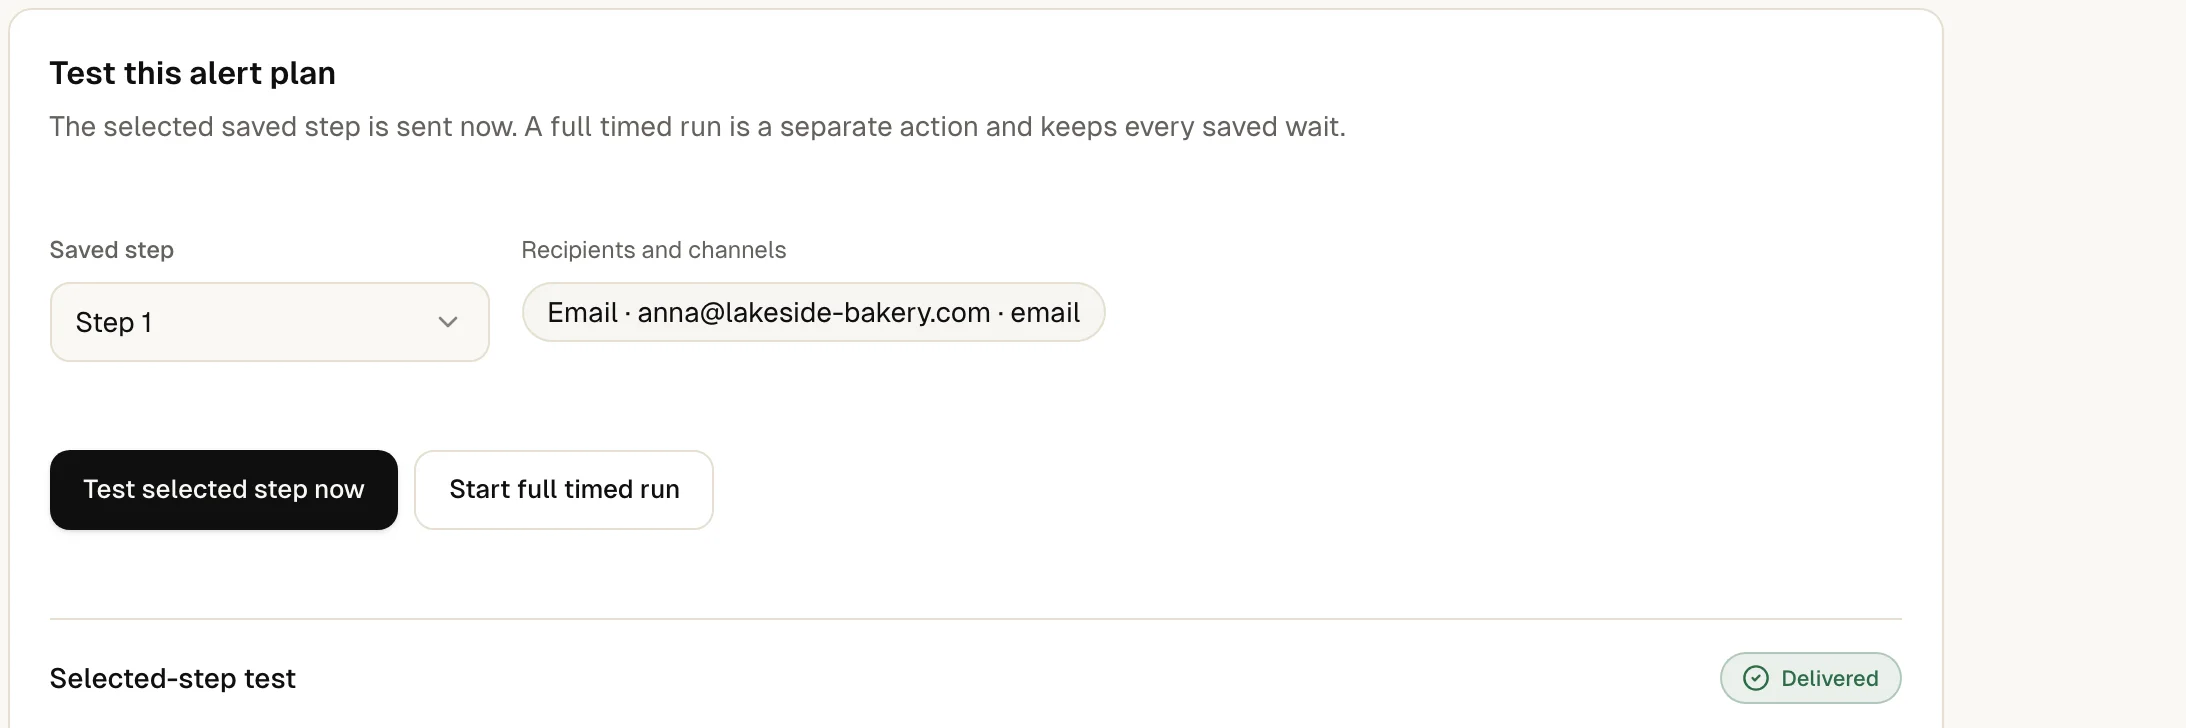
In the list, open the row menu of the plan and select **Edit**. The box **Test this alert plan** sends one saved step right away with **Test selected step now**. **Start full timed run** plays the whole plan with its saved waits. The app asks you to confirm and states that this does not create an incident.
[](https://upfour.io/docs/images/walk/en/build-an-alert-plan-test.webp)
## How you know it worked
The test reaches the channels of the step you picked, and the box shows **Delivered**. No incident is created.
In the list of plans the monitor count under **Attached** goes up, and the column **Last paged** fills in after the plan has really alerted somebody.
During a real outage the next step fires only while nobody has acknowledged the incident. **Direct outage alerts are sent immediately. Delayed first steps and repeated passes remind previously notified recipients; later steps escalate. Acknowledgement or resolution stops the plan.**
## If something is off
The form will not save.
It names the reason: **Give the plan a name.** **Pick at least one channel or rotation for every step.** **From step 2 on, wait at least 1 minute.**
A step warns that it reaches nobody.
The step's urgency allows only some channel types, for example phone calls only, and none of the step's channels is one of them. Add a matching channel or choose another urgency.
The monitor went down and the plan stayed quiet.
Check that the plan is attached on the monitor's edit page, that the monitor is not paused or in a maintenance window, and that the outage was confirmed. [When you get alerted](https://upfour.io/docs/how/when-you-get-alerted.md) lists the rules.
## What up4 does not do here
- A step alerts [alert channels](https://upfour.io/docs/receive-alerts.md) and [on-call rotations](https://upfour.io/docs/set-up-on-call.md). A rotation reaches the person on call through the alert channels that person added themselves; if there are none, the incident timeline says so and the step's other targets still go out.
- A plan stops as soon as somebody acknowledges the incident or it resolves. Pressing 1 on a phone call acknowledges.
- A phone call goes out once per incident and plan step. Repeats of the same step place no new call.
- The form shows the current limit of steps per plan and channels per step. A plan that was valid before a limit changed keeps running and is checked again on its next edit.
- A Company-level plan can use only Company-level channels. A plan for a client can use Company channels and that client's own channels.
- Changes to a plan apply to every monitor that uses it.
- Alert plans belong to monitors. [Scheduled jobs](https://upfour.io/docs/watch-a-scheduled-job.md) do not use them.
- The interface offers up to 8 repeats. Through the API a higher number is stored as no repeats instead of being rejected.
- The waits are timers, not delivery promises. How fast a message arrives depends on the channel.
[Per API POST /v1/escalation-policies](https://upfour.io/docs/api/escalation-policies#post_escalation_policies)
| In the app | API field |
| --- | --- |
| Alert plan name | `name` |
| Wait for · seconds; from step 2 on at least 60 | `steps[].wait_seconds` |
| Who should we alert? · a list of alert channel ids | `steps[].targets` |
| How urgent is this alert? · high, voice, sms or low | `steps[].urgency` |
| Reminders after the last step · 0 to 8 | `repeat_count` |
[Full reference](https://upfour.io/docs/api/escalation-policies#post_escalation_policies)
---
# Set up on-call
> Create an on-call rotation with members, a hand-over day and time, send alerts to whoever is on call, and cover a shift with an override.
Source: https://upfour.io/docs/set-up-on-call
Afterwards alerts reach whoever holds the pager, and up4 shows who that is now, who takes over next and who covers a holiday.
- **Who:** Any role except **Viewer**
- **Time:** About five minutes
- **What you need:** At least one member in your Company
To take turns you need two or more.
**In up4:** Alerting › On-call rotations · [Open in up4](https://app.upfour.io/on-call/schedules/new)
## Steps
### 1. [Name the rotation](https://upfour.io/docs/set-up-on-call#name)
Select **Create rotation** and enter a **Name**, for example _Weekend cover_.
[](https://upfour.io/docs/images/walk/en/set-up-on-call-name.webp)
### 2. [Add the members](https://upfour.io/docs/set-up-on-call#members)
Under **Team members** select **Add team member...** for each person. **Choose colleagues to take turns being on-call. They will be rotated in the order listed below.**
The list offers the members of your Company. If a colleague is missing, invite them under [team and roles](https://upfour.io/docs/team-and-roles.md) first.
[](https://upfour.io/docs/images/walk/en/set-up-on-call-members.webp)
### 3. [Set when the shift changes](https://upfour.io/docs/set-up-on-call#settings)
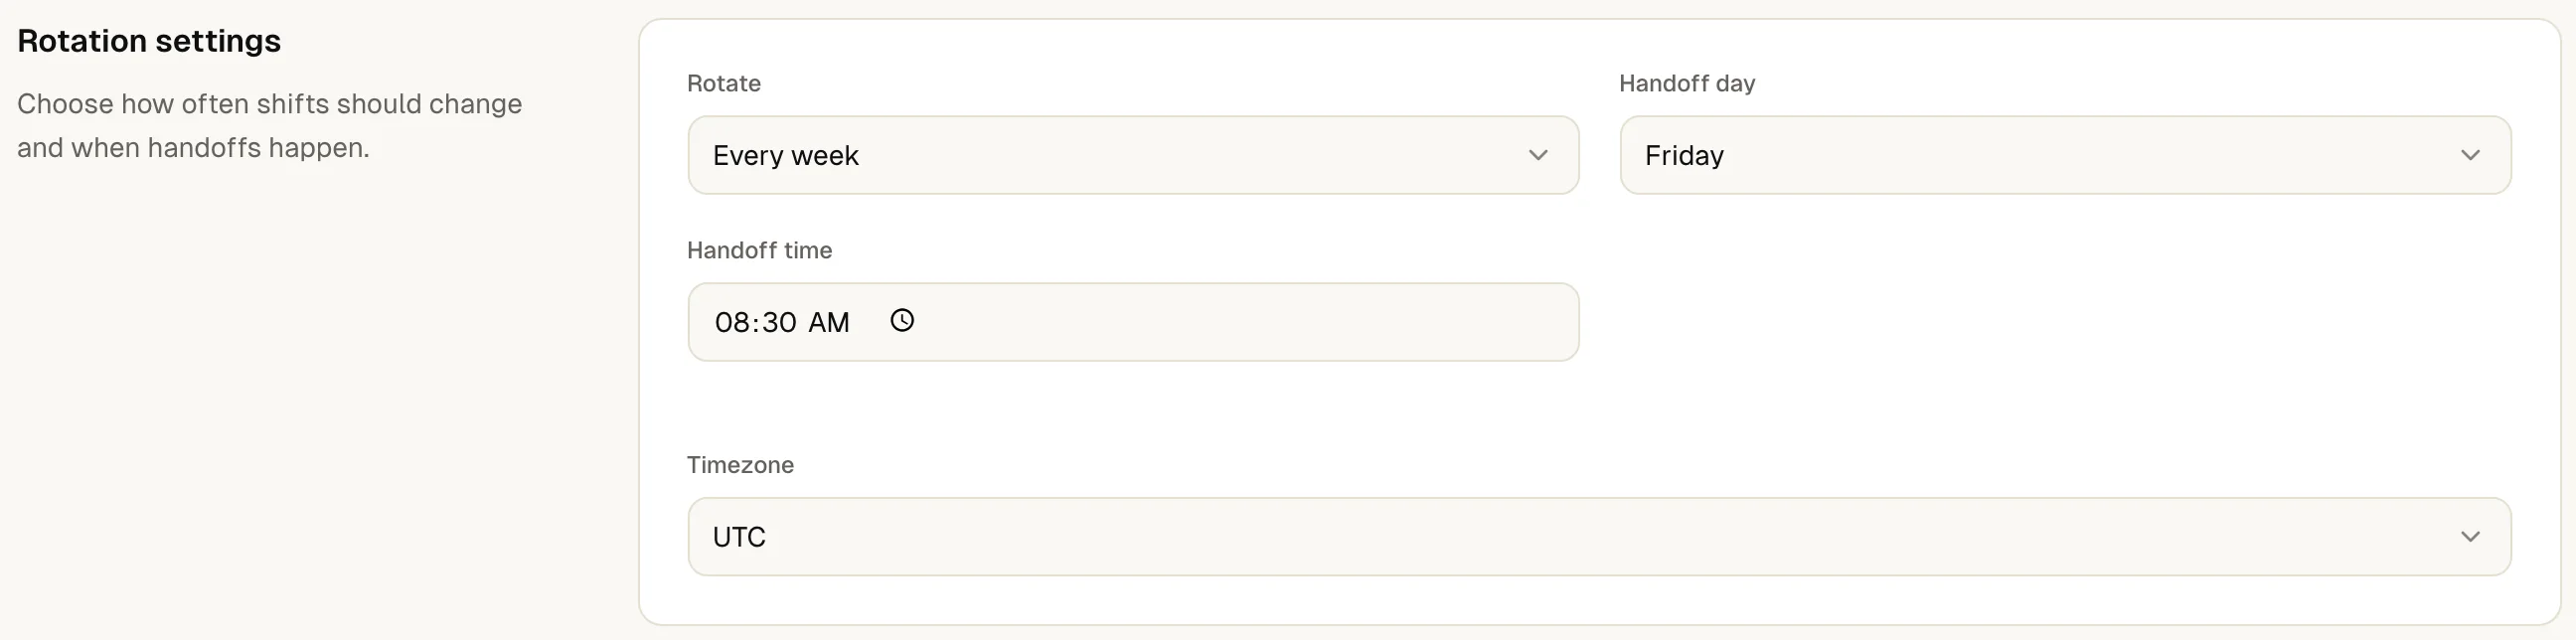
Under **Rotate** choose **Every day** or **Every week**. Set the **Handoff time** and the **Timezone** it is measured in.
A weekly rotation also needs a **Handoff day**: the shift changes on that weekday at the hand-over time. A daily rotation changes every day at that time. The first person in the list is on call until the first hand-over.
[](https://upfour.io/docs/images/walk/en/set-up-on-call-settings.webp)
### 4. [Check the preview and create the rotation](https://upfour.io/docs/set-up-on-call#create)
The **Preview** lists the members in order. If it reads right, select **Create rotation**.
[](https://upfour.io/docs/images/walk/en/set-up-on-call-create.webp)
### 5. [Send alerts to whoever is on call](https://upfour.io/docs/set-up-on-call#route)
A rotation only alerts someone once an alert plan uses it. Open the plan under [build an alert plan](https://upfour.io/docs/build-an-alert-plan.md), select **Add rotation** in a step and pick the rotation. **A rotation reaches whoever is on call when the step fires, on their own alert channels.**
Own alert channels are the ones a person added themselves under **Alert channels**. Ask every member to add at least one, for example their own e-mail address or phone number.
[](https://upfour.io/docs/images/walk/en/set-up-on-call-route.webp)
### 6. [Cover a shift](https://upfour.io/docs/set-up-on-call#override)
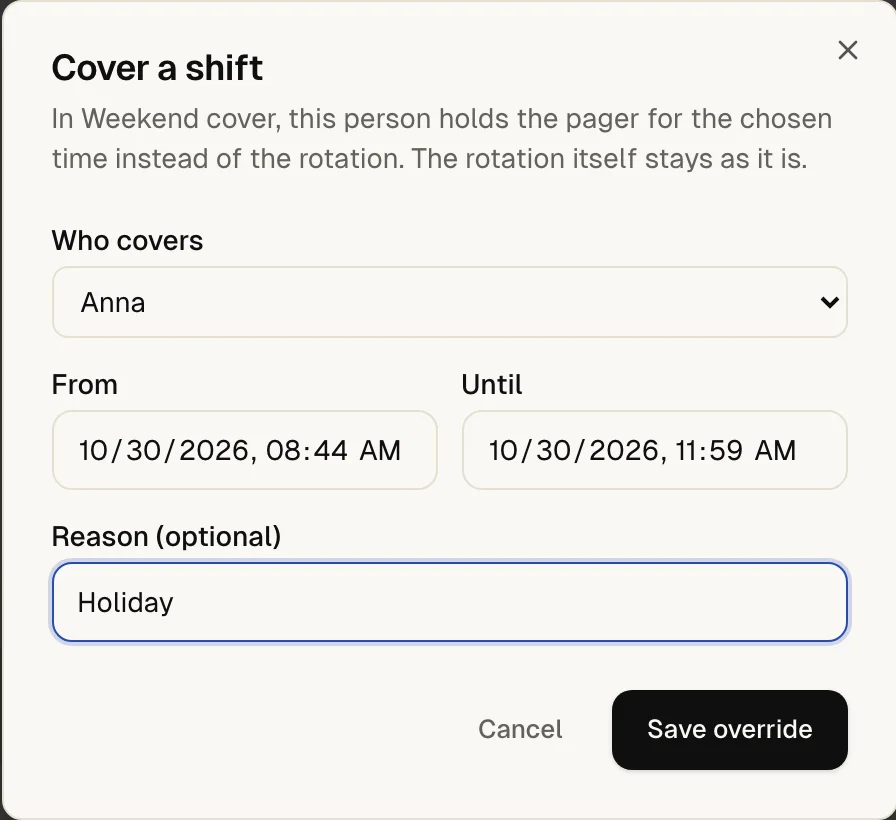
When someone is away, open the rotation and select **Cover a shift**. Under **Who covers** pick the person (anyone in your Company except viewers), set **From** and **Until**, add a **Reason (optional)** if you like and select **Save override**.
**In Weekend cover, this person holds the pager for the chosen time instead of the rotation. The rotation itself stays as it is.** To end a cover early, remove it with **Remove**.
[](https://upfour.io/docs/images/walk/en/set-up-on-call-override.webp)
## How you know it worked
The on-call page names the person under **On call now** and who follows under **Next up**. A covered time is marked **· override**.
The same name appears on the **Alerting** overview under **On call right now**.
When you test the alert plan, the step lists the alert channel it reached and the person on call through the rotation.
## If something is off
The rotation will not save.
It needs a name and at least one member: **Please enter a rotation name.** **Please add at least one team member.**
The incident timeline says **Rotation Weekend cover reached nobody**.
Nobody was on call at that moment, or the person on call has no alert channel of their own. The step still alerted its other targets; with no other target the step failed. Add a member's own channel or a fallback channel to the step.
A rotation cannot be deleted.
An alert plan still uses it. Remove it from the plan's steps first.
The cover will not save.
**Choose who covers.** **The end has to be after the start.**
## What up4 does not do here
- A cover replaces the rotation for its whole time, whoever would have been on duty.
- A rotation reaches the person on call only on the alert channels they added themselves, not on channels a colleague added for them.
- The hand-over keeps its wall-clock time across daylight saving changes in the rotation's time zone.
- Rotations, members and covers belong to your Company. In agency mode you can assign a rotation to a **Client**.
[Per API POST /v1/oncall-schedules](https://upfour.io/docs/api/oncall-schedules#post_oncall_schedules)
| In the app | API field |
| --- | --- |
| Name | `name` |
| Team members · user ids in rotation order | `member_ids` |
| Rotation frequency · daily, weekly or custom | `rotation_type` |
| Handoff day | `handoff_day` |
| Handoff time | `handoff_time` |
| Timezone | `timezone` |
[Full reference](https://upfour.io/docs/api/oncall-schedules#post_oncall_schedules)
[Per API POST /v1/oncall-schedules/{scheduleID}/overrides](https://upfour.io/docs/api/oncall-schedules#post_oncall_schedules_scheduleID_overrides)
| In the app | API field |
| --- | --- |
| Who covers | `user_id` |
| From | `starts_at` |
| Until | `ends_at` |
| Reason (optional) | `reason` |
[Full reference](https://upfour.io/docs/api/oncall-schedules#post_oncall_schedules_scheduleID_overrides)
---
# Handle an incident
> Acknowledge an outage, bring in a colleague, post updates, work through a playbook and resolve the incident. Everything lands on one timeline.
Source: https://upfour.io/docs/handle-an-incident
Afterwards your team knows who is on an outage, what was tried and when it ended, all on one timeline you can read the next morning.
- **Who:** Any role except **Viewer**
- **Time:** A few minutes, plus the outage
- **What you need:** An incident
Viewers can read incidents but not change them. up4 opens an incident when a monitor is confirmed down or a [scheduled job](https://upfour.io/docs/watch-a-scheduled-job.md) misses its check-in. You can also declare one yourself.
**In up4:** Incidents · [Open in up4](https://app.upfour.io/incidents)
## Steps
### 1. [Open the incident or declare one](https://upfour.io/docs/handle-an-incident#open-incident)
Select the incident in the list, or follow the link in the alert you received. Unresolved incidents come first, newest on top.
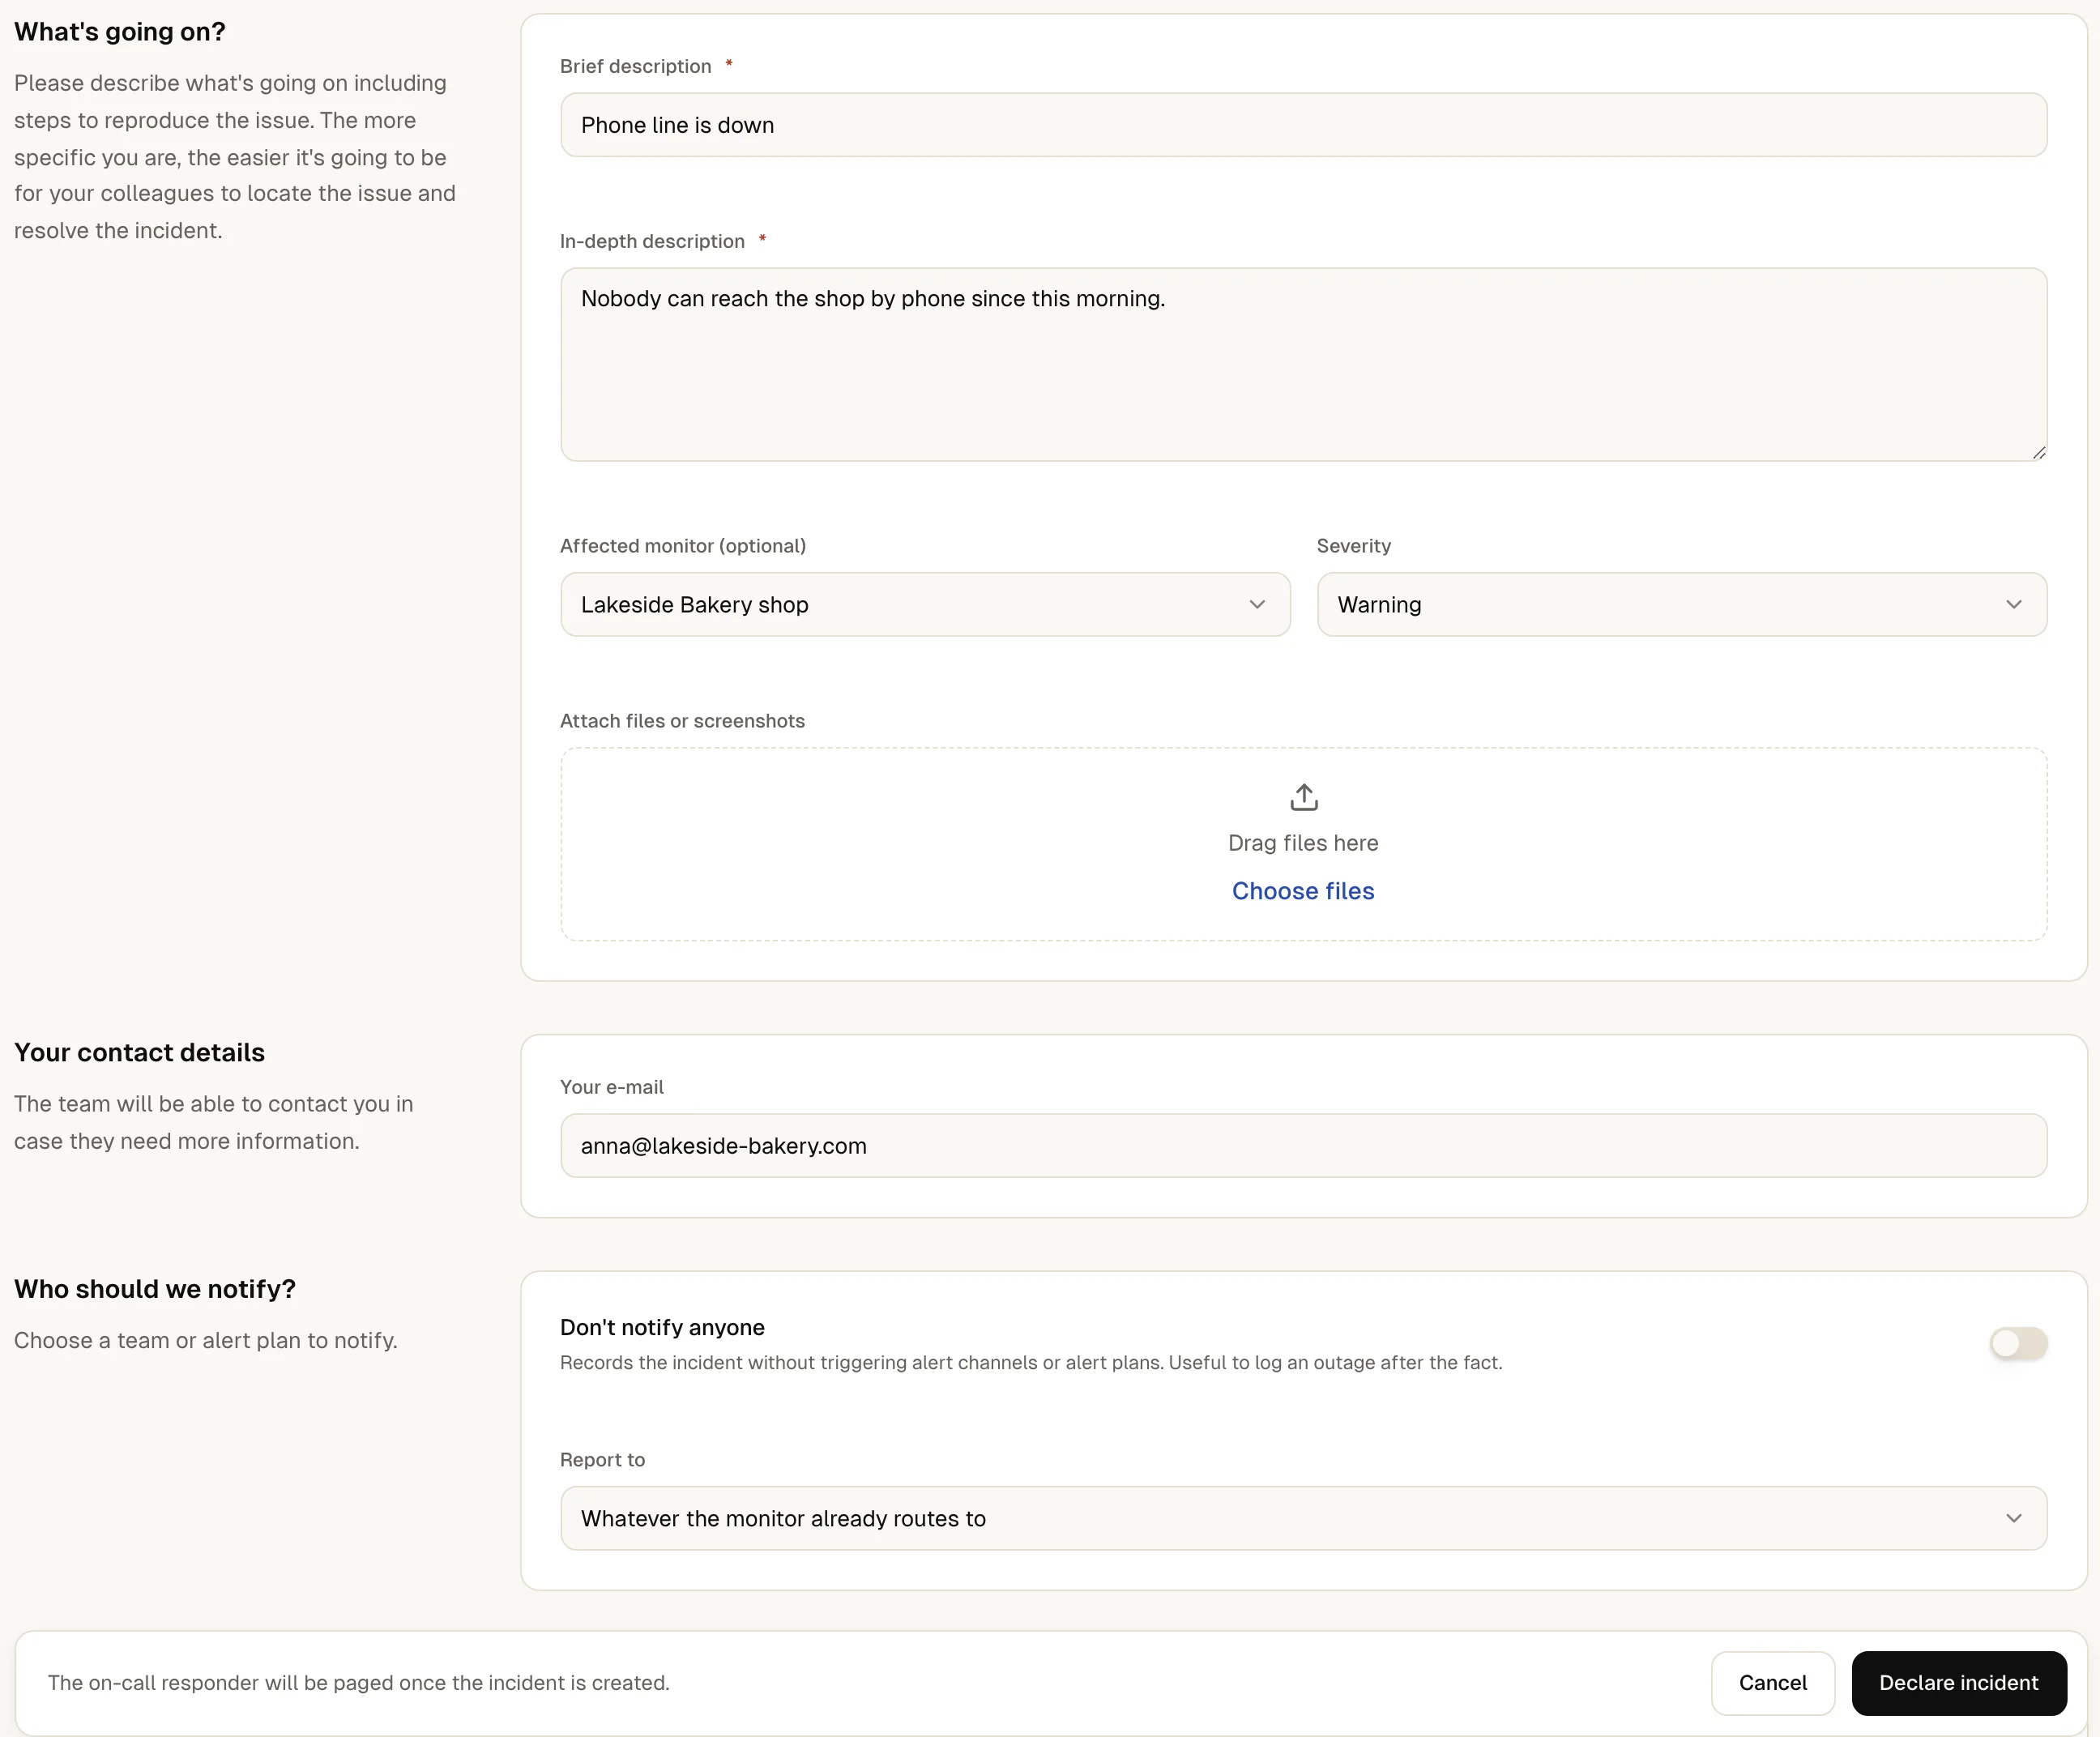
To report something no monitor can see, such as a customer complaint, select **Declare incident**. Fill in **Brief description** and **In-depth description**, optionally choose an **Affected monitor (optional)**, set the **Severity** and select **Declare incident**.
To log an outage after the fact without alerting anyone, turn on **Don't notify anyone**. up4 records the incident and sends nothing through alert channels or alert plans.
[](https://upfour.io/docs/images/walk/en/handle-an-incident-declare-form.webp)
[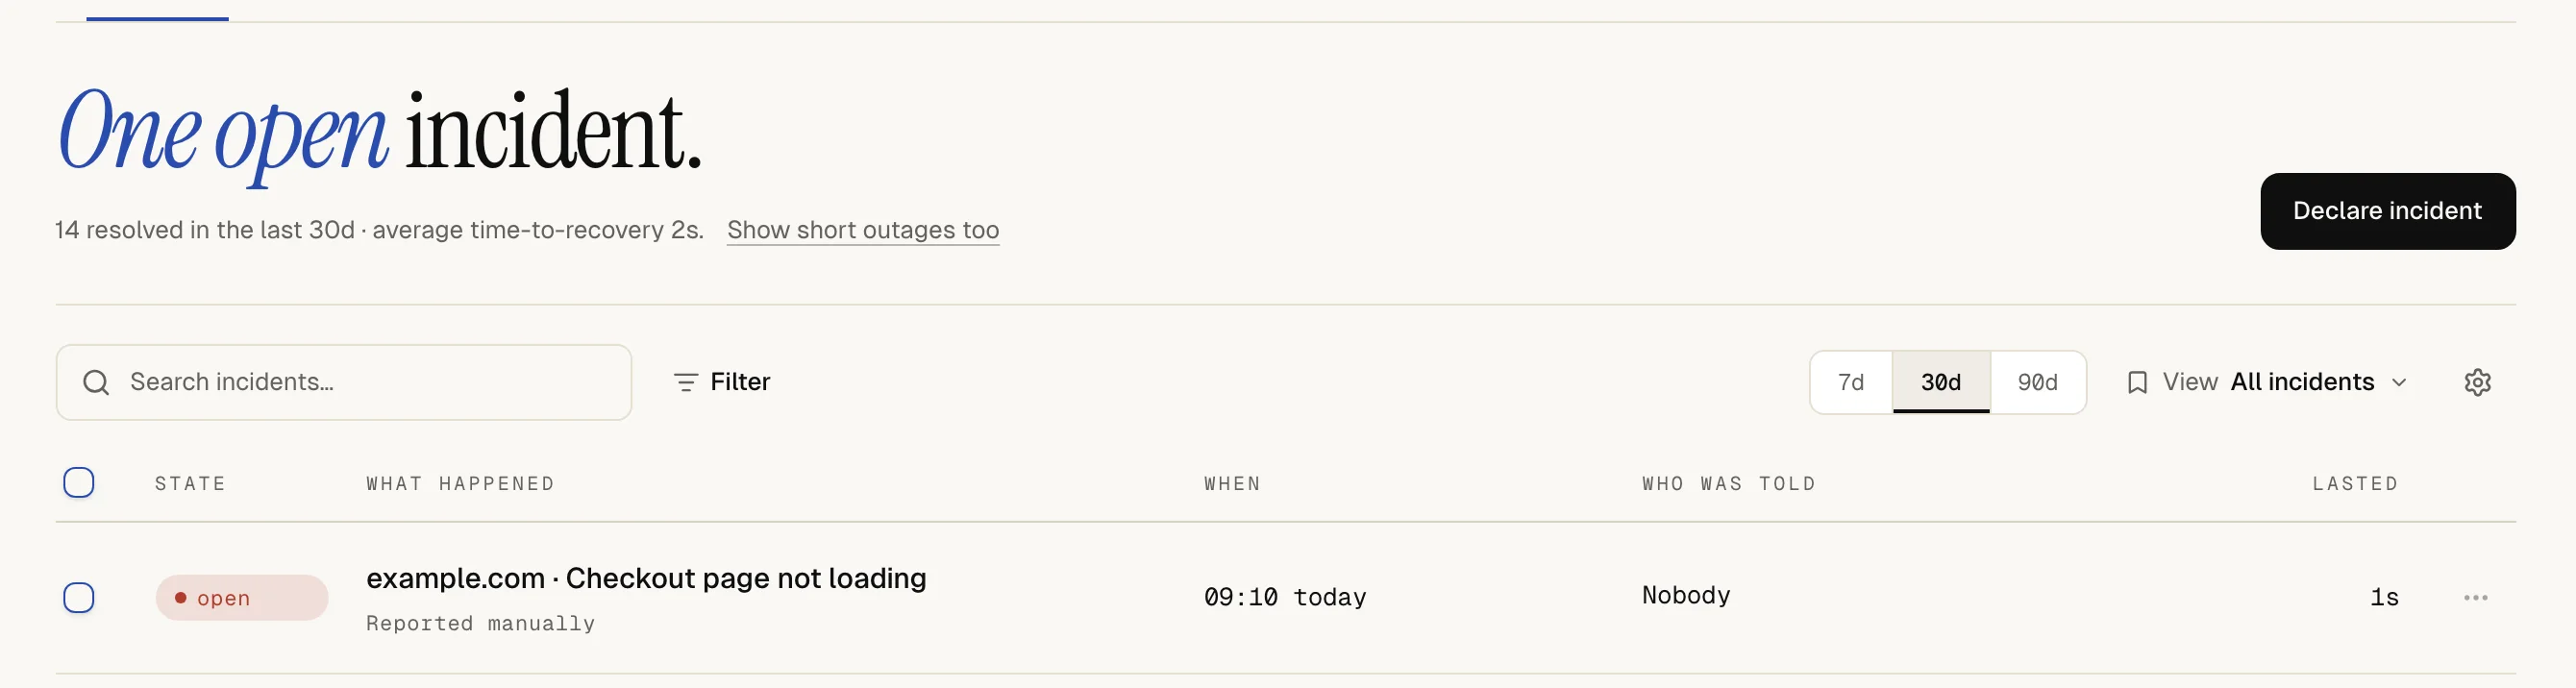](https://upfour.io/docs/images/walk/en/handle-an-incident-open-incident.webp)
### 2. [Bring in a colleague if you need one](https://upfour.io/docs/handle-an-incident#escalate)
up4 has no owner field. To pull someone in, open **Manual escalation**, pick a person under **Escalate to a specific person** and select **Escalate now**. up4 shows which alert channels of that person it will use.
Do this before you acknowledge. Acknowledging stops the alert plan, and up4 cannot escalate an incident that has no running alert plan. After an escalation the plan keeps running until that person acknowledges the incident, and the timeline shows **Escalation target confirmed** when they do.
[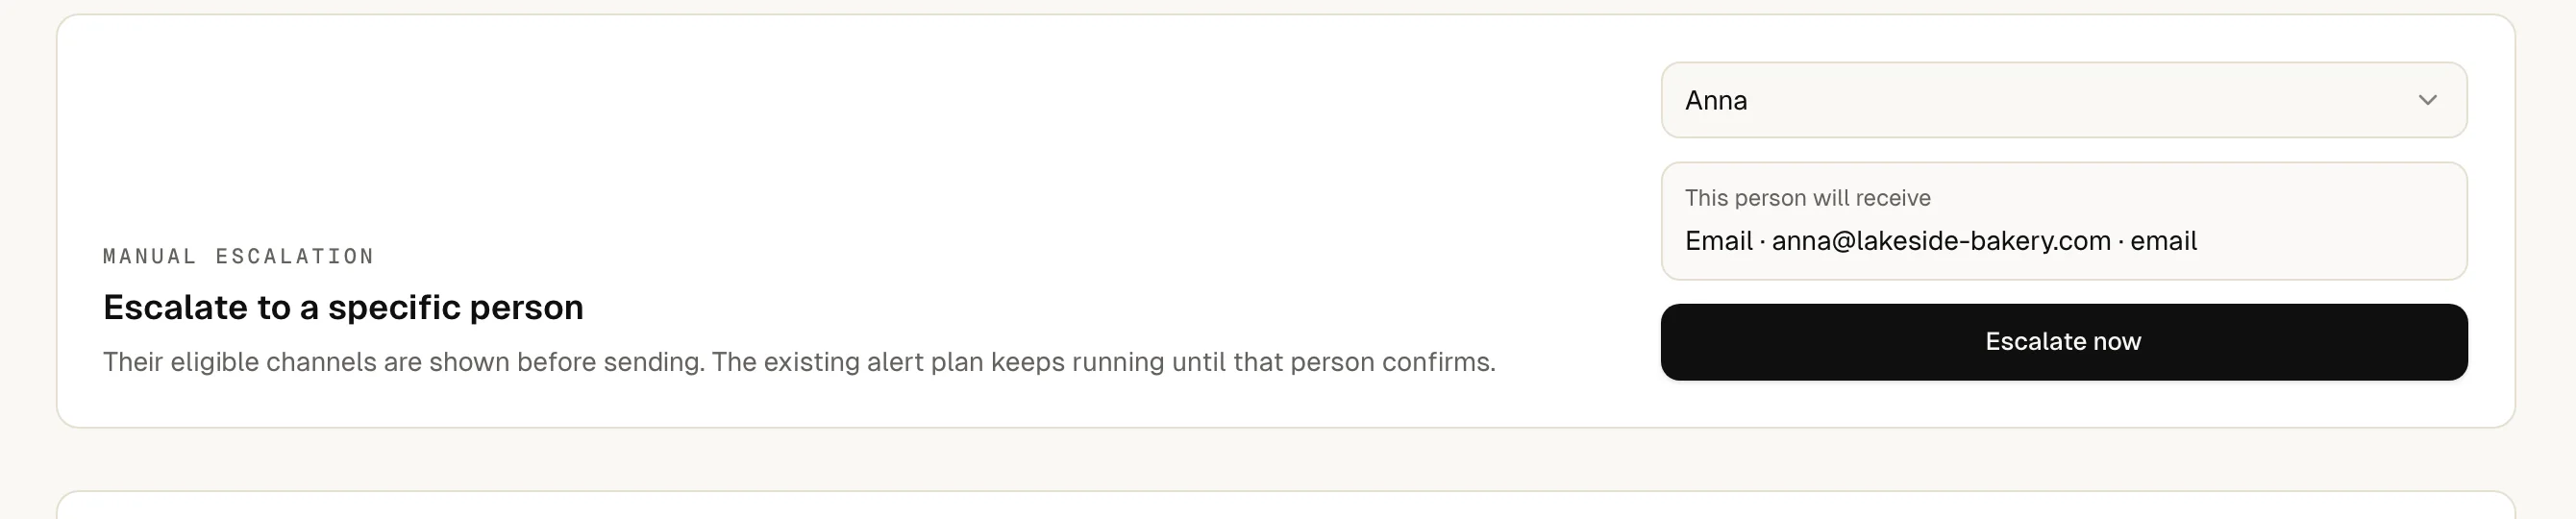](https://upfour.io/docs/images/walk/en/handle-an-incident-escalate.webp)
### 3. [Acknowledge it](https://upfour.io/docs/handle-an-incident#acknowledge)
Select **Acknowledge**. This tells everyone that someone is on it, and the incident shows as acknowledged. Without an escalation, the alert plan stops moving on to its next step. If you escalated to a colleague, it continues until that person confirms.
Acknowledging does not fix anything and does not resolve the incident.
[](https://upfour.io/docs/images/walk/en/handle-an-incident-acknowledge.webp)
### 4. [Write updates and work the checklist](https://upfour.io/docs/handle-an-incident#post-updates)
Write what you see and what you tried under **Post an update** and select **Post comment**. Upload logs or screenshots with **Upload** under **Attachments**.
If a [playbook](https://upfour.io/docs/write-a-playbook.md) is linked to the monitor, it appears as **Playbook checklist**. Tick a step when it is done. The ticks belong to this incident, so the next incident starts with a clean list.
[](https://upfour.io/docs/images/walk/en/handle-an-incident-post-updates.webp)
### 5. [Tell your customers](https://upfour.io/docs/handle-an-incident#tell-customers)
The incident page and a public [status page](https://upfour.io/docs/publish-a-status-page.md) are separate. Post a status report on the status page so visitors and subscribers hear it from you.
[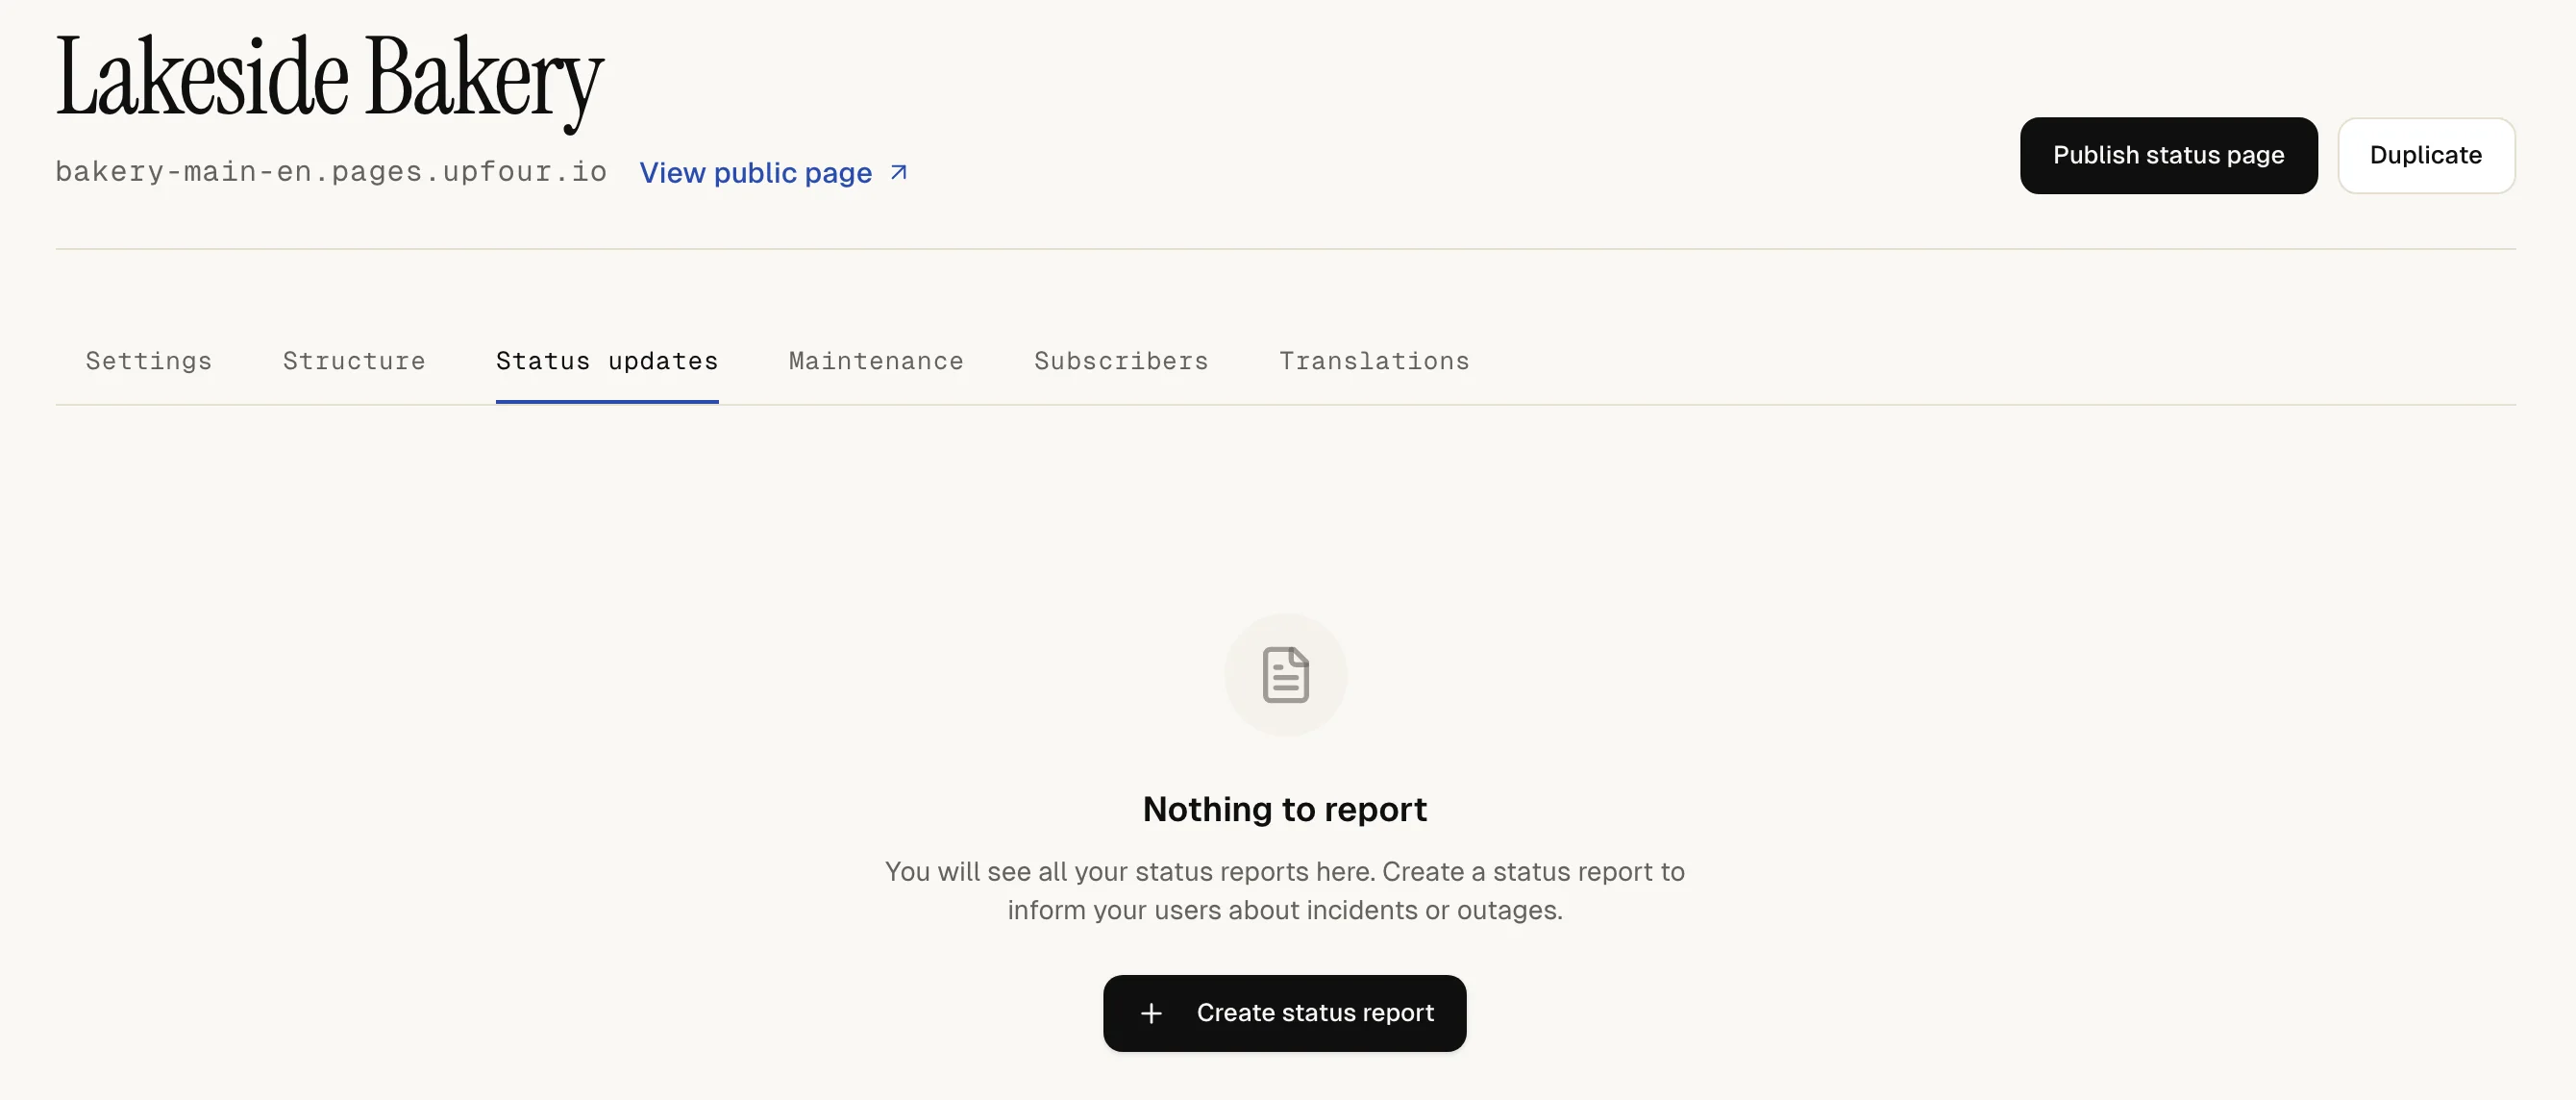](https://upfour.io/docs/images/walk/en/handle-an-incident-tell-customers.webp)
### 6. [Resolve it](https://upfour.io/docs/handle-an-incident#resolve)
Select **Resolve**. up4 stops any running escalation and records who resolved it and how long it was open.
Resolved too early? Select **Reopen**, or use the undo link that appears right after resolving.
[](https://upfour.io/docs/images/walk/en/handle-an-incident-resolve.webp)
## How you know it worked
The incident shows as resolved. Under **Timeline** you see every step in order: when it opened, who escalated to whom, who acknowledged it, each update, each ticked playbook step and each attachment, with the person and the time.
## Let up4 resolve it
An incident opened by a monitor resolves on its own once the monitor is confirmed back up, even if it was acknowledged. How quickly that happens depends on the monitor's recovery settings; see [when you get alerted](https://upfour.io/docs/how/when-you-get-alerted.md). A scheduled job's incident resolves when the job checks in again.
An incident you declared never resolves on its own. Someone must select **Resolve**.
## Read grouped incidents
When several monitors fail the same way, for example on timeouts, DNS errors or server errors, up4 groups their incidents. A new incident of the same kind joins an open group when it starts within 20 minutes of the group's latest incident.
Each incident keeps its own timeline. The box **CORRELATED INCIDENT** on the incident page shows the group and how many monitors are still affected. When monitors on one host fail together, a box titled Down together on example.com lists them in one place.
## Capture a screenshot of the outage
For HTTP monitors up4 can take a screenshot of the page when an incident opens. Turn it on per monitor under **Incident screenshots**, or switch on **Screenshots on by default** in your company settings and leave monitors on **Use company default**.
- up4 makes one attempt per confirmed outage, and only when the website still answered. After a timeout or a refused connection there is nothing to capture.
- The screenshot is a compact image of the visible page. It stays available for seven days on every plan. Find it under **Incident evidence** on the incident.
- A successful screenshot costs €0.005. A failed attempt is free. Team and Agency subscriptions include a monthly number of screenshots, and the line under the setting shows how many you have used.
- No screenshot is taken in the 5-minute grace mode, while monitoring is paused for billing, or after the monthly allowance is used up. The incident says why.
## If something is off
The buttons are greyed out.
Your role is Viewer. Ask an admin to change it in [team and roles](https://upfour.io/docs/team-and-roles.md).
Escalating to a colleague fails.
The person needs access to the incident and at least one alert channel of their own, and the incident needs a running alert plan. Acknowledging stops the plan, so escalate before you acknowledge. Resolved incidents cannot be escalated.
No playbook shows up.
Link a playbook to the monitor first. An incident without a monitor, and a scheduled job's incident, has no checklist.
No screenshot appears.
Check the setting on the monitor. The incident explains why it skipped one.
## What up4 does not do here
- There are three severities: Critical, Warning and Info. You choose one only when you declare an incident. You cannot rename or add levels.
- An incident has no owner or assignee. Acknowledging and escalating are how up4 records who is on it.
- Only one playbook shows on an incident, the first one linked to its monitor when sorted by title.
- Resolving a grouped incident by hand updates the group, but the other incidents in it stay open until each recovers or is resolved.
- If AI features are enabled for your Company, a resolved incident can get a drafted summary and postmortem (Evidence-aware summary and postmortem). They are not enabled for every Company.
- Incidents do not post to your status page by themselves. Status page updates are written and published separately, apart from the optional automatic reports described in [publish a status page](https://upfour.io/docs/publish-a-status-page.md).
[Per API POST /v1/incidents](https://upfour.io/docs/api/incidents#post_incidents)
Acknowledge, resolve and reopen are one request each on the incident. Comments, attachments and escalation have their own endpoints.
| In the app | API field |
| --- | --- |
| Brief description | `title` |
| In-depth description | `description` |
| Affected monitor (optional) | `monitor_id` |
| Severity · critical, warning or info | `severity` |
[Full reference](https://upfour.io/docs/api/incidents#post_incidents)
[Per API POST /v1/incidents/{incidentID}/comments](https://upfour.io/docs/api/incidents#post_incidents_incidentID_comments)
| In the app | API field |
| --- | --- |
| Post an update | `message` |
[Full reference](https://upfour.io/docs/api/incidents#post_incidents_incidentID_comments)
[Per API POST /v1/incidents/{incidentID}/escalate](https://upfour.io/docs/api/incidents#post_incidents_incidentID_escalate)
| In the app | API field |
| --- | --- |
| Escalate to a specific person · the request also needs an Idempotency-Key header | `target_user_id` |
[Full reference](https://upfour.io/docs/api/incidents#post_incidents_incidentID_escalate)
[Per API PATCH /v1/monitors/{monitorID}](https://upfour.io/docs/api/monitors#patch_monitors_monitorID)
| In the app | API field |
| --- | --- |
| Incident screenshots · a setting of the monitor, not of the incident | `capture_on_incident_open` |
[Full reference](https://upfour.io/docs/api/monitors#patch_monitors_monitorID)
---
# Write a playbook
> Write the fix steps once, link them to your monitors and your team gets a checklist on every incident.
Source: https://upfour.io/docs/write-a-playbook
Afterwards every incident on your monitor shows a checklist of fix steps, so nobody has to remember how you handled it last time.
- **Who:** Any role except **Viewer**
- **Time:** About ten minutes
- **What you need:** At least one monitor
You link the playbook to the monitor.
**In up4:** Incidents › Playbooks › New playbook · [Open in up4](https://app.upfour.io/runbooks/new)
## Steps
### 1. [Start a new playbook](https://upfour.io/docs/write-a-playbook#start-playbook)
Open **Incidents**, select **Playbooks** at the top of the list, then **New playbook**. Until you have written one, the same place offers **Create playbook**.
[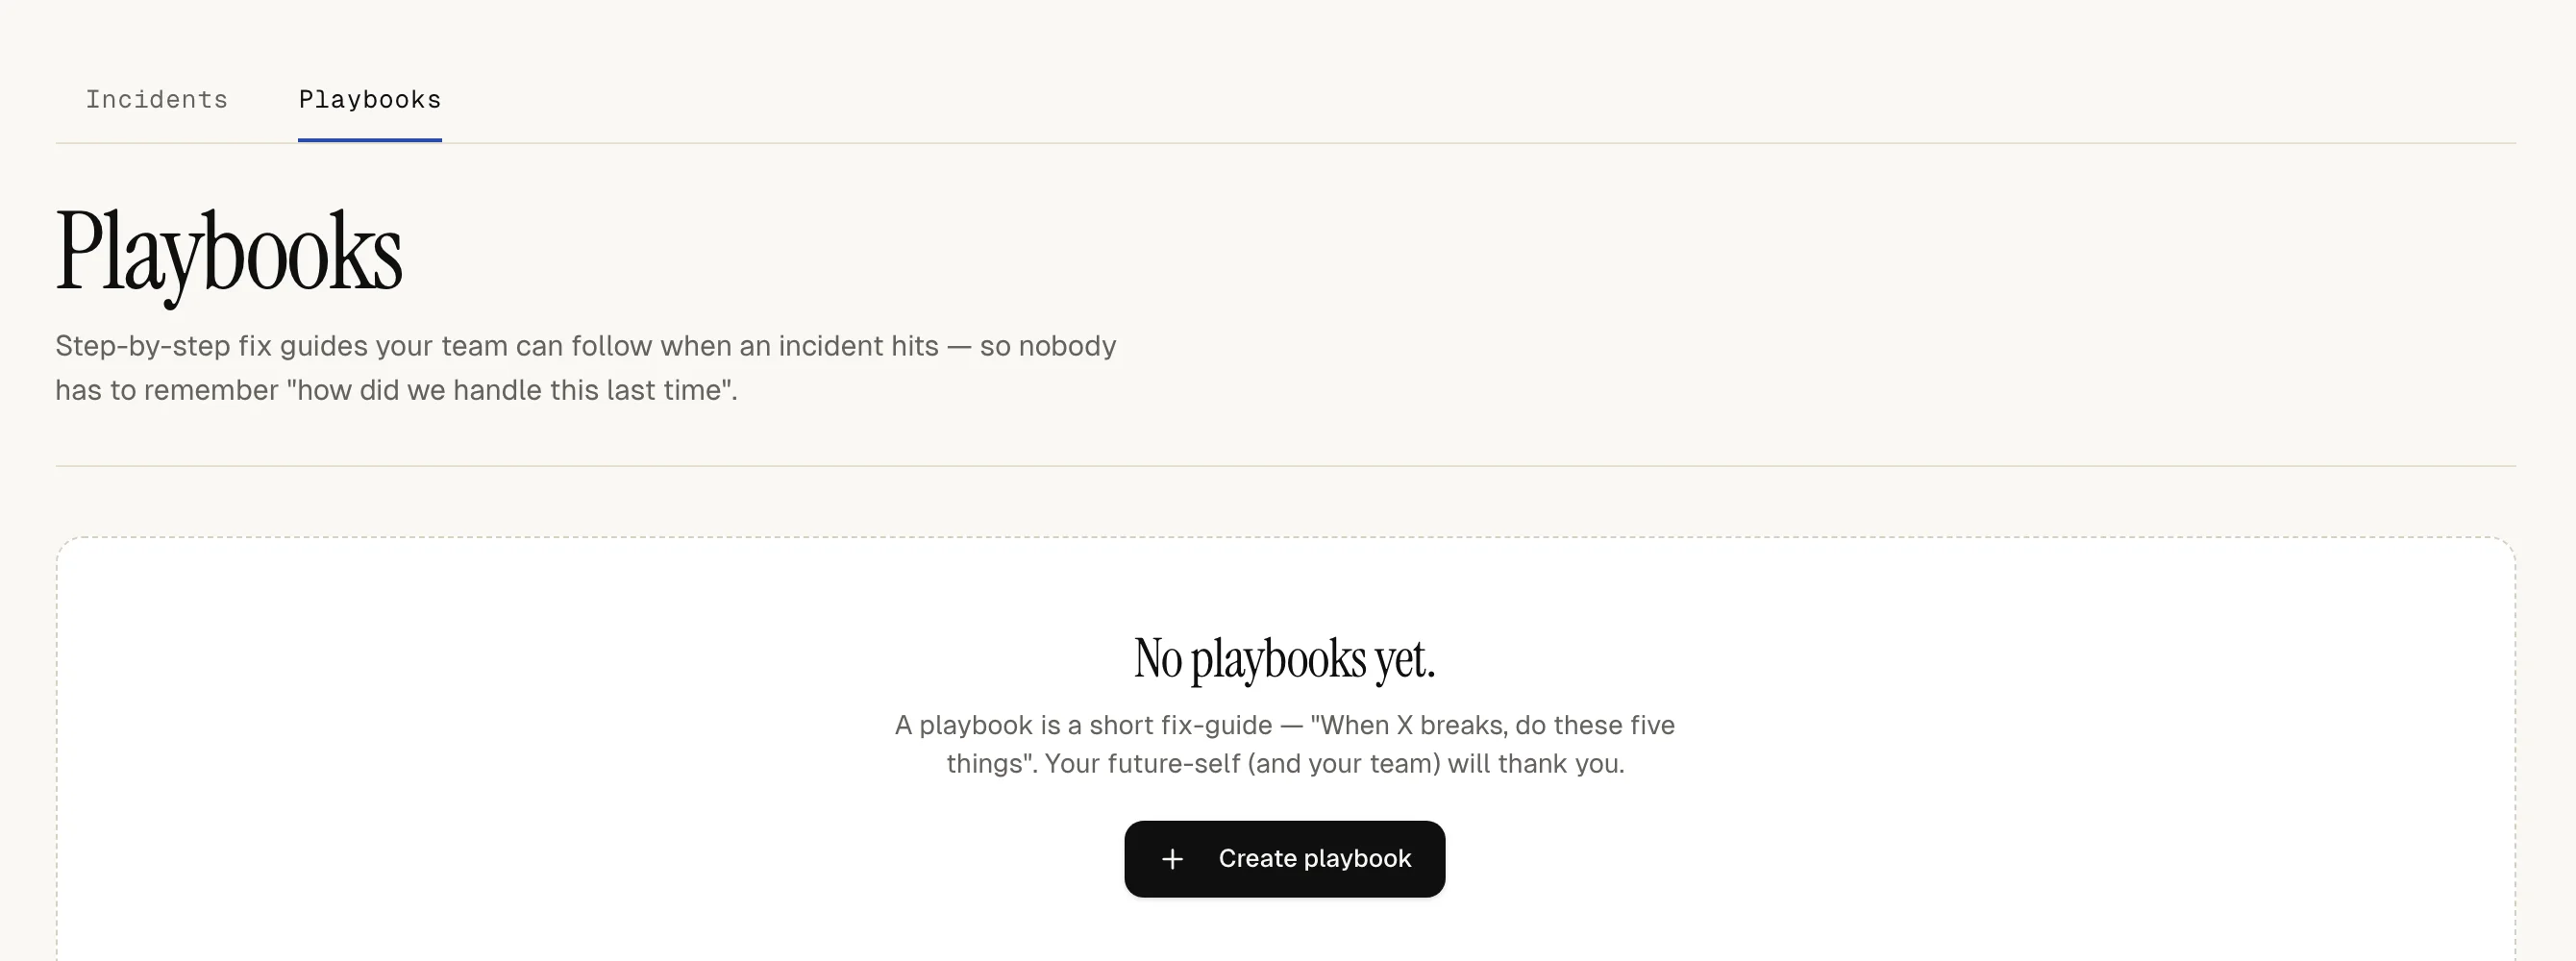](https://upfour.io/docs/images/walk/en/write-a-playbook-start-playbook.webp)
### 2. [Name it and say who owns it](https://upfour.io/docs/write-a-playbook#name-playbook)
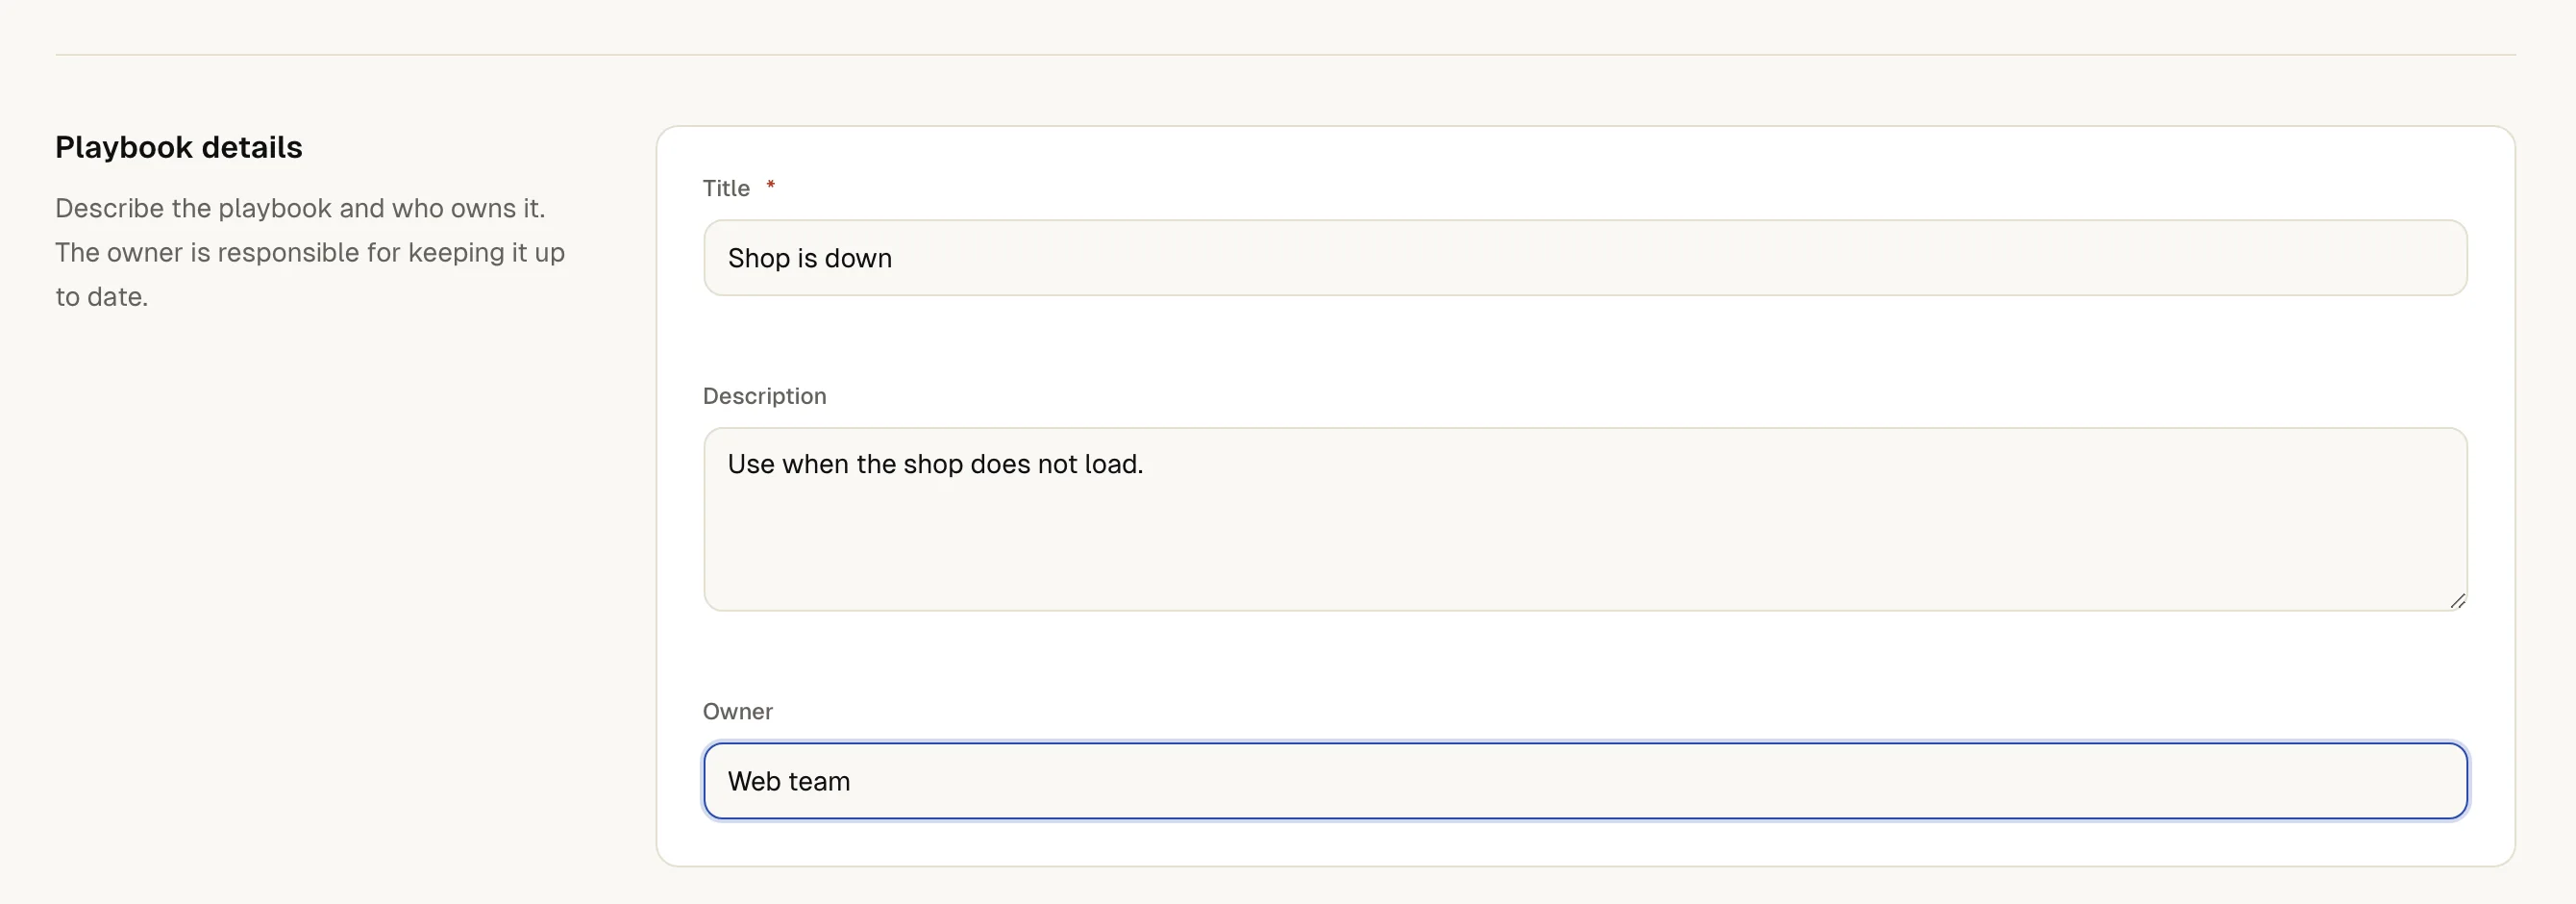
Enter a **Title**, for example the failure it covers. Under **Description** say when to use it. The first lines show on the incident.
**Owner** is free text, for example a team name. It tells people who keeps the playbook up to date.
[](https://upfour.io/docs/images/walk/en/write-a-playbook-name-playbook.webp)
### 3. [Add the steps](https://upfour.io/docs/write-a-playbook#add-steps)
Select **Add step**. Give each step a **Step title** and, if useful, detailed instructions. Write steps a tired person can follow at 4 a.m.: one action each, in order.
To reorder, open the menu of a step (**Actions for step 2**) and choose **Move up** or **Move down**. At least one step needs a title.
[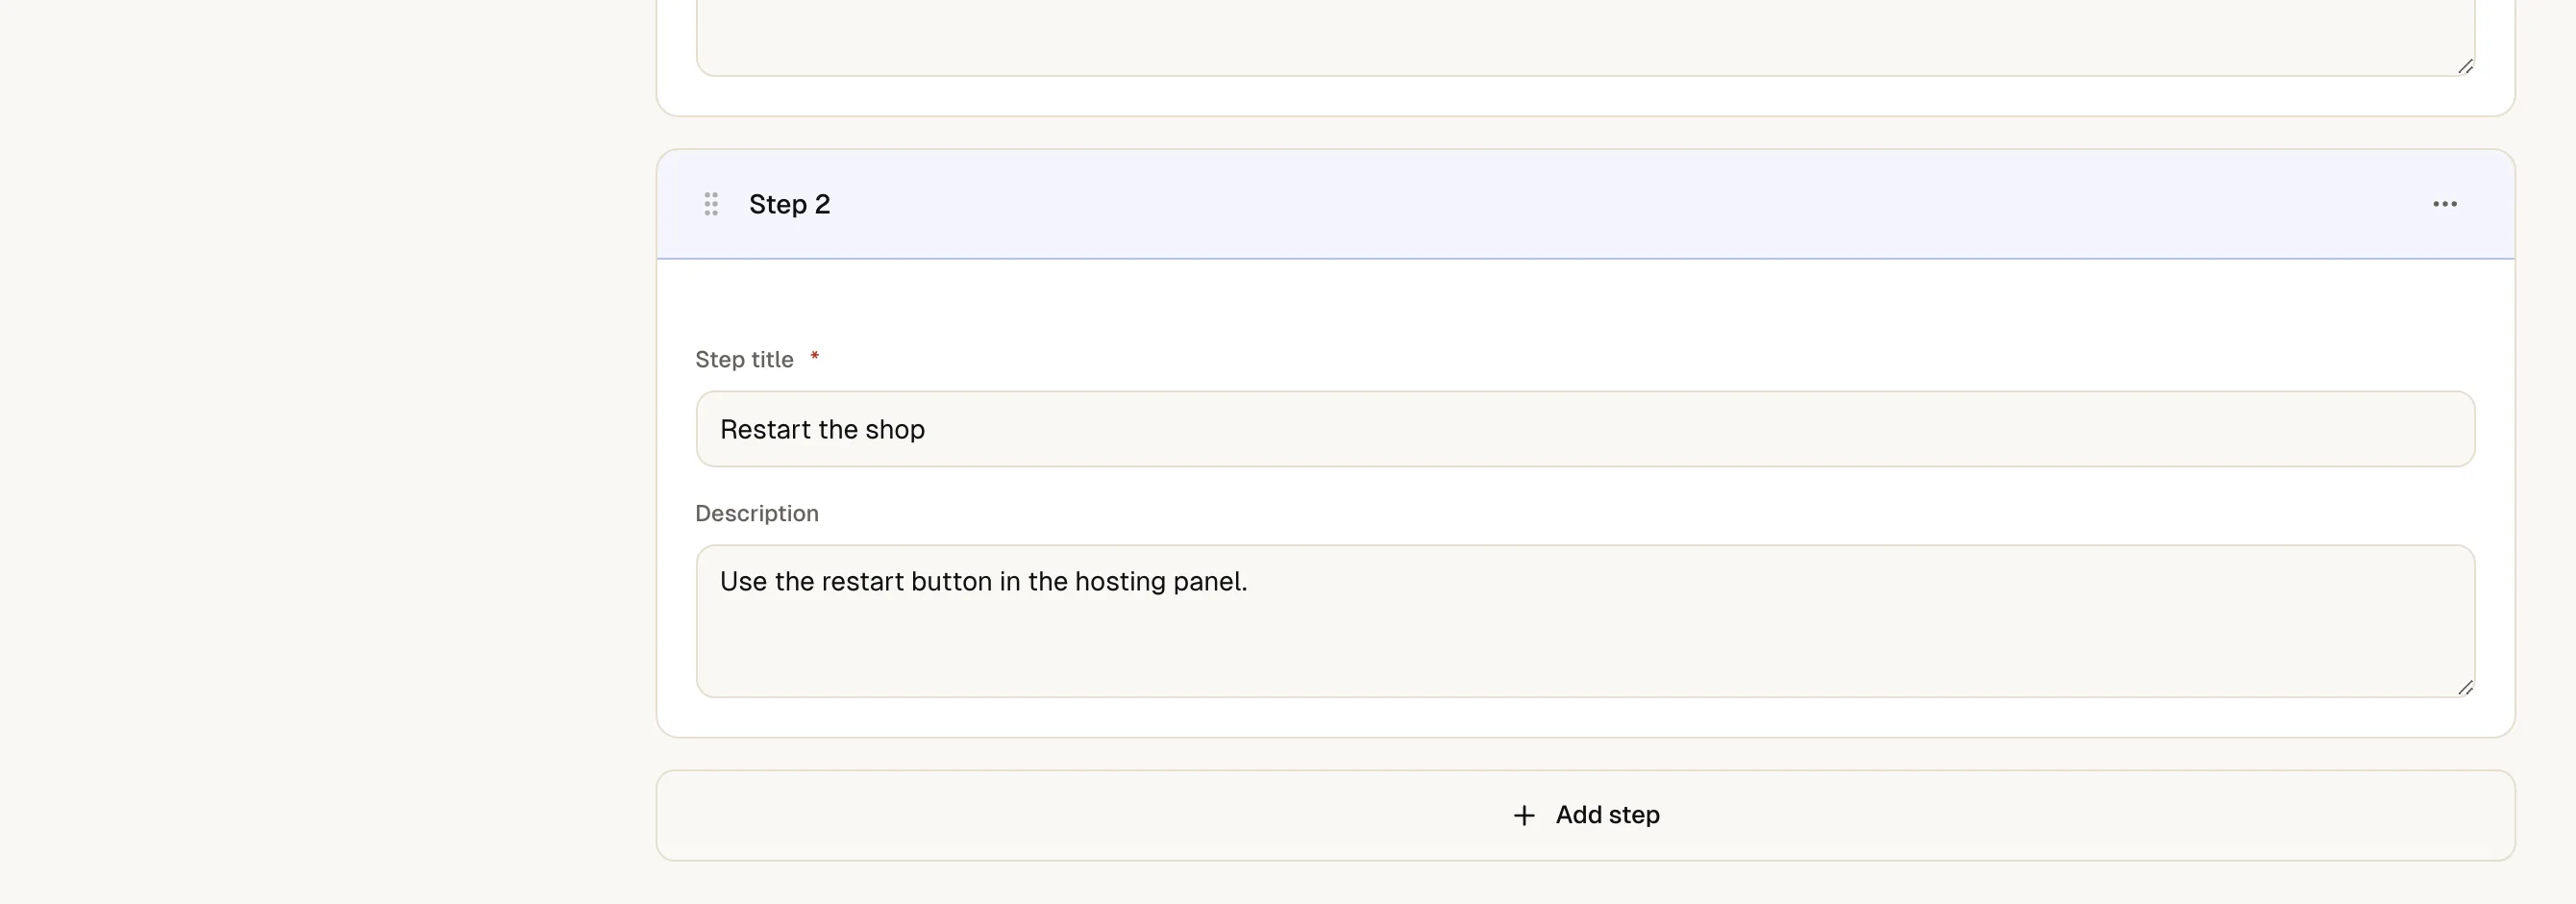](https://upfour.io/docs/images/walk/en/write-a-playbook-add-steps.webp)
### 4. [Link the monitors](https://upfour.io/docs/write-a-playbook#link-monitors)
Under **Linked monitors**, tick the monitors this playbook belongs to. With more than eight monitors a search field helps you find them. When an incident opens on a linked monitor, the checklist appears on it.
[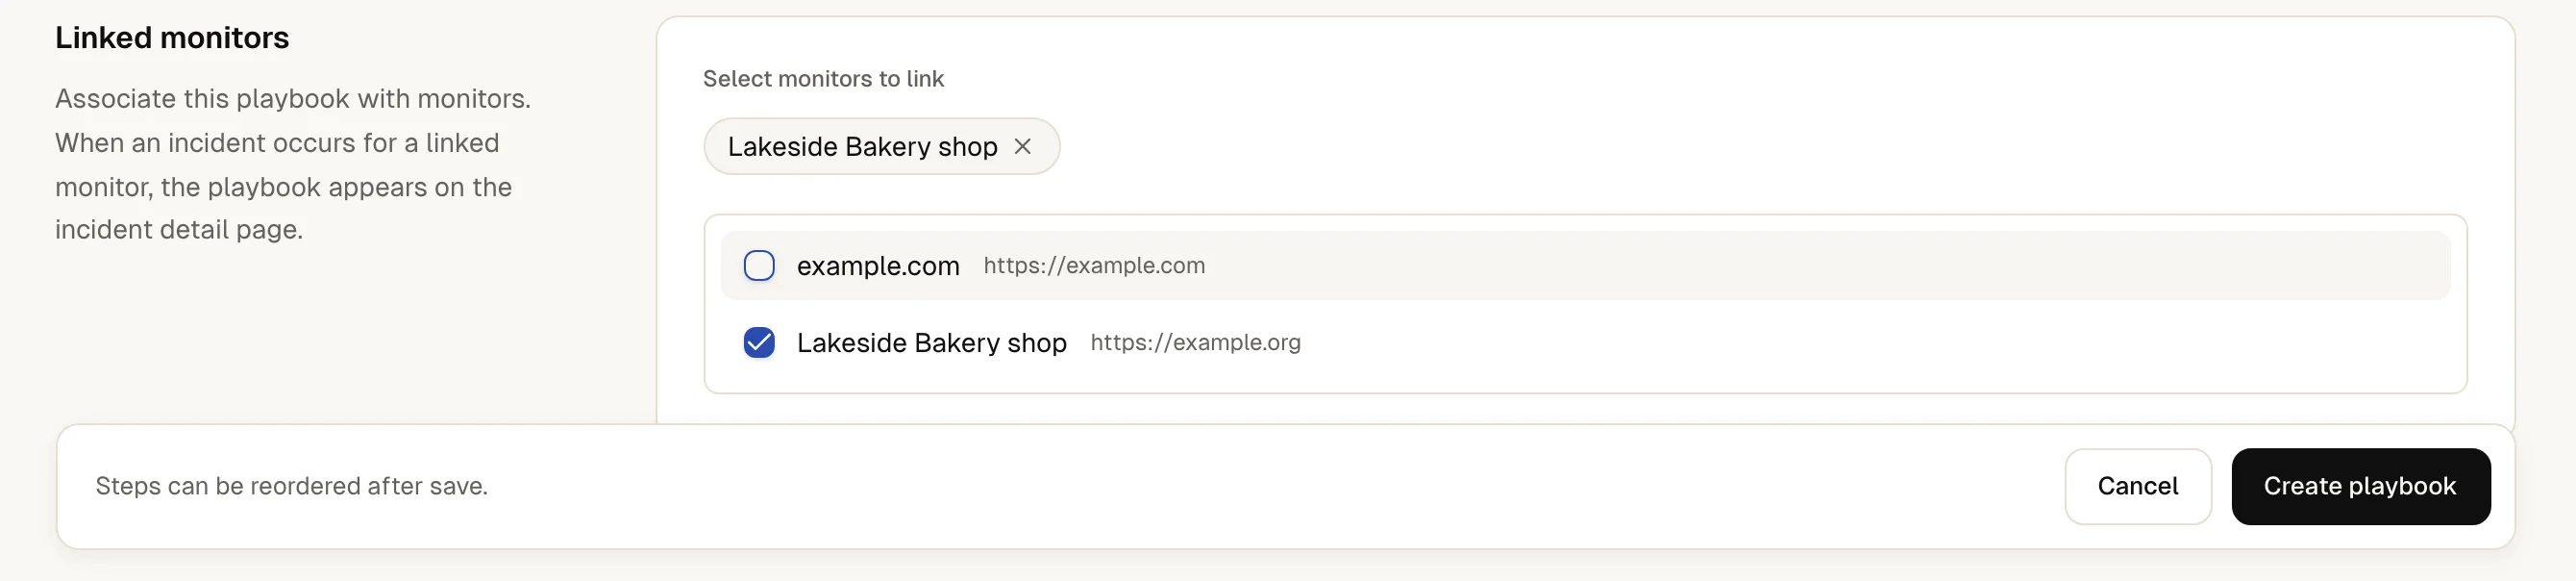](https://upfour.io/docs/images/walk/en/write-a-playbook-link-monitors.webp)
### 5. [Create the playbook](https://upfour.io/docs/write-a-playbook#create-playbook)
Select **Create playbook**. To change it later, open it and select **Edit**, then **Save changes**.
[](https://upfour.io/docs/images/walk/en/write-a-playbook-create-playbook.webp)
## How you know it worked
The playbook appears in the list with its number of steps. On the next incident of a linked monitor, the sidebar shows **Playbook checklist** with every step, its instructions and a progress bar.
Anyone handling the incident can tick a step. up4 shows who ticked it and when, and adds the tick to the incident's timeline. The playbook page itself stays an unticked template.
## If something is off
No checklist on the incident.
The incident must belong to a monitor that is linked to a playbook. Incidents without a monitor and scheduled jobs' incidents have none. See [handle an incident](https://upfour.io/docs/handle-an-incident.md).
A monitor is missing from the list.
With clients turned on, a playbook and its monitors must belong to the same client, or all be company-level.
The wrong playbook shows.
When several playbooks are linked to one monitor, the incident shows only the first, sorted by title. Link each monitor to one playbook.
## What up4 does not do here
- Playbooks link to monitors only, not to alert plans or scheduled jobs.
- Steps are plain text. They do not run commands, and links in them are not clickable.
- Saving a playbook replaces its steps, and that clears the ticks on every incident that used it. Edit a playbook when no incident is open.
- Ticks belong to the incident, not the playbook. Everyone on the incident sees the same ticks.
- The checklist is for your team. It is not shown in the client portal.
[Per API POST /v1/runbooks](https://upfour.io/docs/api/runbooks#post_runbooks)
Ticking a step on an incident is a separate request on the playbook. Updating a playbook sends all steps again.
| In the app | API field |
| --- | --- |
| Title | `title` |
| Description | `description` |
| Owner | `owner` |
| Steps · a list of steps, each with a title and a description | `steps` |
| Linked monitors | `monitor_ids` |
[Full reference](https://upfour.io/docs/api/runbooks#post_runbooks)
---
# Publish a status page
> Create a public status page with your monitors, choose a layout, publish it and let customers follow it by e-mail.
Source: https://upfour.io/docs/publish-a-status-page
Afterwards your customers have a page that shows whether your services are up, follows your checks on its own and carries your updates during an outage.
- **Who:** Any role except **Viewer**
- **Time:** About ten minutes
- **What you need:** Monitors or scheduled jobs
They show on the status page. You can also add components that nobody checks and set their status by hand.
**In up4:** Status pages › New status page · [Open in up4](https://app.upfour.io/status-pages/new)
## Steps
### 1. [Name the page and choose its address](https://upfour.io/docs/publish-a-status-page#name-page)
Enter the **Company name** visitors see, and a **Public page slug**. The slug is the first part of the page's address. If you change it later, the old address stops working. With no status page yet, the same place offers **Create status page** instead of **New status page**.
[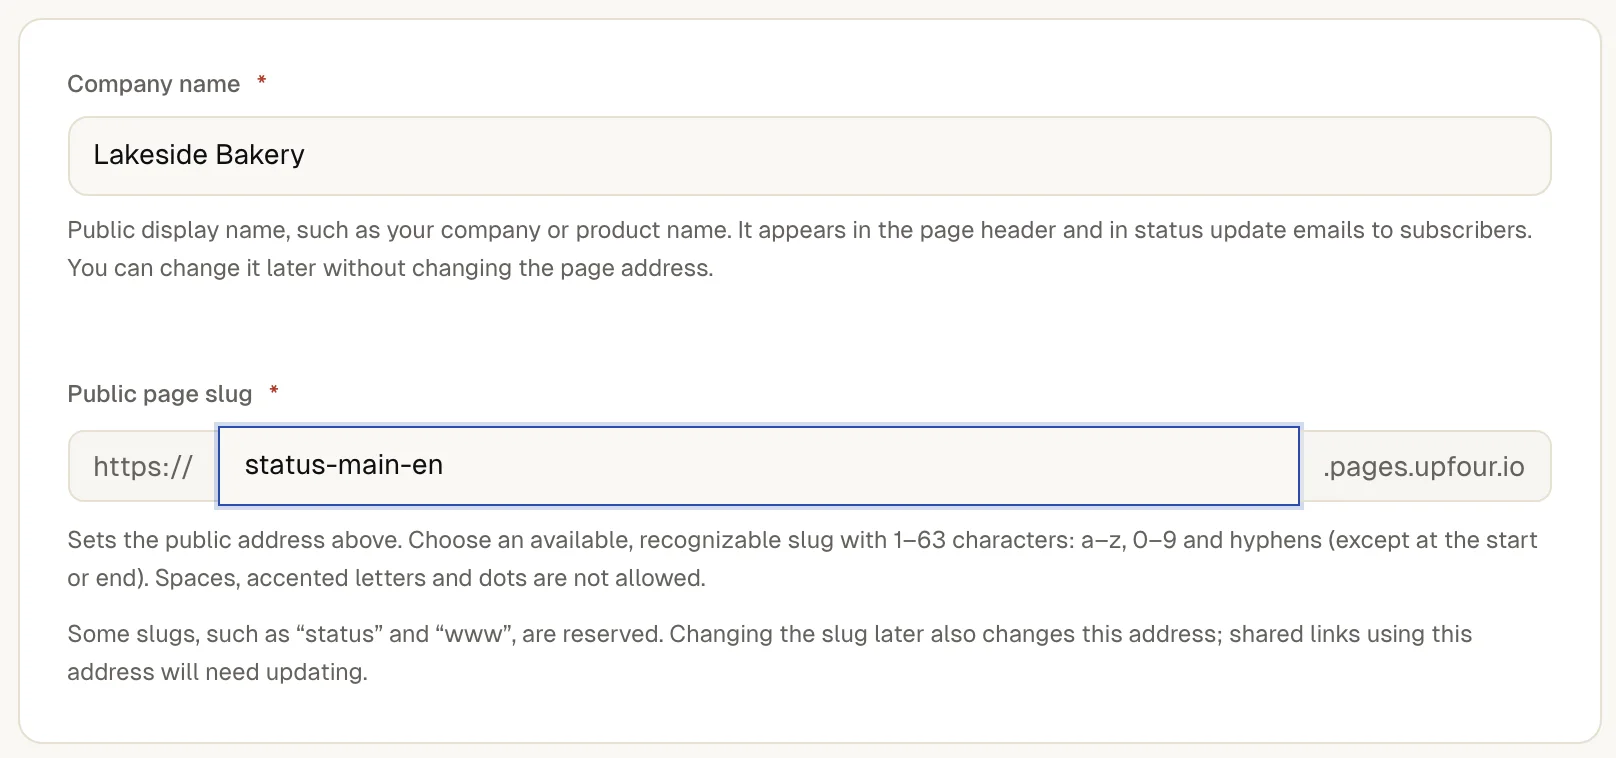](https://upfour.io/docs/images/walk/en/publish-a-status-page-name-page.webp)
### 2. [Choose what the page shows](https://upfour.io/docs/publish-a-status-page#choose-content)
Open **Structure**. A new page starts with one empty section. Name it under **Section name** (leave it blank to hide the heading), then search under **Resources** and select the monitors and scheduled jobs for it. Select **Add section** for another section. Drag the cards to reorder them.
Select a component's row to open it. There you can set a **Public name** and an **Explanation** that shows as a help icon. Under **Fill this section** a section can also fill itself, so new monitors appear without anyone editing the page.
[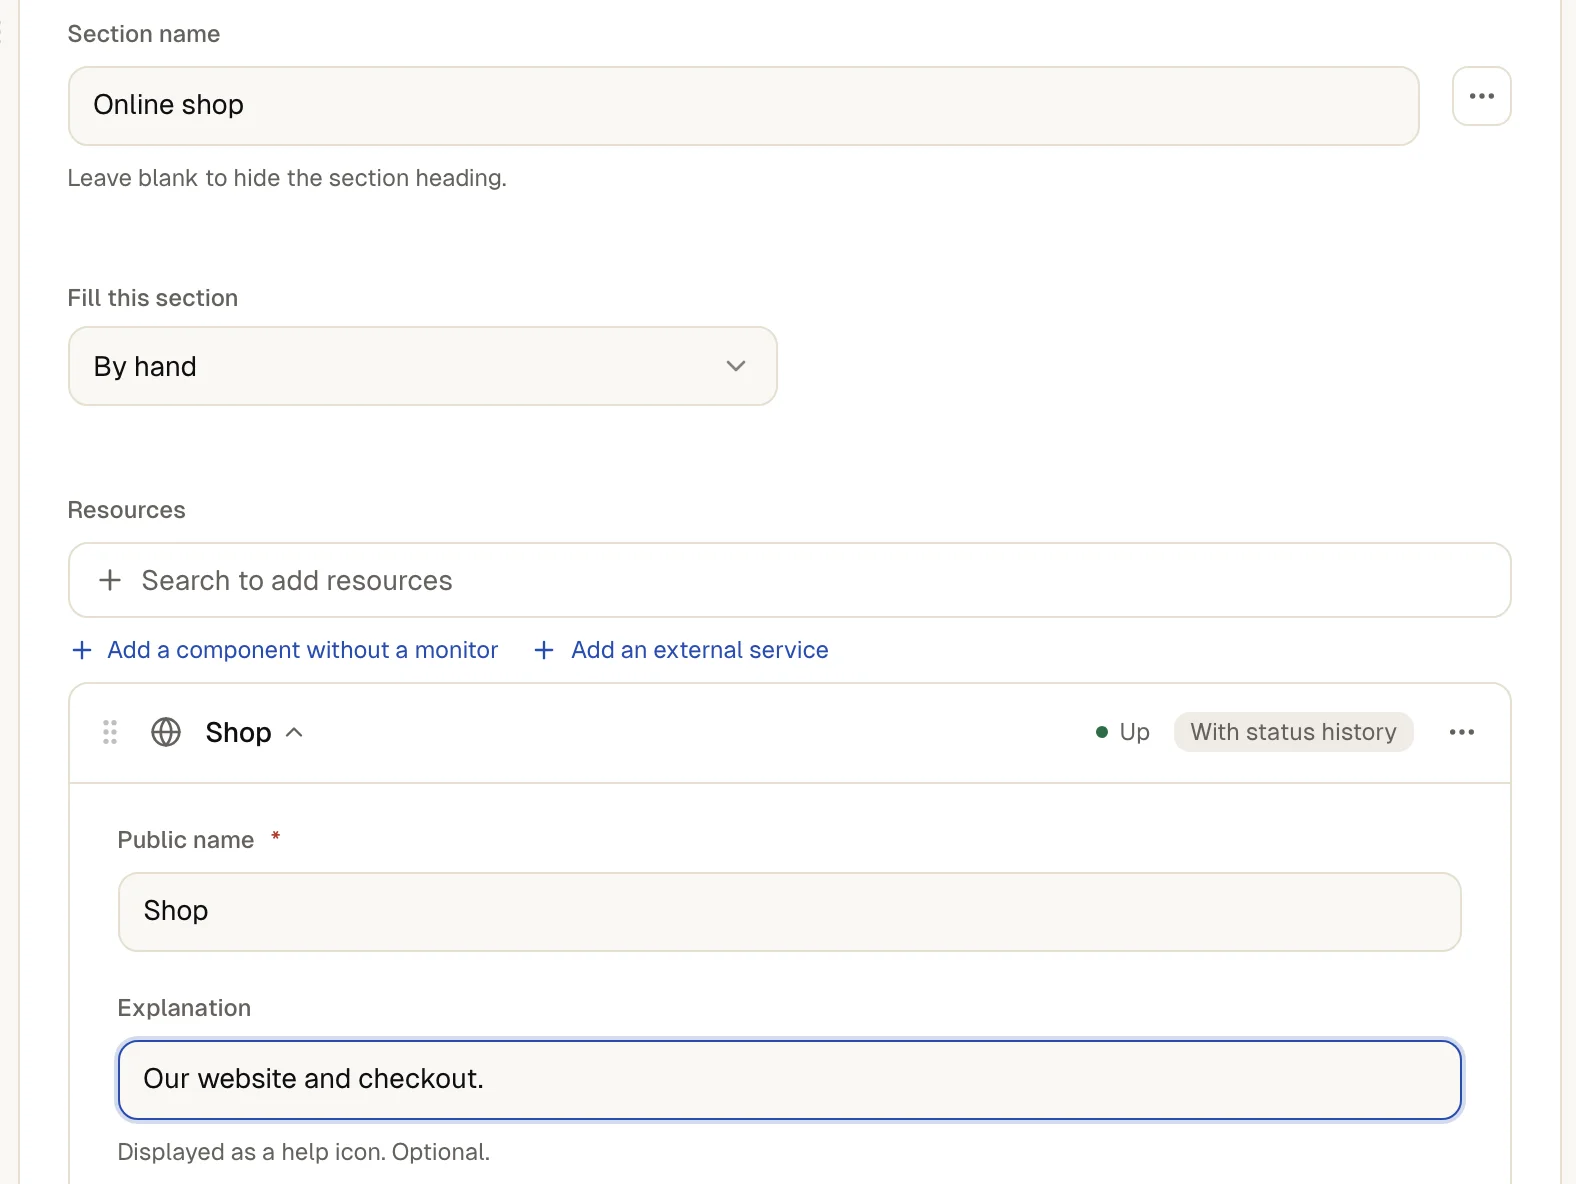](https://upfour.io/docs/images/walk/en/publish-a-status-page-choose-content.webp)
### 3. [Add things you do not monitor](https://upfour.io/docs/publish-a-status-page#add-manual)
Select **Add a component without a monitor** for something up4 cannot check, such as a phone hotline, and set its **Status** yourself. It keeps that status until you change it.
To show a provider you depend on, select **Add an external service**. up4 reads the provider's own status page every five minutes. An external service never changes your page's overall status.
[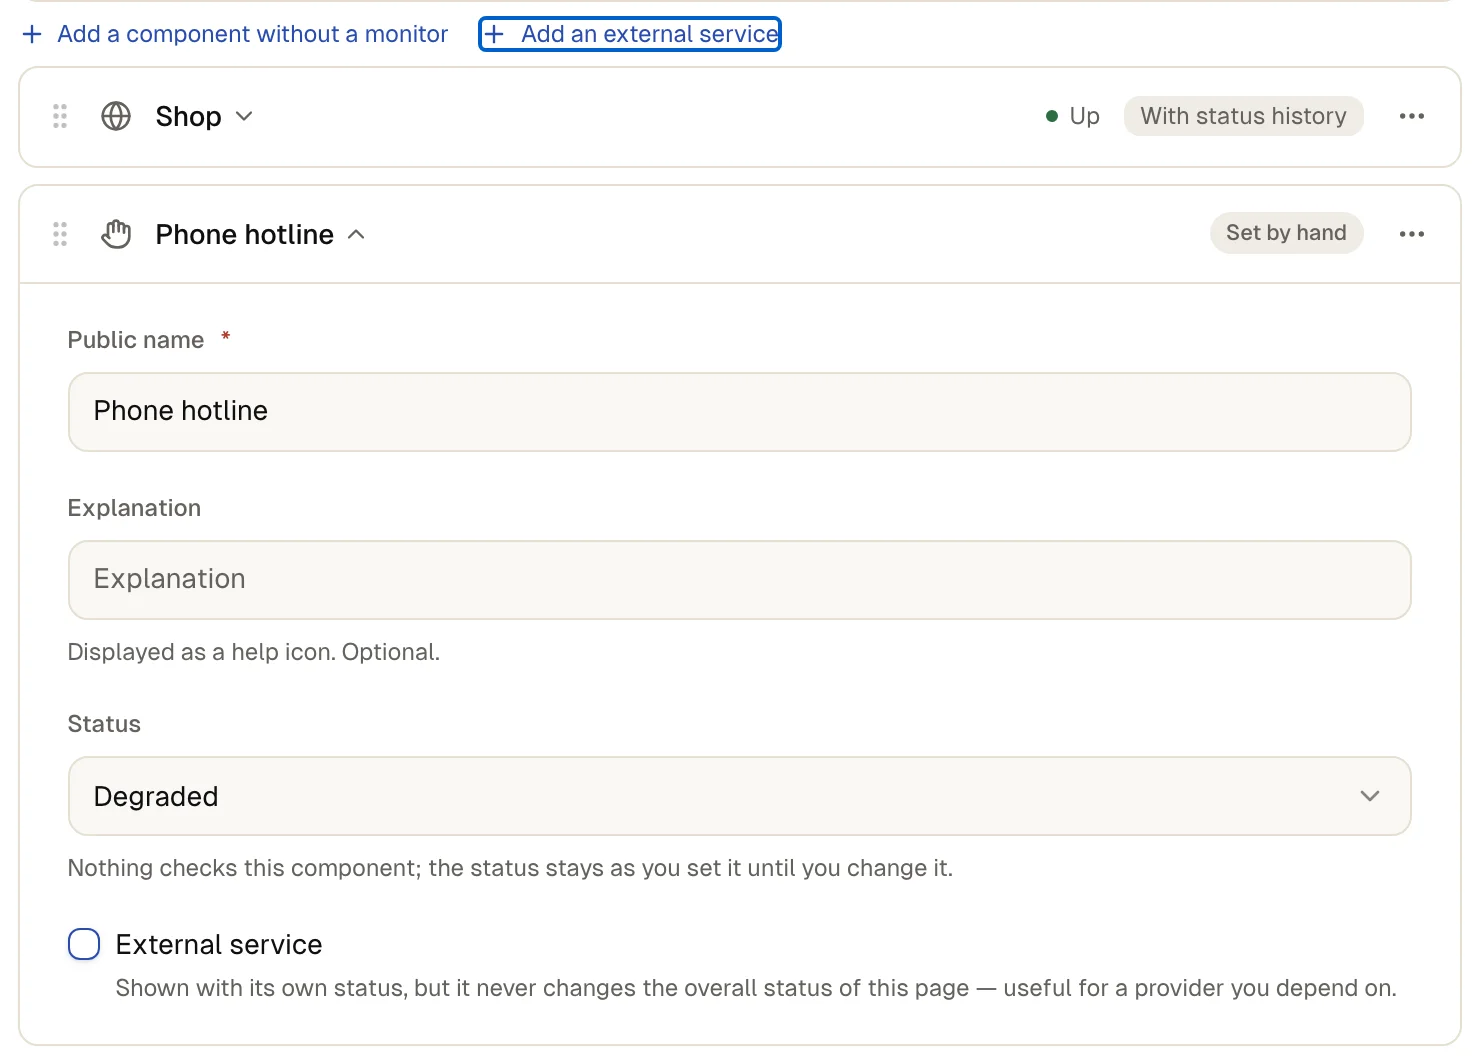](https://upfour.io/docs/images/walk/en/publish-a-status-page-add-manual.webp)
### 4. [Choose a layout and your brand](https://upfour.io/docs/publish-a-status-page#choose-layout)
Under **Settings** open **Brand & look** and find **Personalization**. Pick a **Layout**:
- **Essential** is one calm column for up to about twelve services. It is the default.
- **Brand** puts your logo on your header colour, so the page looks like part of your site.
- **Overview** uses two columns with a row per service, for many services.
Add your logo and favicon, an accent colour, a **Header colour** and a **Background**. The preview beside the form is your real page. Status colours stay fixed on purpose, so green, amber and red always mean the same.
[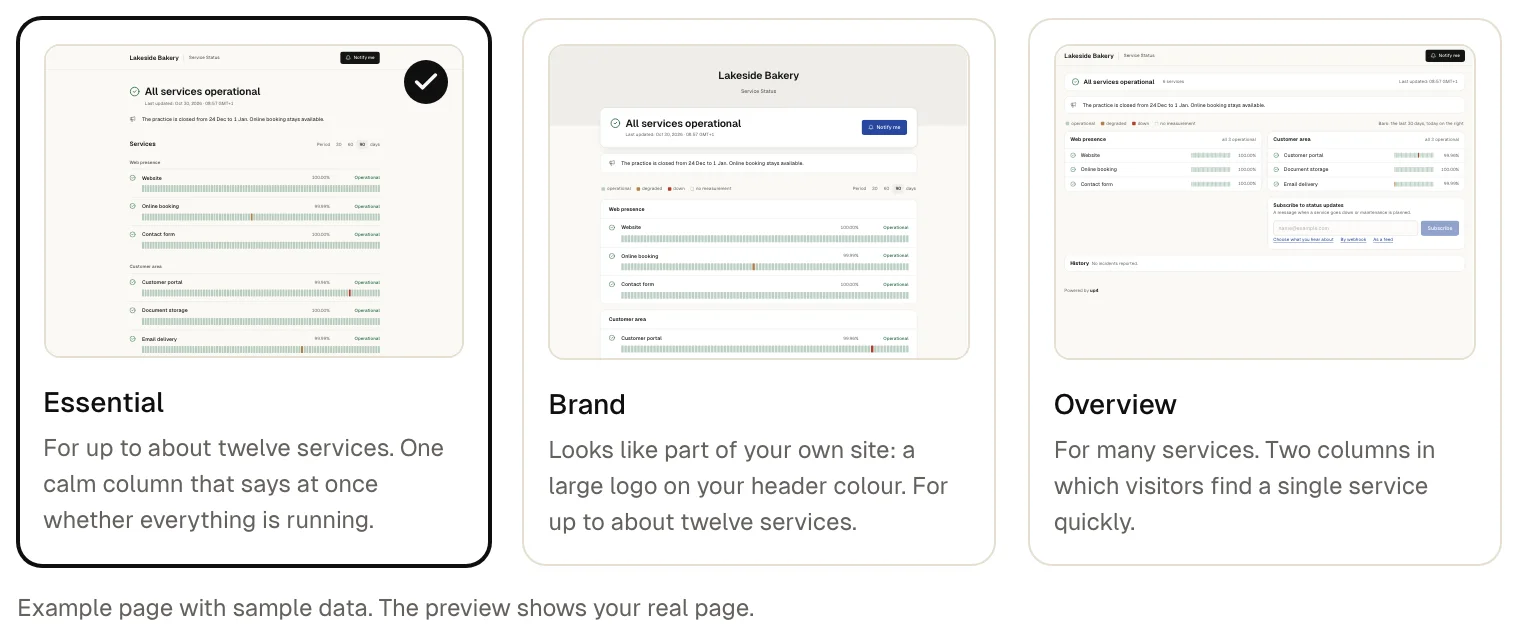](https://upfour.io/docs/images/walk/en/publish-a-status-page-choose-layout.webp)
### 5. [Create the page, then publish it](https://upfour.io/docs/publish-a-status-page#publish)
Select **Create status page**. A new page starts unpublished and visitors cannot reach it. When it looks right, select **Publish status page**, then **View public page** to open it.
[](https://upfour.io/docs/images/walk/en/publish-a-status-page-publish.webp)
### 6. [Let people follow it](https://upfour.io/docs/publish-a-status-page#subscribers)
Visitors subscribe on the page. By default they follow by e-mail and confirm their address first, so nobody is signed up for someone else's outages. The page can also be followed by webhook or feed, for everything or only for incidents or maintenance.
Switch this off under **Subscribing to status updates** in **Advanced**. You can import addresses on the **Subscribers** tab with **Upload**. Every imported address gets a confirmation e-mail first.
[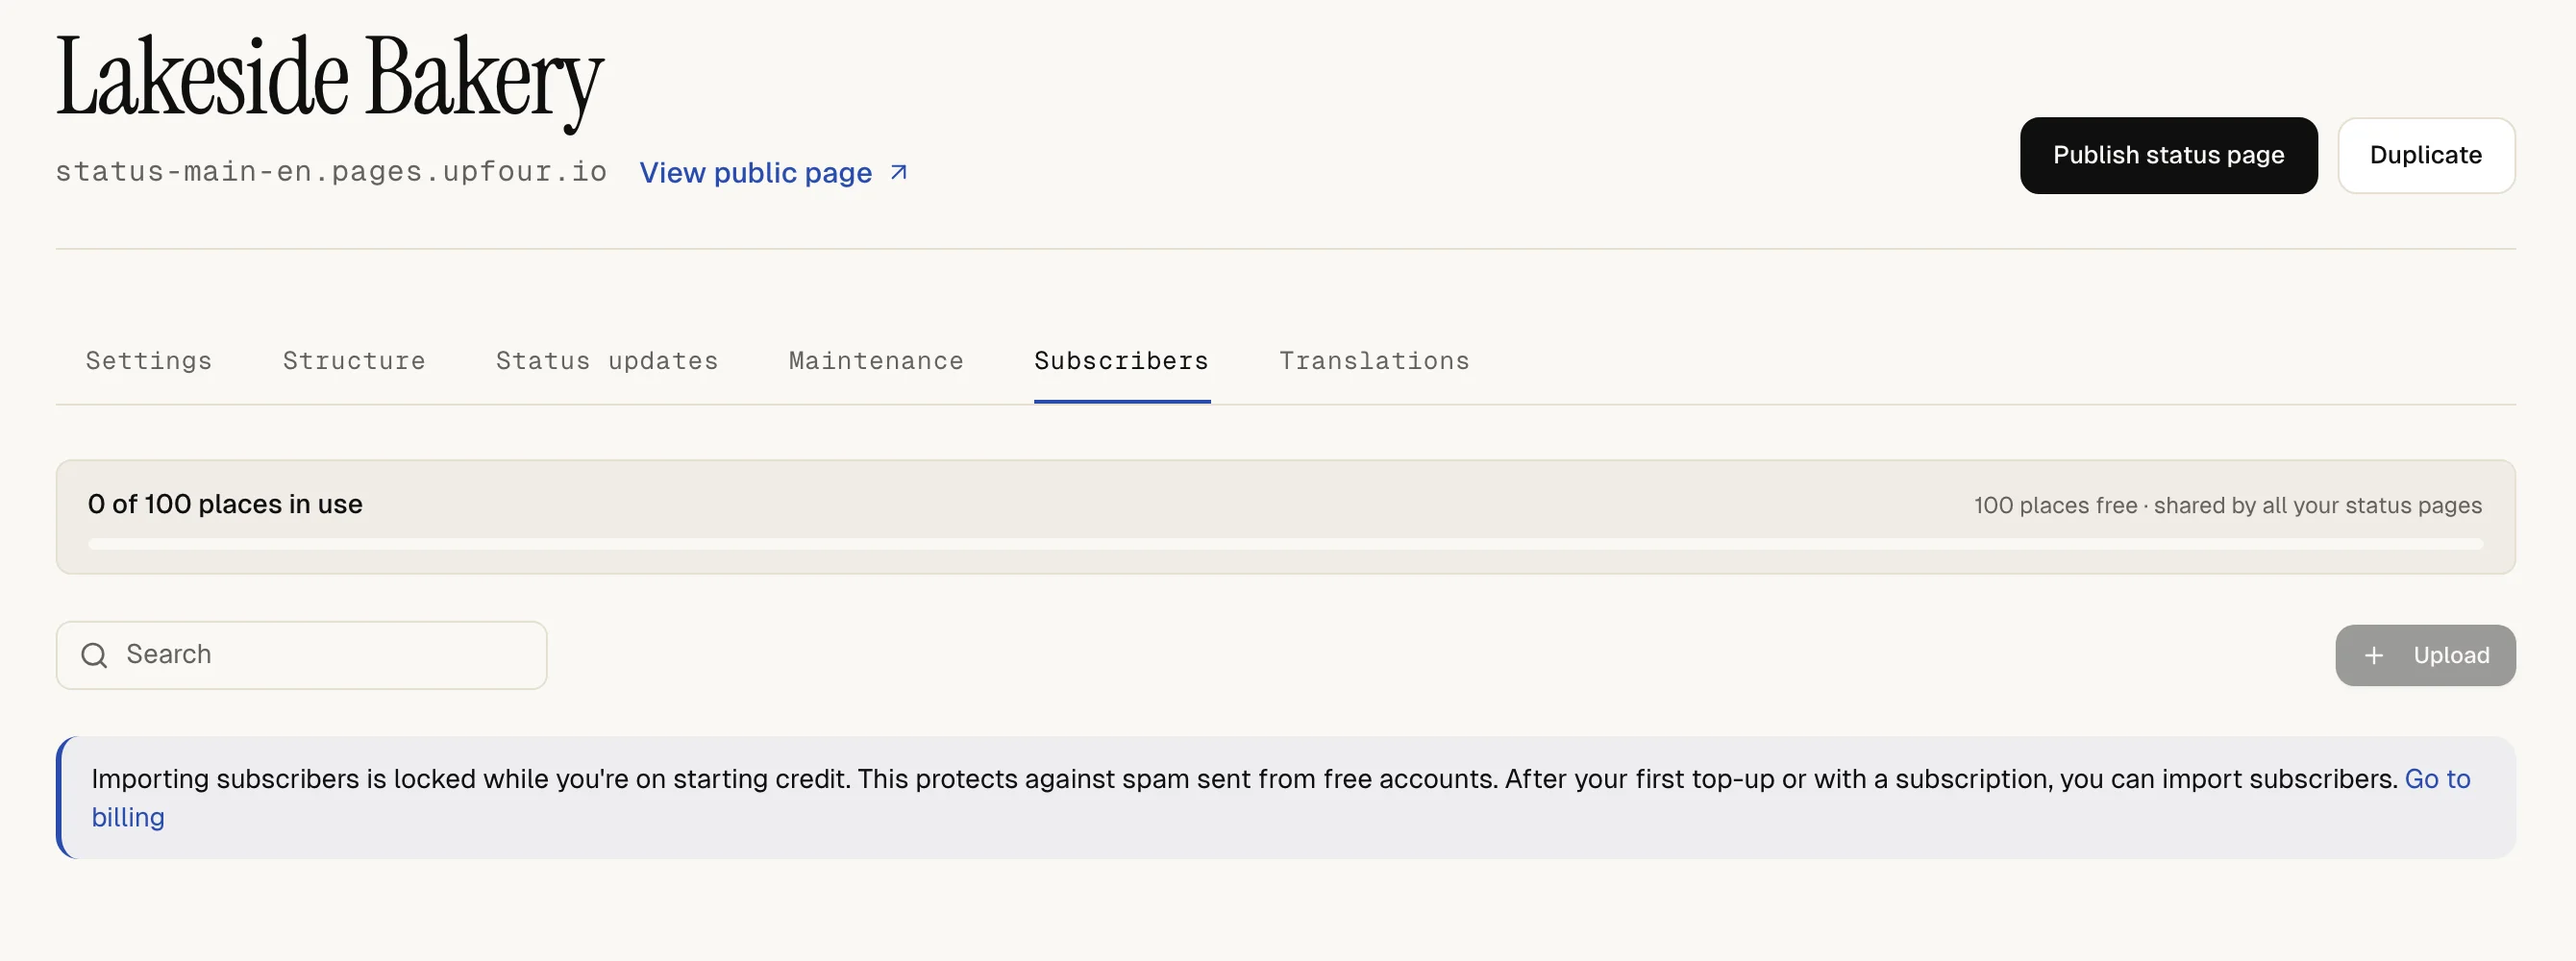](https://upfour.io/docs/images/walk/en/publish-a-status-page-subscribers.webp)
## How you know it worked
The public page shows each component with its current state, taken from its checks. You did not have to set anything for monitored components. The page address works in a private browser window without signing in.
## Post an update during an incident
A status page changes state by itself, but customers also want to hear from you. Open the **Status updates** tab and select **Create status report**. Enter a **Title**, the **Current status** (**Investigating**, **Identified**, **Monitoring** or **Resolved**), a **Message** and the **Affected components**. Messages support Markdown.
Before anything goes out, choose **Confirm & email** or **Publish without emailing**. Later messages on the same report are added to its thread.
To have up4 open a report for you, switch on **Create a status report automatically when a monitor is down** under **Advanced**. It opens when a monitor on the page is down longer than the **Minimum incident length** and closes when the monitor recovers. Subscribers are only e-mailed if you also switch on **Notify subscribers about these reports**.
Planned work goes on the **Maintenance** tab. See [plan maintenance](https://upfour.io/docs/plan-maintenance.md).
## Use your own domain
Open **Address** and select **Add a custom domain**, for example `status.example.com`. up4 shows a DNS record to add. After you add it, up4 verifies the record and issues the certificate. Apex domains and wildcards are not supported. How many custom domains you can use depends on your plan; see [limits](https://upfour.io/docs/reference/limits.md).
## Keep a page private
Open **Advanced**. You have four ways to limit who sees the page:
- **Password protection**: only people with the password get in.
- **Allowed networks**: only listed IP addresses or ranges get in.
- **Access link**: a link that opens the page in a browser session of 15 minutes. Rotating or revoking the link ends every session.
- Access by e-mail code: people on **Who may ask for a code** can ask for a six-digit code, valid for ten minutes and usable once. Nobody learns whether an address is on the list.
## Offer more languages
Set the **Default language** under **Advanced**. It is used for automatic texts and for subscribers you add. For more languages, open **Translations** and select **Create translation**. You write the text for each language, including every message of a report. Visitors switch language on the page; a language they pick is remembered for their next visit.
## Show the status on your own website
Under **Feeds & status badge** and **On your own website** up4 builds a status badge, feed addresses and one line of code for a small banner. The banner shows only while an incident is open or maintenance is near.
## If something is off
The page address shows "not found".
The page is probably still unpublished. Select Publish status page. Check the slug for typos, too.
A component shows "unknown".
Nothing monitors it and you set no status. Link a monitor or set the status by hand.
Subscribers did not get an e-mail for a report.
Check which option you chose when you posted it. Automatic reports only e-mail if you switched that on.
The custom domain does not become active.
Check the DNS record against the one up4 shows. Look in [troubleshooting](https://upfour.io/docs/troubleshooting.md) if it still waits.
## What up4 does not do here
- Incidents you handle in up4 do not appear on the status page by themselves. A status report is a message you write, or an automatic report as described above.
- up4 bundles updates that follow each other quickly, so not every update arrives as its own e-mail. The page always shows every update.
- Confirmed e-mail subscribers count against a pool that depends on your plan, one place per address and page. When the pool is full, new sign-ups are turned away. See [limits](https://upfour.io/docs/reference/limits.md).
- Importing subscribers is not available while you only have starting credit.
- Removing the "Powered by up4" footer, password protection and access by e-mail code are paid options on pay as you go and included in Team and Agency. See [credit and plans](https://upfour.io/docs/credit-and-plans.md).
- Under **Search engines**, **Hide from search engines** keeps a public page out of search results. It does not hide the page from anyone who has the address. To keep a page away from strangers, use one of the private options above.
- **Custom CSS** only changes how the page looks; it adds no scripts and no blocks. See the [custom CSS reference](https://upfour.io/docs/reference/status-page-css.md).
- Duplicating a page (Duplicate) copies the look, settings and sections into a new unpublished page. It does not copy the custom domain, password, access rules, subscribers, updates or translations.
[Per API POST /v1/status-pages](https://upfour.io/docs/api/status-pages#post_status_pages)
The structure, translations, subscribers and updates each have their own endpoints.
| In the app | API field |
| --- | --- |
| Company name | `company_name` |
| Public page slug | `subdomain` |
| Layout · an object with layout, ground and header colours | `appearance` |
| Announcement | `announcement` |
| How many days to display? | `history_days` |
| Default language | `default_language` |
| Reply-to address for status e-mails | `reply_to_email` |
| Password | `password` |
| Custom CSS | `custom_css` |
| Publish status page · a page created through the API starts unpublished unless you send true | `is_published` |
[Full reference](https://upfour.io/docs/api/status-pages#post_status_pages)
[Per API PUT /v1/status-pages/{pageID}/structure](https://upfour.io/docs/api/status-pages#put_status_pages_pageID_structure)
| In the app | API field |
| --- | --- |
| Structure · sections with their resources, in display order | `sections` |
[Full reference](https://upfour.io/docs/api/status-pages#put_status_pages_pageID_structure)
---
# Add a client
> Turn on agency mode, create a client and keep its monitors, status pages and reports apart from your other clients.
Source: https://upfour.io/docs/add-a-client
Afterwards one of your customers has its own space in up4: monitors, scheduled jobs and status pages filed under its name, kept apart from every other client.
- **Who:** Company Owner or **Admin**
- **Time:** About five minutes
You need a customer you monitor on behalf of. Other roles cannot turn on agency mode or create clients. Nothing changes for existing monitors until you assign them to a client.
up4 organizes a Company in three levels. The **Company** is your account. A **Team** is a group of your own people and decides who gets access. A **Client** is a customer's data: the things you watch for them. Teams are about access, clients are about data. [Team and roles](https://upfour.io/docs/team-and-roles.md) covers the first.
**In up4:** Company › Clients · [Open in up4](https://app.upfour.io/settings/clients)
## Steps
### 1. [Turn on agency mode](https://upfour.io/docs/add-a-client#enable)
Open **Company**, find **Agency mode** and switch on **Enable clients**. **Enable agency mode** on the Clients page and in the view switcher does the same.
The switch adds the client switcher and the Clients and Teams pages. Switching it off hides client data and the switcher. Clients and their monitors are kept, not deleted.
[](https://upfour.io/docs/images/walk/en/add-a-client-enable.webp)
### 2. [Add the client](https://upfour.io/docs/add-a-client#create)
Select **Add client**. Enter a **Client name**. Add the **Primary domain** if you know it. A starter template can use it to prefill the first monitor.
Optional: a logo (PNG, JPEG or SVG, up to 1 MiB), and the **Communication language** for reports, invitations and alerts sent for this client. Without a choice, the Company default applies.
[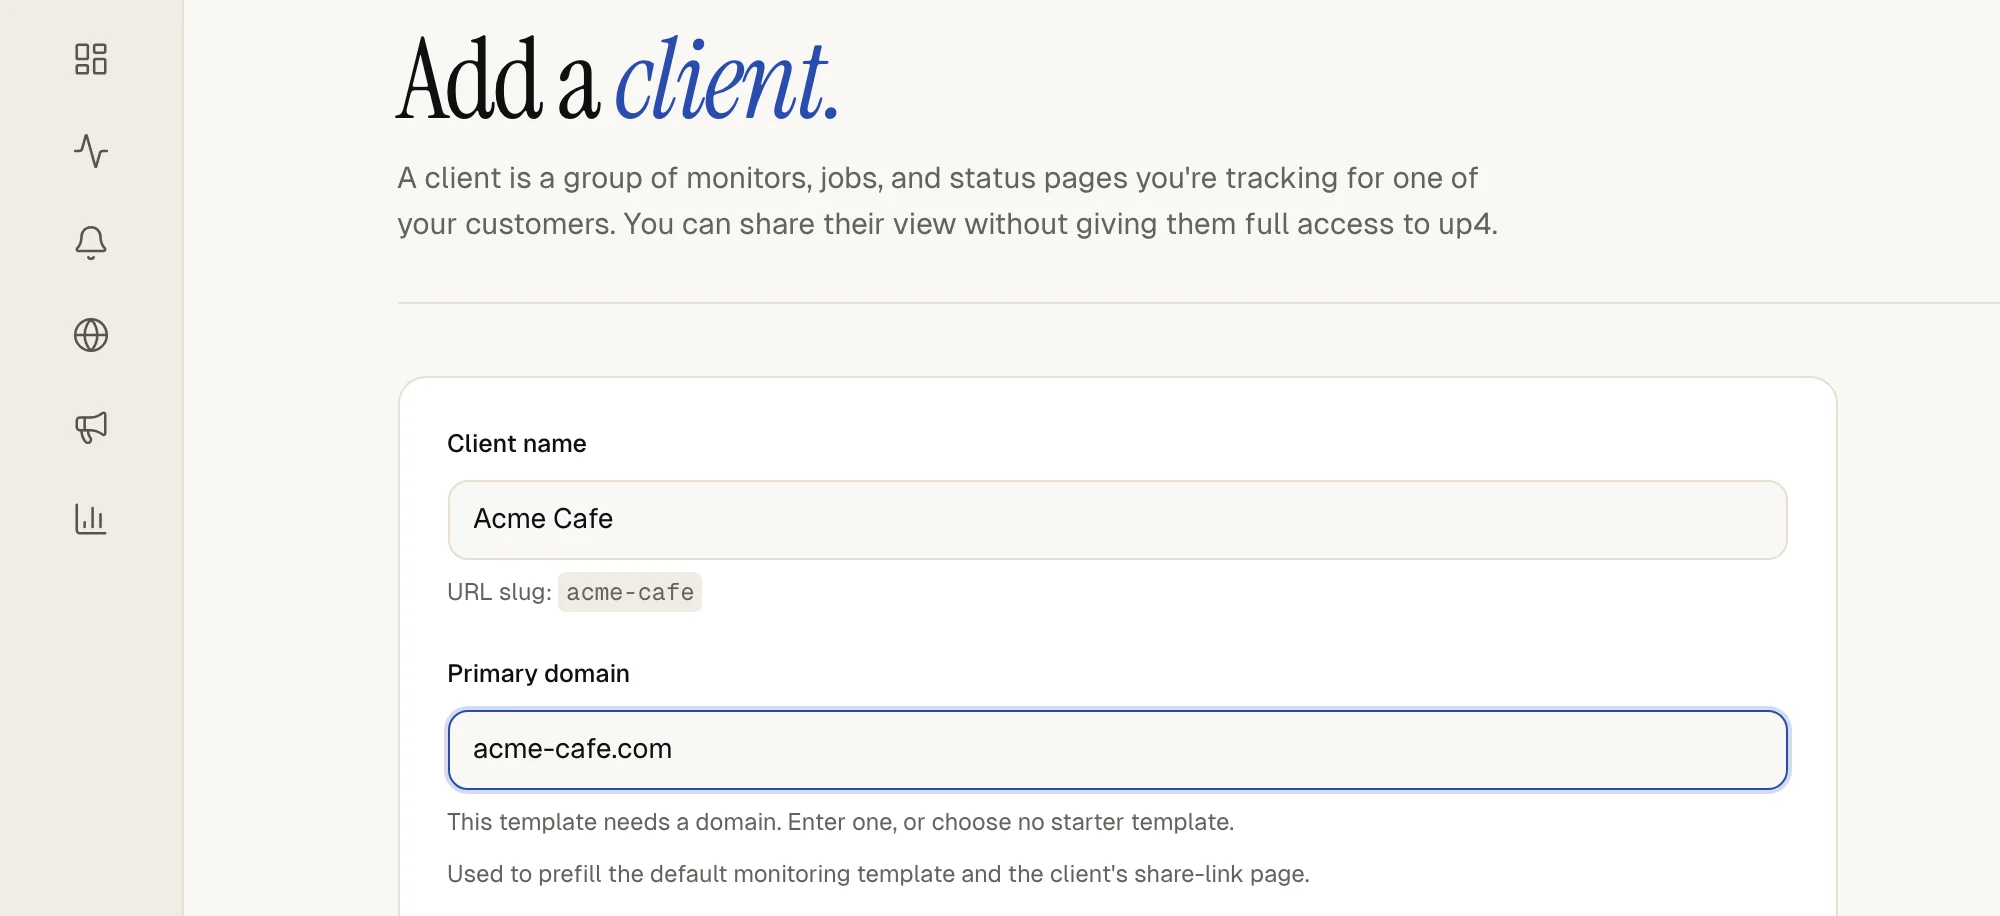](https://upfour.io/docs/images/walk/en/add-a-client-create.webp)
### 3. [Start from a template or empty](https://upfour.io/docs/add-a-client#template)
Under **Starter template** pick a saved template, or No template — start empty. up4 adds a template named Default (one monitor and one status page) and preselects it. A template creates the monitors, alert plans and status pages it describes, with the client's domain filled in.
Status pages from a template start unpublished. The result screen lists them with a link to the editor. To write your own template, open **Templates** next to **Clients** and select New.
[](https://upfour.io/docs/images/walk/en/add-a-client-template.webp)
### 4. [Decide on a client login](https://upfour.io/docs/add-a-client#login)
Leave **Let this client sign in** off if a read-only link is enough for the client. Turn it on to invite their staff into a portal that shows only this client. [Give a client their own login](https://upfour.io/docs/client-portal.md) explains both.
Select **Create client**. up4 switches your view to the new client.
[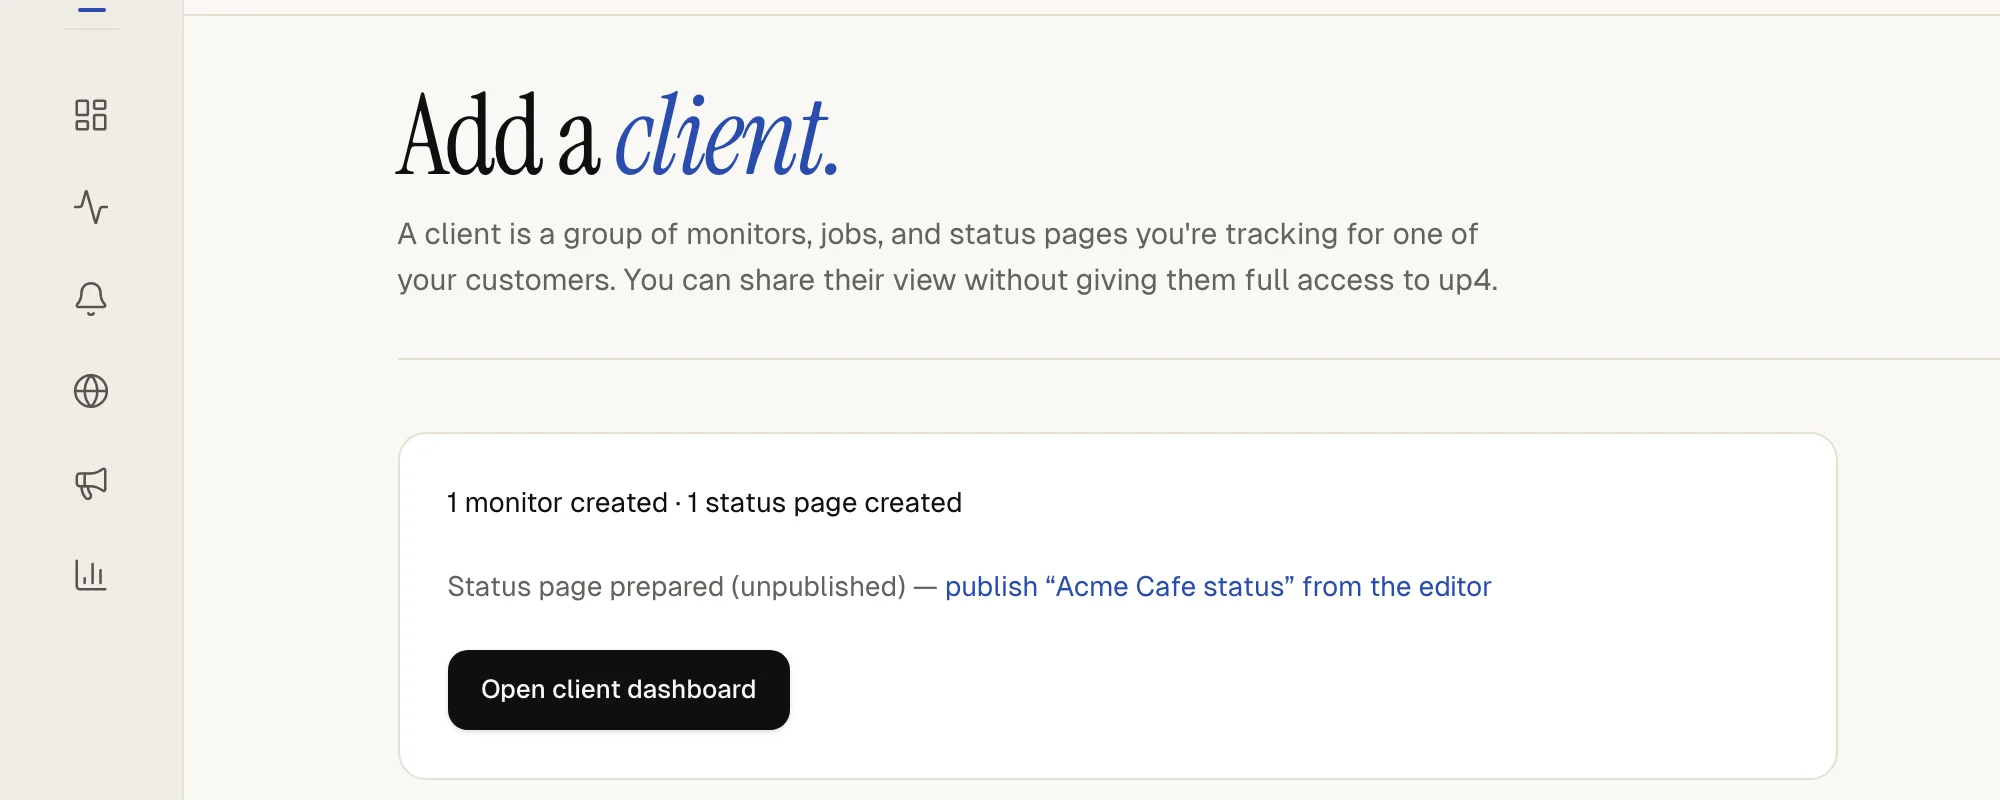](https://upfour.io/docs/images/walk/en/add-a-client-login.webp)
### 5. [File things under the client](https://upfour.io/docs/add-a-client#assign)
While a client is selected in the switcher, new monitors you create belong to that client. For something that already exists, change **Belongs to** on the monitor, or select several monitors, choose Change selected…, and under **Action** pick Move to client.
Scheduled jobs, alert plans, on-call rotations, playbooks and status pages show **Assign to client** in their forms. Alert channels show **Belongs to client (optional)** and report schedules **Scope to client (optional)**. An incident appears under the client of its monitor.
[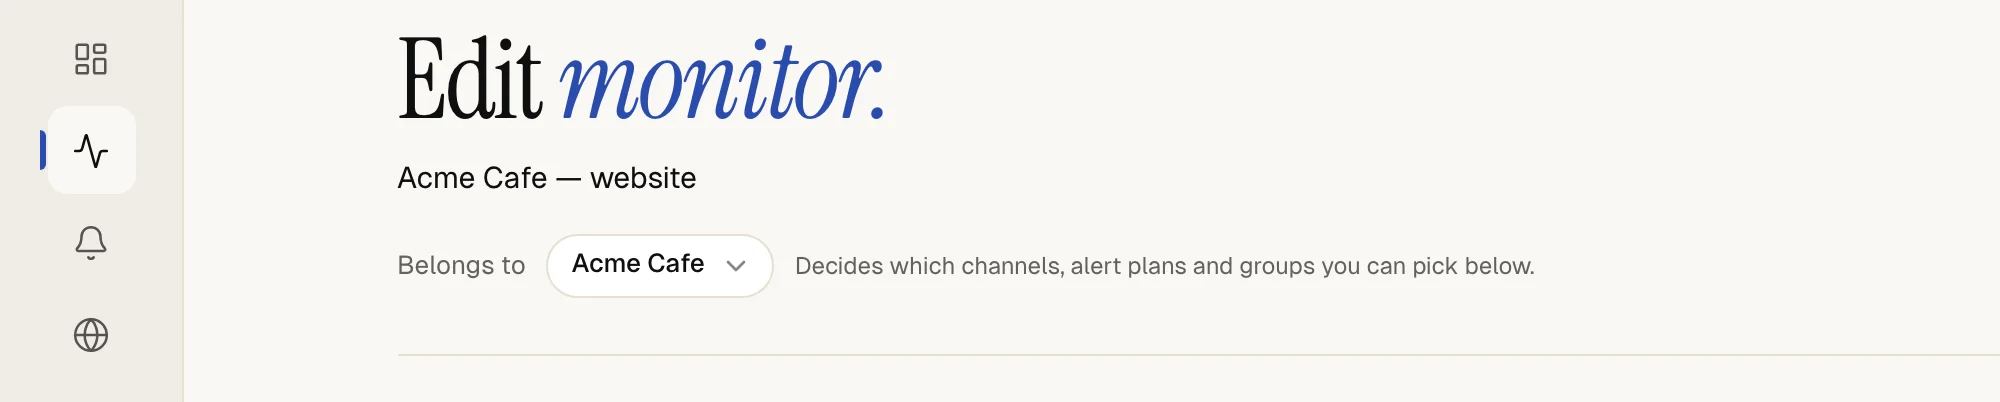](https://upfour.io/docs/images/walk/en/add-a-client-assign.webp)
### 6. [Switch between clients](https://upfour.io/docs/add-a-client#switch)
The switcher at the top of the left menu has three views. Under **Company** your Company's name shows what belongs to no client. A client's name shows that client only. **All clients** adds everything together, for a Monday sweep across every customer.
Lists and the dashboard follow the view you pick. The shortcut ⌘J opens the switcher.
[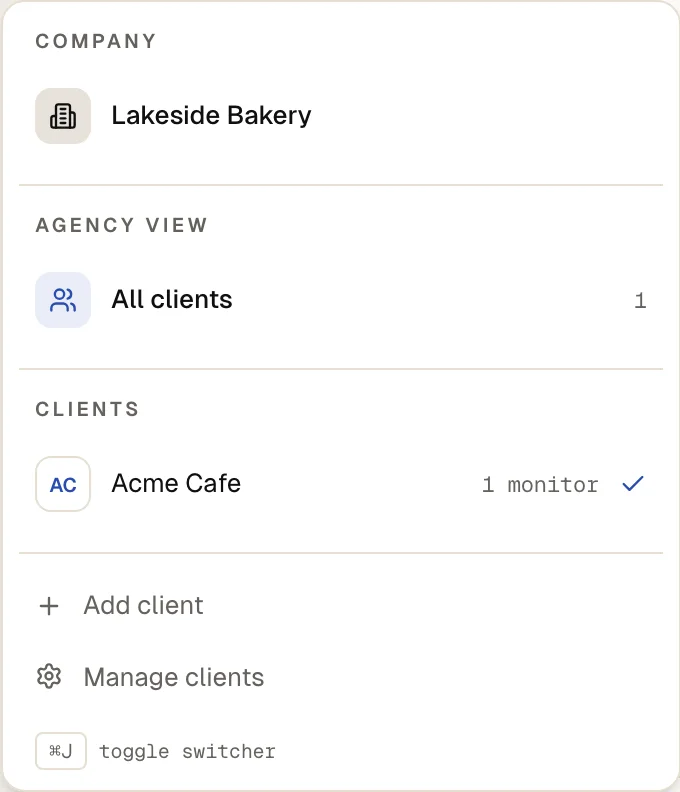](https://upfour.io/docs/images/walk/en/add-a-client-switch.webp)
### 7. [Archive a client when the contract ends](https://upfour.io/docs/add-a-client#archive)
Open the client under **Clients** and select **Archive client**. The client disappears from the switcher and the lists. Its portal members are locked out. Monitors, history and settings stay.
**Pause their monitors and scheduled jobs** is ticked when the dialog opens. Leave it ticked to stop the checks, because running checks keep costing money. To bring a client back, choose **Show archived clients** under the list of clients and then **Unarchive**. Unarchiving does not resume paused checks.
[](https://upfour.io/docs/images/walk/en/add-a-client-archive.webp)
## How you know it worked
The client appears in the switcher and in the list under **Clients**, with its monitor count and open incidents. Select **Open client dashboard** to see a dashboard that contains only this client.
To see what each client costs, open **Usage**. The section **Spend by client** splits the usage by client.
## If something is off
There is no client switcher.
Agency mode is off, or your role is not allowed to turn it on. Ask a Company Owner or Admin, or start at step 1.
A template needs a domain.
If a template uses the client's domain, enter one such as `acme.example` or pick No template — start empty.
A monitor is missing from the client's view.
It may belong to no client or to another one. Switch to All clients and move it.
## What up4 does not do here
- Applying a template only adds. It never changes or removes what a client already has, so applying it twice gives two copies. up4 applies a template when you create a client; it does not apply one to an existing client.
- Each resource belongs to one client or to none. up4 has no sub-clients and no shared monitors.
- Archiving a client does not stop its checks unless you pause them.
- Show archived clients appears only while at least one active client is left. After you archive your last client, add a new one to see the archived ones again.
- A client's data is kept apart on the server, not just hidden in the screen. People in a Team see the clients assigned to that Team, plus what belongs to no client.
[Per API POST /v1/clients](https://upfour.io/docs/api/clients#post_clients)
| In the app | API field |
| --- | --- |
| Client name | `name` |
| Primary domain | `domain` |
| Starter template | `template_id` |
| Communication language | `language` |
| Let this client sign in | `allow_login` |
[Full reference](https://upfour.io/docs/api/clients#post_clients)
---
# Give a client their own login
> Let a client's staff look at their own monitoring in a read-only portal, and see what they can and cannot open.
Source: https://upfour.io/docs/client-portal
Afterwards a client's staff can open a read-only portal with their own monitors, and nothing else of yours. The second part of this page is written for the client and can be forwarded.
- **Who:** Company Owner or **Admin**
- **Time:** About three minutes
- **What you need:** A [client](https://upfour.io/docs/add-a-client.md)
For people who only need to look now and then, a share link works without any login.
**In up4:** Company › Clients › Client access · [Open in up4](https://app.upfour.io/settings/clients)
## For the agency
## Steps
### 1. [Allow portal sign-in](https://upfour.io/docs/client-portal#allow)
Open the client and find **Client access**. Switch on **Allow portal sign-in**. You can also tick **Let this client sign in** when you create the client.
The switch is also the off button. Turning it off locks out every portal member of this client at once.
[](https://upfour.io/docs/images/walk/en/client-portal-allow.webp)
### 2. [Choose what the client sees](https://upfour.io/docs/client-portal#view)
Under **Portal view** pick a preset. The dashboard and the monitors are always visible, read-only. Select **Save changes** at the bottom of the page to keep the choice; portal sign-in itself is saved the moment you switch it.
- **Compact**: reports with **Service levels** and **Response time**. No incidents, no downloads.
- **Transparent**: incidents and every report, including downloads.
- **Custom**: switch **Incidents** and **Reports** on or off, and under reports choose **Service levels**, **Response time**, **Incident analytics**, **Downtime evidence** and **Report downloads** one by one.
[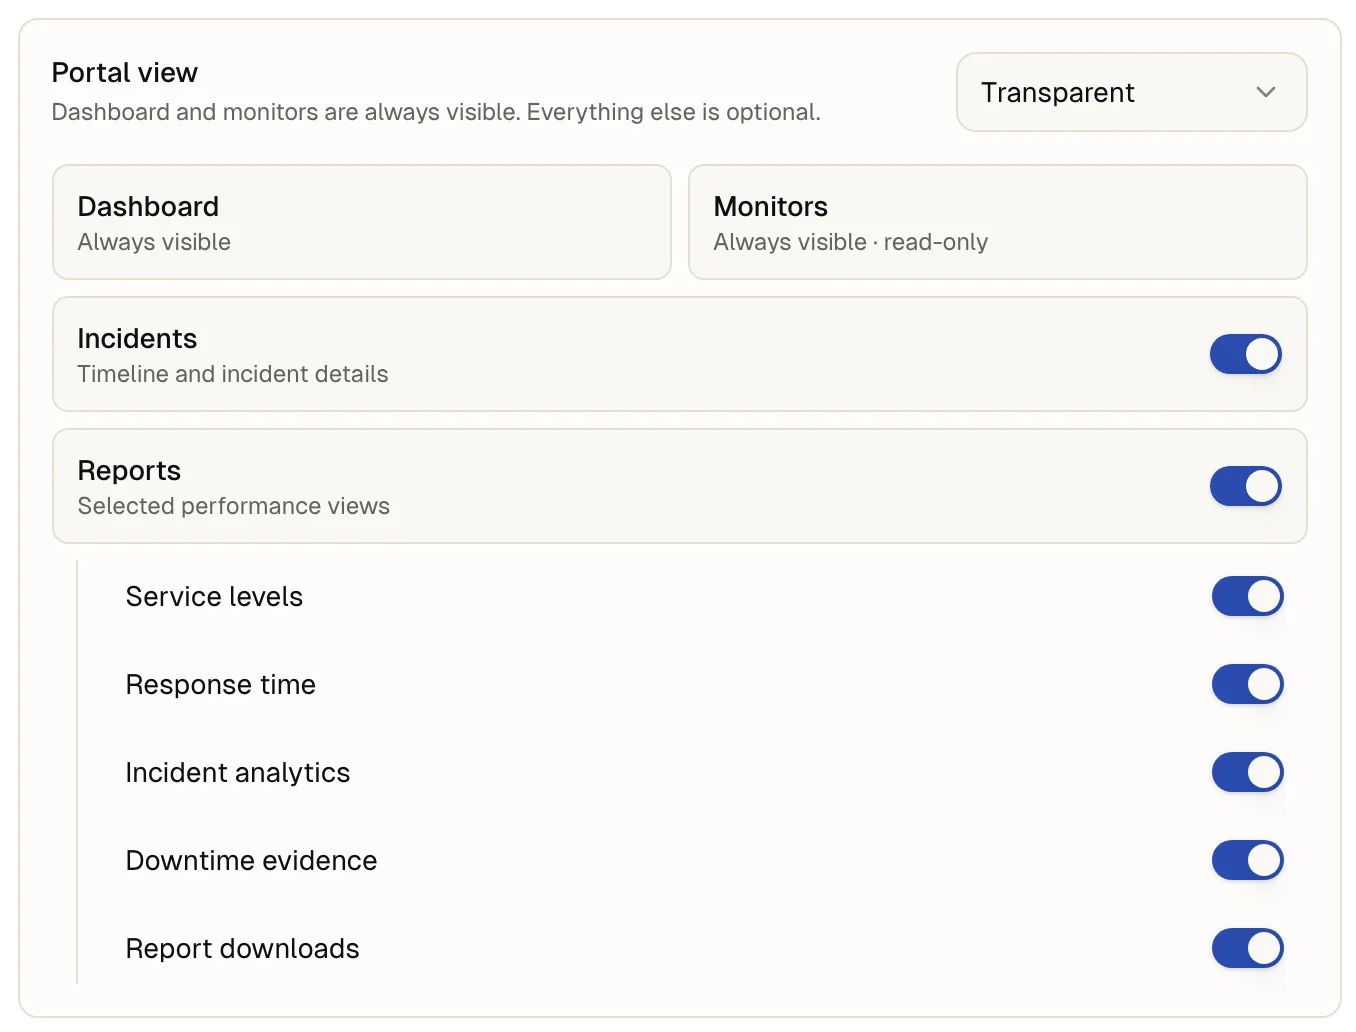](https://upfour.io/docs/images/walk/en/client-portal-view.webp)
### 3. [Send the personal access](https://upfour.io/docs/client-portal#invite)
Under **Send personal access** enter the contact's email address and select **Send access**. Pick the **Invitation language** for the email.
The email holds a personal link. It stays valid for seven days. A pending access shows its expiry date, with **Resend** next to it.
[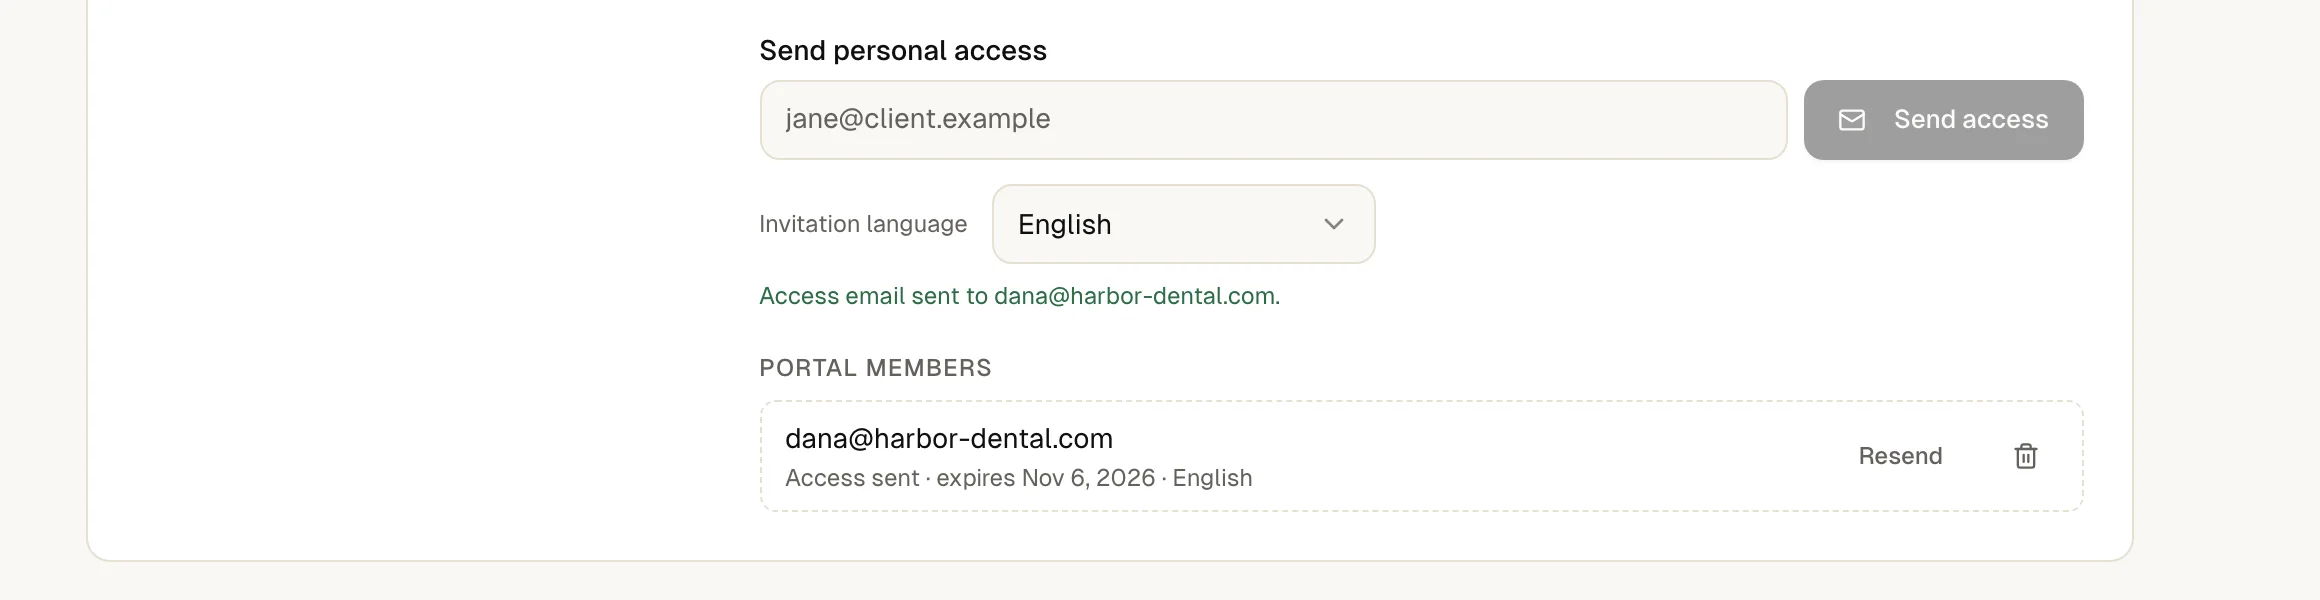](https://upfour.io/docs/images/walk/en/client-portal-invite.webp)
### 4. [Check who has access](https://upfour.io/docs/client-portal#members)
People who opened their link appear under **Portal members**; pending ones show Access sent · expires date. Remove a person there and their portal access ends. Their account stays, and a new invitation brings them back.
[](https://upfour.io/docs/images/walk/en/client-portal-members.webp)
### 5. [Or send a link without a login](https://upfour.io/docs/client-portal#share)
For someone who only needs to look, select **New link** under **Share-links**, add a label and choose when it Expires: 30, 90 or 365 days, or never. Without a choice it expires after 90 days. Copy the link at once; up4 shows it only once. A revoked link stops working immediately.
[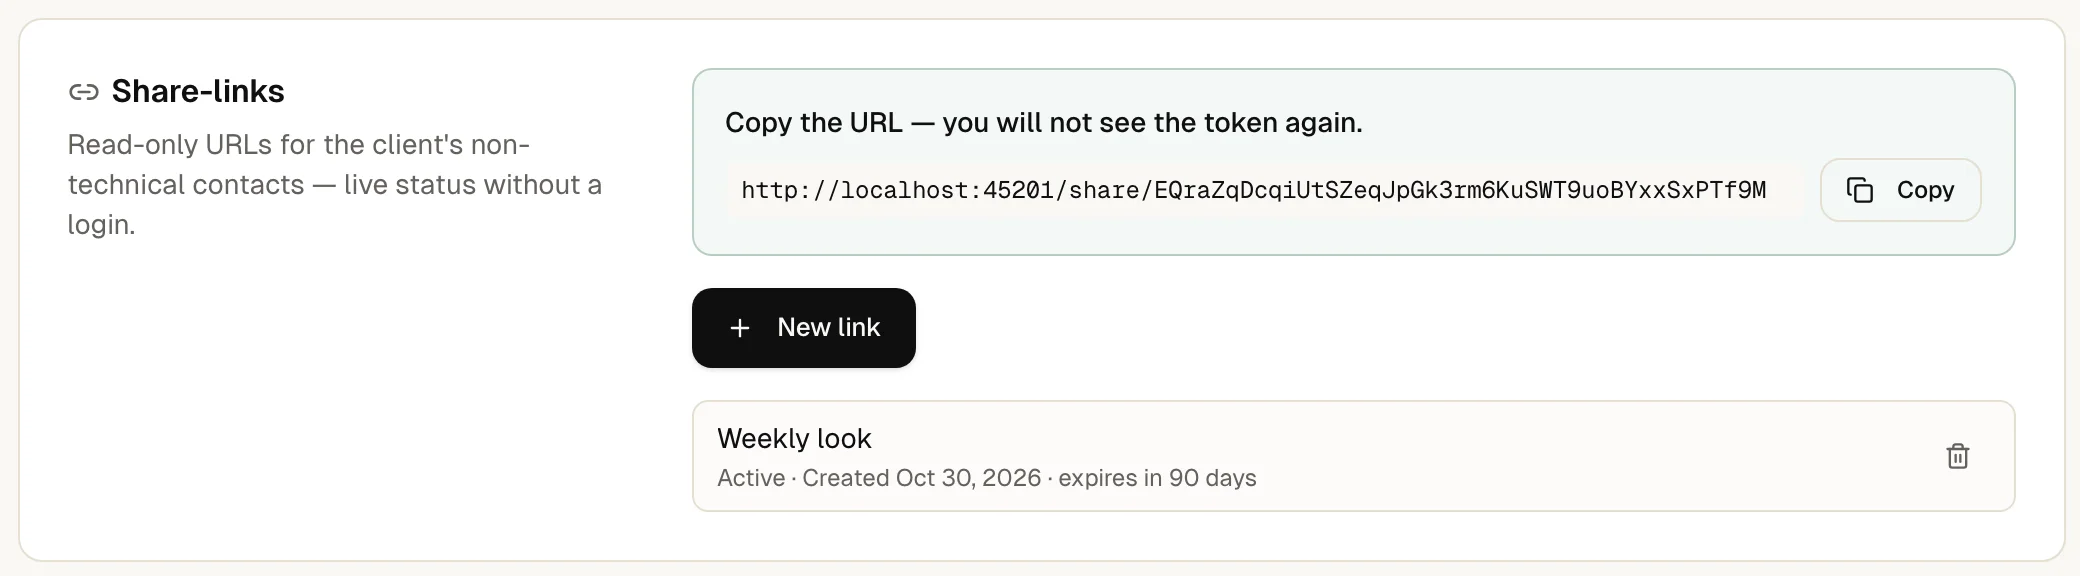](https://upfour.io/docs/images/walk/en/client-portal-share.webp)
## How you know it worked
The contact appears under **Portal members** once they have opened the link. Their portal menu lists **Home** and **Monitoring**, plus **Incidents** and **Reports** if you allowed them.
## If something is off
Sending access fails.
Portal sign-in must be on for the client, and the client must not be archived. Archiving a client locks out its portal members too.
The client says the link has expired or was used.
A used link offers Send fresh link on its page. For an expired link, send a new access.
The contact already has an up4 account.
If that account uses two-factor sign-in, the contact signs in once first. The invitation then adds the portal.
## What up4 does not do here
- A portal member is a **Viewer** in your Company with access to exactly one client, and in no Team. Portal members cannot create or edit anything.
- A portal never shows status pages, alert plans, on-call rotations, billing, members or Company settings.
- If your Company requires two-factor sign-in, a new portal member must set up an authenticator app before they can open the portal.
## For your client
Your agency monitors your websites and services with up4 and gives you a view of the results. This part explains what you can open and how to get back in.
### Opening the portal
The email from your agency contains a personal link. Opening it signs you in to the portal that shows your company's monitors. You do not create a password or an account. The link works once and stays valid for seven days.
Later, open the same link again. The page then offers Send fresh link, which sends a new sign-in link to the same email address. If the link has expired, your agency can send a new one.
### What you can see
- **Home** and **Monitoring**: the current state of every monitor your agency watches for you, with its history.
- **Incidents**: past and current incidents with their timeline. Your agency decides whether this is shown.
- **Reports**: service level, response time and more. Your agency decides which reports are shown and whether they can be downloaded.
- **Profile** and **Security**: your own name, password and sign-in options.
### What you cannot do
The portal is read-only. You cannot add, change or delete monitors, and you cannot see other clients of your agency or anything that belongs to the agency itself. If something is missing, ask your agency to switch it on.
[Per API PUT /v1/clients/{clientID}/portal-settings](https://upfour.io/docs/api/clients#put_clients_clientID_portal_settings)
| In the app | API field |
| --- | --- |
| Portal view | `preset` |
| Incidents | `show_incidents` |
| Reports | `show_reports` |
| Service levels | `show_report_sla` |
| Response time | `show_report_response_time` |
| Incident analytics | `show_report_incidents` |
| Downtime evidence | `show_report_downtime` |
| Report downloads | `allow_report_export` |
[Full reference](https://upfour.io/docs/api/clients#put_clients_clientID_portal_settings)
---
# Send client reports
> Email a client a monthly or weekly report under your own name, logo and colours, and share a report as a link.
Source: https://upfour.io/docs/send-client-reports
Afterwards a client gets a report by email every month or week, under your agency's name, logo and colours, as a link that opens without an account.
- **Who:** Any role except **Viewer**
- **Time:** About ten minutes
- **What you need:** At least one monitor with some history
To set the branding you need Company Owner or **Admin**; other roles except Viewer can create schedules. To send a report about one client, [add the client](https://upfour.io/docs/add-a-client.md) first.
**In up4:** Reports › Scheduled · [Open in up4](https://app.upfour.io/reporting/scheduled)
## Steps
### 1. [Set your report identity](https://upfour.io/docs/send-client-reports#branding)
Open **Company** and find **Report branding**. Enter the **Agency name** and **Agency website**. Upload a logo (PNG or JPEG, up to 1 MB) with **Upload logo**.
Choose a **Brand colour** and a **Footer**. The **PDF preview** shows the header. Select **Save changes** when it looks right. Without clients turned on, the first two fields read Company name and Company website.
Branding applies to reports created after you save. Reports already created keep their look.
[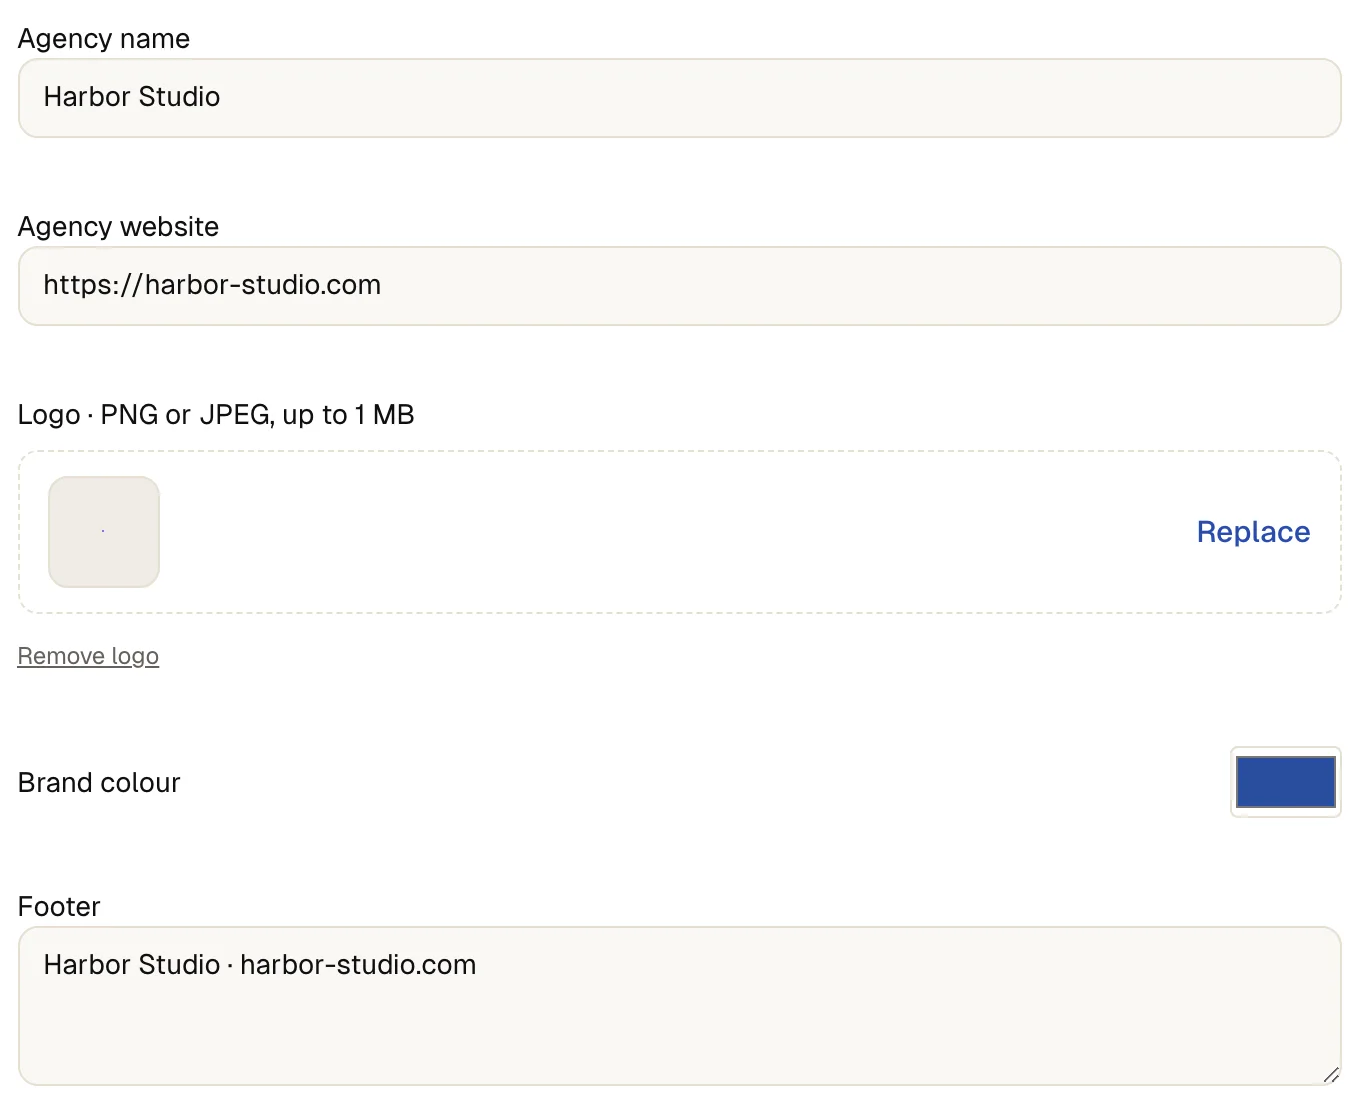](https://upfour.io/docs/images/walk/en/send-client-reports-branding.webp)
### 2. [Create a schedule](https://upfour.io/docs/send-client-reports#schedule)
Open **Reports**, then **Scheduled**, and select **New schedule**. Enter a **Name** that the recipients will recognize, such as the client's name and the month.
[](https://upfour.io/docs/images/walk/en/send-client-reports-schedule.webp)
### 3. [Choose the report and the client](https://upfour.io/docs/send-client-reports#report)
Pick the **Report**: **Executive summary**, **SLA / service level**, **Response time**, **Incident analytics**, **Downtime ledger (evidence)**, **Per-monitor report** or **Trends**. For a first client report, start with the Executive summary.
Under **Scope to client (optional)** select the client, so the report contains only that client's monitors. Choose a **Format**: PDF, XLSX, CSV or JSON.
[](https://upfour.io/docs/images/walk/en/send-client-reports-report.webp)
### 4. [Choose period and rhythm](https://upfour.io/docs/send-client-reports#rhythm)
For a monthly report set **Period covered** to Previous calendar month. Select Monthly for the **Cadence** and a **Day of month** from 1 to 28\. For a weekly report choose Weekly and a weekday.
Set **Send at (hour)** and the **Timezone** of the people reading it.
[](https://upfour.io/docs/images/walk/en/send-client-reports-rhythm.webp)
### 5. [Add the recipients](https://upfour.io/docs/send-client-reports#recipients)
Enter the email addresses under **Recipients**, separated by commas or line breaks. One schedule takes up to 50 addresses. **Report language** sets the language of the report and of the email; left on automatic, it follows the client's communication language.
[](https://upfour.io/docs/images/walk/en/send-client-reports-recipients.webp)
### 6. [Check the preview and create](https://upfour.io/docs/send-client-reports#create)
The line **Next report** shows which period the next report covers and when it goes out. If it reads right, select **Create schedule**. The list shows the schedules of the view you work in: a schedule for a client appears once you pick that client (or all clients) in the view switcher, not under your Company's own name.
### 7. [Send one now to see the result](https://upfour.io/docs/send-client-reports#run)
In the list, select **Run now** on the new schedule. Under **Recent reports** the report appears with its delivery state.
[](https://upfour.io/docs/images/walk/en/send-client-reports-run.webp)
## How you know it worked
The recipients get an email from your agency with the report's name and period, your logo and footer, and a button that opens the report. The state of the run reads Sent to all recipients.
A report holds the headline figures of the period, each compared with the period before: service availability, services in scope, disruptions, total disruption time and typical response time. Below come a day-by-day availability chart and a table per monitor with availability, response times, incidents and checks. The other report types go deeper into one of these.
## If something is off
The run shows Delivery failed or Delivery retry scheduled.
up4 retries failed deliveries by itself. Check the addresses of the recipients that did not receive it, then correct them in the schedule.
A run shows Skipped.
Monitoring was paused at that time. The schedule continues at its next slot once monitoring resumes.
A run shows Not stored.
The storage limit for report files is reached. Nothing was deleted. Free up space or ask for a higher limit, then run the schedule again.
## What up4 does not do here
- The email carries a link, not an attachment. A report link that comes with a schedule stays valid for 90 days.
- Reports are sent from up4's own sending address. Your name, logo, colours and footer appear inside the email and the report. A sending address of your own is not offered.
- A monthly schedule runs on day 1 to 28, so that it exists in every month.
- A Company has an overall limit on schedules and recipients. Within a schedule, 50 recipients is the maximum.
- You can send the same report to a person without a schedule: open the run under Recent reports, select Share, name the link and choose whether it never expires. Without that choice it works for 90 days. Revoke a link under Share links and it stops opening at once.
- A client's own portal login is a separate feature. [Give a client their own login](https://upfour.io/docs/client-portal.md).
[Per API POST /v1/reports/schedules](https://upfour.io/docs/api/reports#post_reports_schedules)
| In the app | API field |
| --- | --- |
| Name | `name` |
| Report | `report_type` |
| Scope to client (optional) | `client_id` |
| Format | `format` |
| Recipients | `recipients` |
| Cadence | `cadence` |
| Day of month | `day_of_month` |
| Send at (hour) | `send_hour` |
| Timezone | `timezone` |
| Report language | `language` |
[Full reference](https://upfour.io/docs/api/reports#post_reports_schedules)
---
# Team and roles
> Invite people to your Company, choose what each role may do, limit access with Teams and secure sign-in.
Source: https://upfour.io/docs/team-and-roles
Afterwards your colleagues can sign in with the access you chose for each of them, and you know what each role may and may not do.
- **Who:** Company Owner or **Admin**
- **Time:** About two minutes per person
You need the email address of the person you invite. You can invite members of your own staff; for a customer’s staff, [give the client a login](https://upfour.io/docs/client-portal.md).
**In up4:** Company › Members · [Open in up4](https://app.upfour.io/settings/members)
## Steps
### 1. [Invite the person](https://upfour.io/docs/team-and-roles#invite)
Select **Invite member**. Enter the **Email address** of the person. If that address already belongs to a member of your Company, the form changes to Add to team instead.
[](https://upfour.io/docs/images/walk/en/team-and-roles-invite.webp)
### 2. [Choose a role](https://upfour.io/docs/team-and-roles#role)
Under **Role** choose Member, Admin or Viewer. The table below shows what each allows. Invitations never create an Owner. If your Company uses Teams, pick the **Team** too.
[](https://upfour.io/docs/images/walk/en/team-and-roles-role.webp)
### 3. [Send the invitation](https://upfour.io/docs/team-and-roles#send)
Select **Send invite**. The invitation waits under **Pending invites** with its expiry date. It stays valid for seven days. Use **Resend** or **Revoke** there. up4 accepts a resend two minutes after the last mail of that invitation and refuses an earlier one.
[](https://upfour.io/docs/images/walk/en/team-and-roles-send.webp)
### 4. [Change a role later](https://upfour.io/docs/team-and-roles#change)
Open the menu on the member's row and choose Make admin, Make member or Make viewer. The change applies at once. The list offers no menu for your own row or for the Owner.
[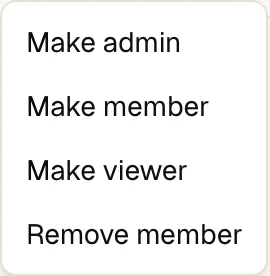](https://upfour.io/docs/images/walk/en/team-and-roles-change.webp)
### 5. [Remove a member](https://upfour.io/docs/team-and-roles#remove)
Open the same menu and choose Remove member, then confirm. The person loses access immediately and needs a new invitation to come back.
[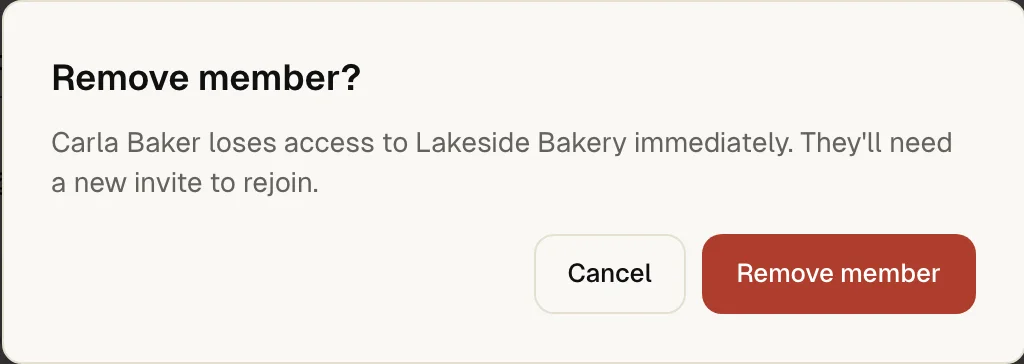](https://upfour.io/docs/images/walk/en/team-and-roles-remove.webp)
## How you know it worked
The person appears under **Members** with the role you chose, once they have accepted the invitation. Until then they sit under Pending invites.
## What each role can do
There are four roles in a Company. The Owner is the person who created it and is the only one who can delete it. An Owner cannot be removed or demoted from the member list.
| Action | Owner | **Admin** | **Member** | **Viewer** |
| --- | --- | --- | --- | --- |
| See monitors, scheduled jobs, incidents, status pages and reports | Yes | Yes | Yes | Yes |
| Create and change monitors, scheduled jobs, alert plans, playbooks, status pages and report schedules; work on incidents | Yes | Yes | Yes | No |
| Invite and remove members, change roles | Yes | Yes | No | No |
| Create Teams and assign clients to them | Yes | Yes | No | No |
| Turn on agency mode, create and archive clients, manage client portals | Yes | Yes | No | No |
| Company settings, report branding, custom domains for status pages | Yes | Yes | No | No |
| Two-factor requirement, single sign-on, audit log | Yes | Yes | No | No |
| Billing: top up credit, change plan, buy extensions | Yes | Yes | No | No |
| Delete the Company | Yes | No | No | No |
**Roles & permissions** in the app shows the same four roles with the number of people in each.
## Limit access to clients with Teams
A Team is a group of your own people. It matters once you work for several customers: after you [turn on clients](https://upfour.io/docs/add-a-client.md), you assign clients to a Team. Its members then see only the monitors, incidents and status pages of those clients, plus everything that belongs to no client. Owners, Admins and Team admins see every client.
- Open **Members & teams**, then **Teams**, and select **Create team**. Enter a **Team name**.
- On the Team's page, add people with **Add member** and choose their **Team role**. A Team admin manages that Team's membership.
- Open the Team's **Clients** tab. Under **Assigned clients** the clients the Team handles are listed. **Assign another client** offers one button for every client that is not assigned yet.
A Team adds no permissions of its own. What a person may do comes from the Company role; the Team decides which clients they see. Without agency mode the Teams page is hidden.
## Require two-factor sign-in
Open **Company**, then **Security**, and switch on **Require two-factor authentication**. Every member then needs an authenticator app before signing in.
Before you confirm, up4 shows how many members have no second factor yet. They stay signed in and see a notice asking them to set one up. Until they do, their next sign-in is refused. Members who sign in by email link need a password first.
On the same page, a verified domain makes everyone who signs up with an email address on it join your Company automatically.
## Sign in with Google or GitHub
Open **Single sign-on**. Each provider has its own switch, **Client ID**, **Client secret** and **Callback URL**, which you register with Google or GitHub. Members then sign in from the login page with their work email or your Company slug.
up4 supports Google and GitHub for each Company. SAML is not offered.
## If something is off
The invitation does not arrive.
Check the spam folder, then use Resend (two minutes after the last mail at the earliest). An invitation that expired needs a new one.
A person cannot do something they should.
Compare their role with the table above. Viewers can read but not change anything.
A member sees too little.
If your Company uses clients, check which clients their Team has under Assigned clients.
## What up4 does not do here
- A Company sends 25 invitations a day on its starting credit and 100 a day after the first top-up or with a subscription. Resends count as well.
- Roles apply to the whole Company. There are no per-Team permission switches and no custom roles.
- A person belongs to one Company. An account that belongs to another Company cannot accept your invitation.
- Two-factor sign-in is a Company-wide setting. up4 does not enforce it per Team or per role.
- Roles in the table are for people who sign in. API keys have their own scopes, described in the [developer docs](https://upfour.io/docs/api.md).
[Per API POST /v1/invites](https://upfour.io/docs/api/invites#post_invites)
| In the app | API field |
| --- | --- |
| Email address | `email` |
| Role | `role` |
| Team | `team_id` |
[Full reference](https://upfour.io/docs/api/invites#post_invites)
---
# Credit and plans
> How a Company pays for up4: starting credit, topping up, Team and Agency plans, what happens when credit runs out, invoices and cancelling.
Source: https://upfour.io/docs/credit-and-plans
Afterwards you know what pays for your checks, how to add credit or choose a plan, and what happens when the credit runs out.
- **Who:** Owner or administrator
- **Time:** About three minutes
- **What you need:** A card for top-ups and plans
Other roles cannot top up or change a plan. The starting credit needs no card.
**In up4:** Company › Billing · [Open in up4](https://app.upfour.io/settings/billing)
## Three ways to pay
| Way | How it works |
| --- | --- |
| **Starting credit** | Every new Company starts with €9 and every feature, without a card. Checks, check-ins and the monthly minimum draw from it. Light use lasts at most 3 months; heavier use ends it sooner. Until the first payment a Company can have 50 monitors and 20 scheduled jobs. |
| **Pay as you go** | You top up a balance, from €10. Usage draws from it and the balance never goes below zero. Each month costs at least €3; usage counts toward that minimum, so a month above it pays usage only. After the first top-up there is no limit on the number of monitors. |
| **Team** | €19 a month or €190 a year. Includes usage worth €180 at list price, about 20 million checks, and 100 monitors. |
| **Agency** | €49 a month or €490 a year. Includes usage worth €600, about 66 million checks, and 500 monitors. |
What each plan includes, from monitors to subscribers, is listed in [Limits and allowances](https://upfour.io/docs/reference/limits#plans). What counts as usage is in [What costs money](https://upfour.io/docs/how/what-costs-money.md).
## Steps
### 1. [Look at your balance and plan](https://upfour.io/docs/credit-and-plans#look)
Open **Billing**. On the starting credit or pay as you go the page leads with your **Balance**. While the starting credit lasts, the page header shows how much of the **Starting credit** is left. **Transactions** starts with the starting credit and lists every top-up, every day of usage and the monthly minimum.
[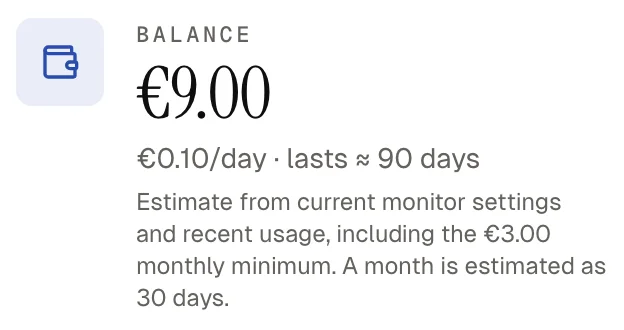](https://upfour.io/docs/images/walk/en/credit-and-plans-look.webp)
### 2. [Top up the balance](https://upfour.io/docs/credit-and-plans#top-up)
Under **Top up** choose an amount or enter your own under **Other amount**. The smallest top-up is €10, plus VAT where it applies; below it the button stays disabled. You pay in a secure checkout and the balance rises.
Switch on **Auto-reload** to top up on its own when the balance falls below a threshold. Not every payment setup offers it. When yours does not, the page says so.
[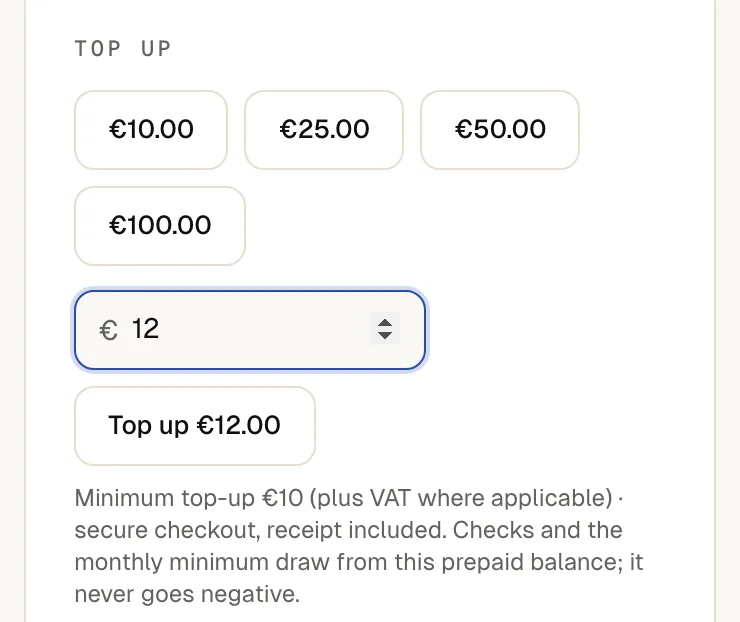](https://upfour.io/docs/images/walk/en/credit-and-plans-top-up.webp)
### 3. [Or choose a plan](https://upfour.io/docs/credit-and-plans#plan)
Under **Prefer a plan?** pick **Monthly** or **Yearly**, then select Choose Team or Choose Agency. A yearly term costs ten monthly prices for twelve months. Prices are net; VAT is added at checkout where it applies. Each card shows the price, the monitors, the seats and the regions with their retention. If a checkout is not available, the button reads Temporarily unavailable instead.
[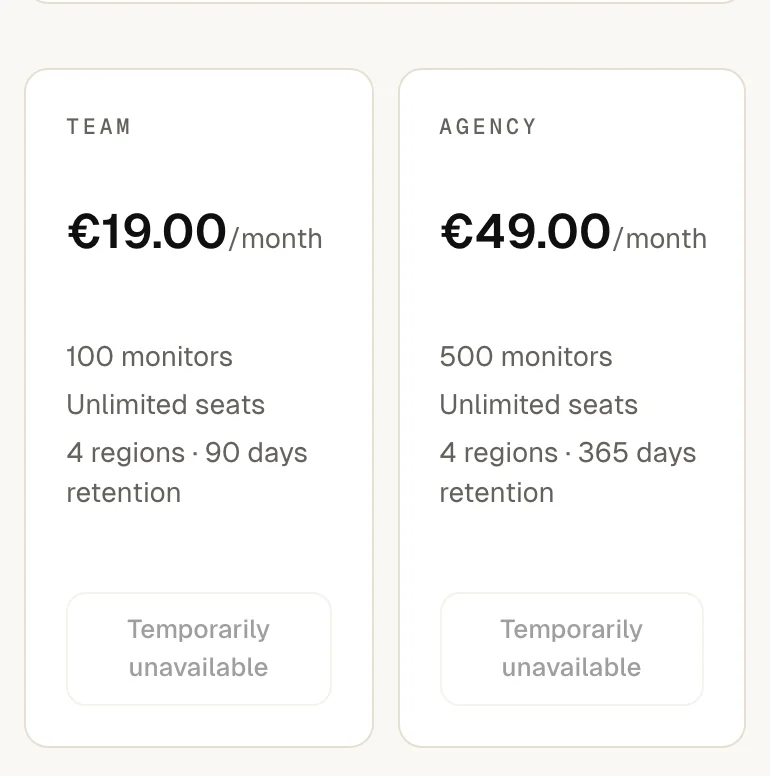](https://upfour.io/docs/images/walk/en/credit-and-plans-plan.webp)
### 4. [Set a spend alert](https://upfour.io/docs/credit-and-plans#spend-alert)
Open **Usage** and enter an amount under **Spend alert**, then select **Save**. up4 sends one email when the month's usage crosses it. An amount of 0 turns the alert off.
[](https://upfour.io/docs/images/walk/en/credit-and-plans-spend-alert.webp)
### 5. [Change a plan or cancel](https://upfour.io/docs/credit-and-plans#change)
Once you have a plan, the billing page shows a subscription card. On it, switching from monthly to yearly and from Team to Agency apply at once, with a preview first. Every other change, such as **Switch to Team**, applies when the paid period ends.
To cancel, select **Open billing portal**. The card then shows **Cancellation scheduled**. After the paid period the Company continues as pay as you go with its balance.
### 6. [Find invoices and receipts](https://upfour.io/docs/credit-and-plans#invoices)
Select **Receipts and invoices in the customer portal** on the subscription card, or **Open receipts** for top-ups. Both open Stripe's customer portal. They appear after the first payment: before it, the top-up card only says where receipts will be, and the subscription card is missing until you have a plan.
## When the credit runs out
up4 warns the Company owner by email before it happens. On pay as you go the warnings come at about 14, 7, 3 and 1 day of balance left, judged by your recent usage. What follows depends on whether the Company has paid before.
| Situation | What happens |
| --- | --- |
| **Starting credit used up, never paid** | Checks pause at once. The email you get says so. A top-up or a plan resumes monitoring. |
| **Balance used up after a first payment** | Grace mode. For 7 days every monitor keeps running, now every 5 minutes, free of charge. Alerts and status pages stay live. A few actions are narrower; see [grace mode limits](https://upfour.io/docs/reference/limits#grace). |
| **After grace mode** | Checks pause. A top-up resumes them. Scheduled-job check-ins are ignored while paused. |
| **Subscription payment fails** | The same grace mode runs. The page shows **Payment failed**; select **Fix payment** to update the card. |
A pause never deletes monitors, pages or settings. The balance never goes negative, and up4 does not chase you for payment.
## How you know it worked
After a top-up the **Balance** shows the new amount and **Transactions** lists it as **Top-up**.
After choosing a plan the subscription card shows **Active** with the plan and its interval, and **Monthly check budget** shows how much of the included usage you have used.
## If something is off
The checkout does not open.
The page shows an error with Message us, which starts a message with the details filled in. A plan button that says Temporarily unavailable cannot start a checkout right now; try again later.
The page says Payment failed.
Select Fix payment and update the card. Monitoring continues in grace mode meanwhile.
New monitors are blocked on a plan.
The monthly check budget is used up. Running monitors keep their interval. New monitors, shorter intervals and more regions wait for the next month, a larger plan or an [add-on](https://upfour.io/docs/reference/limits#addons).
## What up4 does not do here
- up4 charges your card only when you confirm a top-up, a plan or an add-on, or after you switch on auto-reload.
- The monthly minimum is settled when the month closes, prorated by day in the sign-up month. It never takes the balance below zero.
- The check budget of a plan renews with the UTC calendar month. Estimates on the page count a month as 30 days.
- No overage is charged on a plan. When the budget is used up, only new load is blocked.
---
# When you get alerted
> How up4 confirms an outage before it alerts you: observations, regions, quiet mode, recovery, slowdowns, scheduled jobs and escalation.
Source: https://upfour.io/docs/how/when-you-get-alerted
up4 waits for several matching results before it calls an outage, so one hiccup does not wake you. This page lists every rule and what it adds to the wait.
> The timeline needs JavaScript. The rules are written out below.
>
> Time since the outage started. A range means it depends on where in the interval the last check fell.
## Confirming an outage
A state change, up to down or down to up, needs 3 consistent observations. The first check that differs from the current state is the first observation. It starts 2 re-checks at once, so confirmation does not wait for the next interval. With several regions, each region runs its own re-checks.
The count has a shelf life. If the observations do not line up, the streak expires after 3 times the check interval, but not sooner than 30 seconds, and counting starts over.
**Extra confirmation time** adds a minimum wait on top, and only for the failure direction. The outage counts as confirmed once the latest failing check lies at least that long after the first failing one and the observation count is reached. Because the regular checks are an interval apart, the alert comes with the first regular check after that time. The setting No extra wait still means 3 observations, never one.
## Several regions
A monitor that checks from several regions changes state only when a strict majority of its regions agree. up4 counts the regions that have a healthy checker at that moment, each by its latest result, and ignores a result older than 2 minutes. A region without a fresh result counts as not agreeing.
With three regions two must agree. With two healthy regions both must agree, so one region reporting alone never starts an incident. The same majority applies on the way back up. More on regions is in [Checks and regions](https://upfour.io/docs/how/checks-and-regions.md).
## Right away or skip short blips
The monitor form asks **When should we alert you?**. The answer decides only when the first notice goes out.
| Choice | First notice |
| --- | --- |
| **Right away** | As soon as the outage is confirmed. One alert per outage, and an all-clear when it is over. |
| **Skip short blips** | Once confirmed downtime adds up to 3 minutes. A shorter outage stays in the history and sends no notice. |
Downtime adds up from the gaps between successive failing checks. A gap counts only up to the larger of 1.5 times the interval and 30 seconds. A longer gap adds nothing, so missed checks do not count as downtime. Short blips that recover within 15 minutes share one window and add up; the recovery period extends that window when it is longer.
Either way the monitor status, the incident and the status page show the outage as soon as it is confirmed.
## Coming back up
Recovery is confirmed like an outage: the first good check plus its re-checks. At that moment the monitor is up again, and an all-clear goes to the channels that heard about the outage, but only if an alert went out. The incident stays open while **Recovery period** runs and closes with the first good check after that time. With Resolve immediately there is no wait, so the next check closes it.
## Monitors that keep flipping
A monitor that goes down again within 15 minutes of its last recovery counts as unstable. up4 still opens the incident, so the dashboard and the status page show it, but sends one unstable notice instead of a down and up pair for every flip.
Once the monitor has stayed up for 15 minutes you get a stable notice and alerts resume. If it stays down instead, a regular down notice follows after 2 times the interval, but not sooner than 5 minutes. up4 sets both windows; the values here are the defaults.
## Slow, not down
A slowdown warning is a separate message and off until you turn on **Warn when the target gets slow but stays up**. It is confirmed after 3 slow checks and cleared after 3 fast ones. It never opens an incident and never goes to phone call, SMS, PagerDuty, Jira or Grafana channels.
## What shows and what notifies
| What | When it changes |
| --- | --- |
| Monitor status, incident, status page | When the outage is confirmed, in both notification modes. |
| Notice to direct recipients | With Right away, when the outage is confirmed. With Skip short blips, after 3 minutes of downtime. |
| Alert plan steps | See escalation timing below. |
| All-clear | After recovery is confirmed and the recovery period has passed. |
| Paused monitors, maintenance windows | Nothing alerts. Checks inside a maintenance window keep running. |
## Scheduled jobs
A scheduled job is late when its last check-in plus the expected interval plus the grace period has passed. The alerter looks for missed deadlines every 30 seconds, so a missed check-in is noticed within that sweep after the deadline. The defaults are 5 minutes for the interval and 1 minute for the grace period; the interval cannot be shorter than 30 seconds.
No check runs for a scheduled job, so there is no three-result confirmation; the deadline and the grace period do that work. A missed check-in goes to the channels that fit the job's Company, client or team, never to an alert plan and never as a call. A job that keeps changing state gets its alerts bundled once an hour until it settles. [Watch a scheduled job](https://upfour.io/docs/watch-a-scheduled-job.md) shows the setup.
## Escalation timing
Direct recipients get one notice at the moment shown above. An [alert plan](https://upfour.io/docs/build-an-alert-plan.md) adds to it. Its first step fires at once or after its own wait. Every later step fires after its wait, at least 1 minute, and only while nobody has acknowledged the incident. After the last step the plan can start over up to 8 times. Acknowledging or resolving the incident stops it.
## When checking slows down
When the balance of a company is used up after a first payment, up4 moves its checks to one every 5 minutes for 7 days before monitoring pauses. Checks that far apart notice an outage later, up to one interval after it starts. A paused monitor runs no checks and sends no alerts; nothing is deleted. More in [Credit and plans](https://upfour.io/docs/credit-and-plans.md).
## What adds to the wait
| Rule | What it adds |
| --- | --- |
| **Check every** | Up to one interval until a check meets the outage. |
| Request timeout | A failing check can take as long as the timeout, by default 30 seconds. |
| Re-checks | Nothing noticeable. They start right away. |
| **Extra confirmation time** | At least the time you set, failure direction only. |
| **Skip short blips** | 3 minutes of confirmed downtime. |
| Alert plan | The wait of each step. |
| Channel and provider | Not in up4's hands: mail servers, chat services and phone networks. |
## What up4 does not do here
- up4 never promises a delivery time. The table above shows what depends on you and what does not.
- The timeline shows ranges because a check can land anywhere within its interval. It does not model flapping or the channel.
- An outage shorter than the interval can pass between two checks and never be seen.
[Per API POST /v1/monitors](https://upfour.io/docs/api/monitors#post_monitors)
| In the app | API field |
| --- | --- |
| When should we alert you? · Right away alerts once checks confirm an outage. The quiet option skips short blips. | `notification_mode` |
| Extra confirmation time · seconds; 0 means no extra wait | `confirmation_period` |
| Recovery period · How long the monitor must stay healthy before the outage counts as over. | `recovery_period` |
| Alert plan · An alert plan pages people step by step until someone acknowledges, on top of the channels. | `escalation_policy_id` |
[Full reference](https://upfour.io/docs/api/monitors#post_monitors)
---
# What costs money
> What up4 charges for: checks, scheduled-job check-ins, incident screenshots and a few status page extras. Everything else is free. With worked examples.
Source: https://upfour.io/docs/how/what-costs-money
up4 charges for what runs: checks, scheduled-job check-ins, incident screenshots and a few status page extras. Everything else is free.
## What is charged
Every check type costs the same, whatever it checks. Prices are net; VAT is added at checkout where it applies.
| What | Unit | Price | Team and Agency |
| --- | --- | --- | --- |
| **Checks** (HTTP, keyword, body, TCP, DNS, ping) | 1 million executions | €9 | From the included usage |
| **Scheduled-job check-ins** | 1 million accepted check-ins | €3 | From the included usage |
| **Incident screenshots** | 1 successful capture | €0.005 | 500 and 2500 a month included |
| **Status page business features** | 1 published page, month | €10 | Included |
| **Custom status page domain** | 1 domain, month | €2 | 1 and 10 included |
| **E-mail subscribers** above 250 | 1 subscriber, month | €0.005 | 1,000 and 1,500 included |
Plus a monthly minimum on pay as you go: each month costs at least €3, and usage counts toward it. Team and Agency charge their plan price and include usage worth €180 and €600 at list price. For Team that is about 20 million checks. The rest of this page is how the units are counted.
## How checks are counted
- A check is one run of one monitor from one region. A monitor that runs from two regions counts twice.
- Failed checks cost the same as healthy ones. The extra runs that confirm a status change are executed checks and count.
- A redirect or the retry with GET after HEAD inside one run is not an extra check.
- Paused monitors run no checks and cost nothing. Checks that run in grace mode are free.
- Monitors that up4 checks less often after slow responses cost less than the estimate. The **Usage** page says how many.
## How check-ins are counted
A scheduled job reports to up4, so the count comes from your side. Every check-in up4 accepts costs the check-in rate, whether it reports success or a failure. A check-in that up4 rejects costs nothing, for example for an unknown or paused job.
## How screenshots are counted
When an incident opens on a monitor with screenshots switched on, up4 tries once to capture the page. Only a successful capture is charged; a failed attempt costs nothing. On Team and Agency the included screenshots are a separate monthly allowance, not part of the check budget. When it is used up, new incidents get no screenshot until the next month, an upgrade or a screenshot [add-on](https://upfour.io/docs/reference/limits#addons).
## Worked examples
Each example is one month of 30 days on pay as you go. The amount in brackets is the check count and the rate.
| Setup | Cost a month |
| --- | --- |
| One website, every minute, from one region | €0.39 (43,200 checks a month × €9 per million) |
| 20 client websites, every 3 minutes, from two regions | €5.18 (576,000 checks a month × €9 per million) |
| One scheduled job that checks in every 5 minutes | €0.026 (8,640 check-ins a month × €3 per million) |
The first example is far below the monthly minimum, so a Company with only that monitor pays the minimum. The second is above it, so the Company pays the usage only. A job that checks in every five minutes adds a fraction of a cent. The monitor form shows the cost of a monitor before you save it, and **Usage** shows the month so far and a forecast.
## What is free
- Alerts on every alert channel, including e-mail, webhooks and chat tools.
- Playbooks and team members. There is no price per seat.
- Status pages without a business feature. A paid pay-as-you-go Company can publish up to 10 of them at once.
- Whatever else up4 counts internally has no customer price.
SMS and voice alerts use your own Twilio account, so Twilio bills those messages and calls to you. up4 adds no charge on top.
## What up4 does not do here
- Estimates count a month as 30 days. Billing follows the UTC calendar month.
- Usage is booked hourly. The current hour is not yet in the **Usage** page.
- A Company on the starting credit pays the same prices as pay as you go, from the starting credit. See [Credit and plans](https://upfour.io/docs/credit-and-plans.md).
- Allowances, add-ons and the protection limits are listed in [Limits and allowances](https://upfour.io/docs/reference/limits.md).
---
# Checks and regions
> What a check does for a website, keyword, port, DNS record or ping, which regions run it, how intervals and timeouts work and where checks come from.
Source: https://upfour.io/docs/how/checks-and-regions
What one check does, where it runs from and how often. Read this when a result surprises you.
## What each check does
| Type | What up4 does | Counts as up when |
| --- | --- | --- |
| Website | Sends one HTTP request to the address. | The final answer is a 2xx status, or the status you expect. |
| Keyword | Requests the page with GET and reads it. | The status is 2xx and the word is on the page. An absence check turns this around. |
| Port | Opens a TCP connection to the host and port and closes it. Nothing is sent. | The connection opens. |
| DNS | Asks a DNS server for one record type: A, AAAA, CNAME, MX, NS or TXT. | An answer comes back, and contains the value you expect when you set one. |
| Ping | Sends one ICMP echo to the host. | The host answers within a few seconds. |
The first three need no more than the address. [Check page content](https://upfour.io/docs/check-page-content.md) and [check a server, port or DNS record](https://upfour.io/docs/check-server-port-dns.md) walk through the setup.
## Website checks in detail
**Method.** up4 sends the method shown under **HTTP method**. The app preselects GET. A monitor created through the API without a method uses HEAD. A keyword check always uses GET, because a HEAD answer has no page to read. If a server answers a HEAD request with 405 Method Not Allowed, set the method to GET.
**Redirects.** up4 follows redirects to the final page by default and judges that answer. With **Follow redirects** off, the redirect itself is the answer, so a 301 counts as down unless you expect it as the status. **Keep cookies when redirecting** carries cookies along a redirect chain.
**What counts as up.** A 2xx status, unless you chose an exact status or a keyword. Any other status, a refused or reset connection, a failed name lookup and a timeout all count as down.
**Body and headers.** A request body goes out only with POST, PUT and PATCH, up to 8 KB. Basic auth and your own headers are sent with every check. The checker introduces itself as `up4-checker/1.0`; a user agent header you set wins.
**What up4 reads.** A keyword check reads the first 1 MiB of the page; the failure message says so when the word may sit beyond it. Other checks read only a small part of the answer. The checker does not run JavaScript, so a word that scripts add to the page after loading is not there for it.
## Timeouts
The request timeout is how long up4 waits for an answer before the check counts as failed. It starts at 30 seconds and can go up to 1 minute per monitor. It applies to website, port and DNS checks. A ping never waits longer than a few seconds.
## Certificates and domains
Over HTTPS, up4 checks the certificate by default. An expired, untrusted or mismatched certificate makes the check fail. **Verify the TLS certificate** can be switched off for a test server that uses a self-signed certificate.
Two optional warnings reach you before it happens: **Certificate expiry warning** counts days to the certificate's end, **Domain expiry warning** days to the end of the domain registration. Both are off until you set them.
## Regions
A check runs from a region: **Europe**, **North America**, **Asia** or **Australia**. The picker offers only regions that have a checker online. If you pick one that has just gone quiet, up4 says that no checker is online there and asks you to try again in a minute. How many regions one monitor may use depends on your plan.
Checks come from fixed addresses and identify themselves. [Where checks come from](https://upfour.io/ips) lists them, so you can allow them in a firewall.
Each region runs every check on its own, so regions multiply the cost: a monitor checked every minute from one region costs about €0.39 a month, from three regions about €1.17.
## Several regions
With more than one region, up4 compares them before it alerts: a majority of the monitor's regions must agree, each judged by its latest result within 2 minutes. One region with a bad route to your site does not wake anyone. [When you get alerted](https://upfour.io/docs/how/when-you-get-alerted.md) explains the full rule.
## Intervals
The interval is the time between two checks. Your plan sets the shortest one; up4 refuses a shorter interval and names the minimum. Above that minimum, any whole number of seconds works through the API, and the app offers presets. The app's forms start at three minutes; a monitor created through the API without an interval gets 1 minute.
Monitors that use POST, PUT, PATCH or DELETE need an interval of at least 1 minute.
Shorter intervals notice an outage sooner and cost more, see [what costs money](https://upfour.io/docs/how/what-costs-money.md). The time until an alert depends on more than the interval.
## Slow servers
Response time is measured on every check. **degraded** is a separate, optional signal: with slowdown alerts on, 3 slow checks in a row mark the monitor as degraded, and 3 fast ones clear it. Without a threshold of your own, up4 learns the usual response time of the target.
A server that keeps answering far slower than the interval can also be checked less often than you set, so up4 does not hammer it. A server that is down keeps its set interval.
## What up4 does not do here
- Checks do not sign in to pages behind a login form and do not run JavaScript.
- up4 cannot reach addresses that are only visible inside your network. Private and internal addresses are refused.
- A failure on up4's side, such as a checker without ping permission, is shown as not checked and never opens an incident.
- A keyword check reads only the first 1 MiB of a page.
[Per API POST /v1/monitors](https://upfour.io/docs/api/monitors#post_monitors)
| In the app | API field |
| --- | --- |
| Check every · How often up4 checks. Shorter intervals notice an outage sooner and cost more. | `interval_seconds` |
| Regions · The regions the checks run from. With several regions, up4 compares them before it alerts. | `regions` |
| Request timeout · How long up4 waits for an answer before the check counts as failed. | `request_timeout_s` |
| HTTP method · The method up4 sends with every check. A keyword check cannot use HEAD, because HEAD returns no page. | `http_method` |
| Follow redirects · Whether up4 follows redirects to the final page. Off, the redirect itself is the answer. | `follow_redirects` |
| Verify the TLS certificate · Whether up4 rejects an expired, untrusted or mismatched certificate. Turn it off only for a test server. | `ssl_verification` |
[Full reference](https://upfour.io/docs/api/monitors#post_monitors)
---
# Data and privacy
> What up4 stores about your checks and for how long, where it runs, how to export your data, how to delete a Company and where the data processing agreement is.
Source: https://upfour.io/docs/how/data-and-privacy
What up4 stores about your checks, for how long, where it runs and how you get your data out. The legal text is the [privacy policy](https://upfour.io/privacy).
## What up4 stores
- **Your setup.** Monitors, alert plans, status pages and incidents, with the settings you entered. Passwords for basic auth, custom headers and the secret fields of alert channels are encrypted before they are stored. Request bodies are not part of that encryption.
- **Check results.** Status, timing and error diagnostics. A keyword check reads a bounded part of the page, and up4 does not keep that page with the result.
- **Check-ins from scheduled jobs.** When they arrived and from which address.
- **Your account.** Email, name and the members of your Company, as listed in the privacy policy.
## How long it is kept
| Data | Kept |
| --- | --- |
| Individual check results | Up to 7 days in the main database. |
| Results after that | As summaries and a compressed archive for the window your plan sets: 62 days on pay as you go, 90 on Team, 365 on Agency. Reports read both. |
| Monitors, incidents, status page history | As long as the account exists. |
| Source addresses of check-ins | Seven days. |
| Delivery diagnostics and finished webhooks | 30 days. |
| Completed notification records | Up to 400 days. |
The window beyond seven days is plan data, not a fixed rule. The [privacy policy](https://upfour.io/privacy) lists every retention period, including billing records that the law requires up4 to keep.
## Where it runs
The application and its main database run in Germany, and the results of all checks are stored there. After seven days results move to an archive in Paris, so they stay in the EU. Checks run from Europe, North America, Asia and Australia, depending on the regions you choose for a monitor. A region receives the settings it needs to run its check; a monitor set to Europe only is checked from Germany alone. The privacy policy names the providers, their tasks and where they process data.
## Export your data
- **Monitors.** **Export monitors (CSV)** writes every monitor to a file that goes straight back into the batch import, in this or another account. Credentials, request headers, request bodies and proxy settings are left out on purpose and must be entered again.
- **Reports.** Under Reporting, **Export** offers PDF (share & print), CSV (spreadsheet / data), Excel workbook and JSON (machine-readable).
- **Everything about you.** For a request under data protection law, write to the address in the privacy policy.
## Delete data and accounts
**Your own identity.** Any member can delete their own identity in the account settings under **Account deletion**, with **Delete identity**. That removes your sign-in, sessions and memberships. Shared Company data stays with the Company.
**A whole Company.** Only the owner can ask for this, with **Request deletion** in the same place, or by writing to the privacy address. up4 checks subscriptions, refunds and open disputes by hand before it deletes anything, because deletion cannot be undone. Afterwards the Company's product data, public shares, attachments and archives are removed. Records the law requires, such as invoices, stay in pseudonymous form for the legal period.
Starting credit is not refundable. Paid credit that is left over is reviewed and refunded on request where that applies.
## Data processing agreement
The [data processing agreement](https://upfour.io/legal/avv) is available in German and English. If your procurement team needs different terms, send your requirements through the [contact form](https://upfour.io/contact); up4 reviews the terms and the actual processing chain, including agency arrangements.
## What up4 does not do here
- up4 holds no SOC 2 or ISO 27001 certification. The [security page](https://upfour.io/security) says what exists instead.
- Encryption of stored secrets covers the fields named above, not every field in the database.
- Which data leaves the EU depends on the check regions you pick and the services you connect, such as email or chat alerts. The privacy policy lists the transfers.
[Per API GET /v1/reports/export](https://upfour.io/docs/api/reports#get_reports_export)
Reports can be exported through the API as well.
[Full reference](https://upfour.io/docs/api/reports#get_reports_export)
---
# Troubleshooting
> Find what you see, why it happens and what to do: a monitor that is down while the site works, missing alerts, late scheduled jobs, old incidents on a status page, 402 errors and more.
Source: https://upfour.io/docs/troubleshooting
Find what you see on screen. Each entry says why it happens and what to do. If none fits, [contact the up4 team](https://upfour.io/contact) with the monitor or page you mean.
## A monitor is down, but my site works
**You see** a monitor marked **down** while the page loads in your browser. The failed check names what went wrong, for example "HTTP 403", "Check timed out", "Connection refused" or "Address not found (DNS)".
**Likely causes**
- A firewall or bot protection blocks the checkers. They come from fixed addresses, listed under [where checks come from](https://upfour.io/ips).
- The page answers a program differently from a browser, for example with a 403, or redirects while **Follow redirects** is off. Only a 2xx answer counts as up, unless you expect another status.
- The server refuses the method. A monitor set to HEAD fails when the server answers 405.
- The server needs longer than the request timeout, 30 seconds unless you changed it, at most 1 minute.
- The name does not resolve from the checkers yet, for example after a DNS change.
- Only some regions fail, because of a regional block or a bad route.
**What to do** Open the failed check and read its message. Allow the checker addresses, set the method to GET or raise the timeout as it fits. [Website checks in detail](https://upfour.io/docs/how/checks-and-regions#http-checks).
## A keyword check fails, but the word is on the page
**You see** a failed check with the message "Required keyword not found".
**Likely causes**
- **Ignore case** is off. The search is then exact about capitals, and the message adds "search is case-sensitive".
- The word sits beyond the first 1 MiB of the response. The message says "not found in the first 1 MiB".
- Scripts add the word after the page loads. The checker reads only the HTML it receives and runs no JavaScript.
- The page does not answer with a 2xx status, for example an error or consent page. A keyword check needs a 2xx status as well as the word.
- The phrase contains markup or special characters, so it differs from the HTML as sent.
**What to do** Open the page source in your browser and search for the exact word. Shorten the phrase to one plain word. [Check page content](https://upfour.io/docs/check-page-content.md).
## A check fails with a certificate error
**You see** a failed check on an HTTPS address with the message "TLS certificate or handshake failed".
**Likely causes** The certificate has expired, is not trusted, is self-signed, or was issued for another name. up4 verifies certificates unless you switch that off. The message also appears when the server and the checker find no common TLS setting.
**What to do** Renew or fix the certificate. For a test server with its own certificate, switch off **Verify the TLS certificate**. To hear about expiry early, set **Certificate expiry warning**. [Certificates and domains](https://upfour.io/docs/how/checks-and-regions#tls-certificates).
## A monitor keeps flipping between up and down
**You see** many short outages and all-clears for one monitor.
**Likely causes** The target fails now and then, for example under load. up4 already waits for 3 matching results before it changes state, so the failures last longer than a single check.
**What to do** Raise **Extra confirmation time** so a failure must last longer before it counts, and **Recovery period** so up4 waits for stable before the all-clear. Or choose **Skip short blips** for the alerts. [When you get alerted](https://upfour.io/docs/how/when-you-get-alerted.md).
## No alert email arrives
**You see** a monitor that is down, or a test alert that does not arrive, and no email.
**Likely causes**
- The state has not changed yet. It needs 3 matching results.
- The monitor is paused or inside a maintenance window, so it is not checked.
- The alert mode is **Skip short blips**: it alerts only once the downtime adds up to 3 minutes. A shorter outage stays in the history.
- Nobody is selected. The form warns you: Nobody is alerted when this monitor goes down. Pick a channel or an alert plan..
- The email landed in spam, or the address is wrong.
- Monitoring is paused because the credit is used up, see [Monitoring is paused](https://upfour.io/docs/troubleshooting#monitoring-paused).
**What to do** Select **Send test alert** on the monitor page, check the spam folder and add a second alert channel. [Receive alerts](https://upfour.io/docs/receive-alerts.md).
## The alert arrives late
**You see** an alert minutes after the site went down.
**Likely causes** The first failed check comes at the next interval; two instant re-checks follow. **Extra confirmation time** adds its time on the way down, **Skip short blips** waits for the downtime to add up, and an alert plan can wait before its later steps. After that, delivery depends on the alert channel and its provider.
**What to do** Shorten the interval, lower the extra confirmation time and put the people who must react first in the first step of the alert plan. [When you get alerted](https://upfour.io/docs/how/when-you-get-alerted.md).
## A monitor stayed quiet during an outage
**You see** no alert and no check results for a stretch in which the site was down.
**Likely causes** A maintenance window was active. The checker skips a monitor's checks inside its window, so there are no results and no alerts. The window follows the time zone you set on the monitor; the form presets Europe/Berlin, so a window entered in your own local time can land hours off.
**What to do** Check the window's times, weekdays and time zone on the monitor. [Plan maintenance](https://upfour.io/docs/plan-maintenance.md).
## A scheduled job shows late although it ran
**You see** "past its window, still inside the grace period", "grace period elapsed without a ping" or "last run reported an error" on a job that did run.
**Likely causes**
- up4 counts from the last check-in, not from your cron schedule. Once the expected interval has passed the job is late; once the grace period has passed as well it is missed and up4 alerts, within 30 seconds of that moment.
- The check-in goes out at the start of the job, or the job runs longer than interval plus grace.
- The check-in never reaches up4: a wrong address (up4 answers 404), a proxy in the way, or a signature that does not match (up4 answers 401).
- The job reported a failure itself, so it reads "last run reported an error" until the next good check-in.
- Monitoring is paused. up4 acknowledges check-ins with status 200 but drops them.
**What to do** Send the check-in as the last step of the job, widen the grace period, and call the address by hand: a working check-in answers with status 200\. [Watch a scheduled job](https://upfour.io/docs/watch-a-scheduled-job.md).
## A new scheduled job never gets a first check-in
**You see** "no ping received yet" long after you set it up.
**Likely causes** The job has not run yet because its schedule has not come around, the address was copied incompletely, or the request does not leave your network. up4 accepts GET, POST and HEAD requests. A job that was reset when monitoring resumed after a pause waits for its next check-in the same way.
**What to do** Run the job once by hand and watch for status 200\. Copy the address again from the job's page. [Watch a scheduled job](https://upfour.io/docs/watch-a-scheduled-job.md).
## My status page shows an old incident
**You see** an incident on the public page that is long over.
**Likely causes** A status report you wrote by hand stays open until you post an update that resolves it. Automatic reports are opened and closed by a background job that runs periodically, so they can trail the incident by a short while. A public page is also cached briefly, so a change can take a moment to show.
**What to do** Open the page in the editor, find the report and post an update that resolves it. [Publish a status page](https://upfour.io/docs/publish-a-status-page.md).
## Check results look slow
**You see** response times higher than in your browser.
**Likely causes** The time covers the whole request from the region's checker to your server and back, including the connection and certificate set-up. A region far from your server shows higher times than one near it. A slow server shows the same in every region.
**What to do** Compare the regions of the monitor. Add a region near your visitors. To be told about slowness, switch on "Warn when the target gets slow but stays up" and, if you like, set your own value under **Slower than**. [Slow servers](https://upfour.io/docs/how/checks-and-regions#slow-servers).
## I cannot create a monitor (402 or credit message)
**You see** a refusal such as "your available credit is used up", "minimum check interval for your plan is …" or "plan limit exceeded". Through the API it carries the status 402.
**Likely causes** The credit is used up. The interval is shorter than your plan allows. The monitor asks for more regions than your plan includes, or you reached a ceiling on the number of monitors.
**What to do** Select **Top up balance** or choose a plan, lengthen the interval or use fewer regions. [Credit and plans](https://upfour.io/docs/credit-and-plans.md).
## Monitoring is paused
**You see** "Monitoring is paused" or the banner "Grace mode — balance used up".
**Likely causes** The starting credit is used up before a first payment: monitors and scheduled jobs pause at once. After a first payment, an empty balance starts grace mode: for 7 days checks run every 5 minutes at no charge, then monitoring pauses. Nothing is deleted, and check-ins during the pause are not counted.
**What to do** Select **Top up balance** or choose a plan. Checks continue once there is credit. [Credit and plans](https://upfour.io/docs/credit-and-plans.md).
## A region cannot be chosen
**You see** a region you cannot select, marked "No active, healthy checker in this region right now", or the refusal "plan limit exceeded: regions".
**Likely causes** No checker in that region has reported in recently, or your plan allows fewer regions per monitor.
**What to do** Try again in a minute, or pick another region. [Regions](https://upfour.io/docs/how/checks-and-regions#regions).
## My address is refused
**You see** a refusal when you save an address such as `localhost` or one starting with `192.168`, or a failed check reading "Target blocked by the network safety policy".
**Likely causes** The checkers sit on the public internet and cannot reach private or reserved addresses. A name that resolves to such an address is blocked when the check connects.
**What to do** Monitor a public address. For something inside your network, let it report out with a scheduled job instead. [Watch a scheduled job](https://upfour.io/docs/watch-a-scheduled-job.md).
## An incident has no screenshot
**You see** an incident without a screenshot and a note that says why, for example "No screenshot: monitoring is paused until the balance is topped up.".
**Likely causes** **Incident screenshots** is off for the monitor, this month's allowance is used up (the note names the date screenshots resume), the site did not respond so there was nothing to capture, or monitoring is paused or in grace mode. Screenshots exist for website monitors only.
**What to do** Read the note on the incident and, if the setting is off, switch it on for the monitor. [Handle an incident](https://upfour.io/docs/handle-an-incident.md).
## The invite link has expired
**You see** "This invite has expired." or "This invite link is invalid or has expired."
**Likely causes** Invite links work for a limited time after they were sent. A link that was already used is not valid again.
**What to do** Ask an admin to send the invite again with **Resend** in the member list. [Team and roles](https://upfour.io/docs/team-and-roles.md).
## What up4 does not do here
- This page covers what up4 shows and does. It cannot see inside your servers, firewalls or mail systems.
- up4 cannot tell why a site refused a check beyond the status and message it received.
---
# Form fields
> Every field in the up4 forms: what it does, what the form preselects and which guide explains it.
Source: https://upfour.io/docs/reference/form-fields
Every field under the label the app shows, what it does and what the form preselects. The API field names are in the Per API box of each guide.
## Monitors
| Field | What it does | Default | More |
| --- | --- | --- | --- |
| Name | The name shown in lists and alerts. | – | [Watch a website](https://upfour.io/docs/watch-a-website.md) |
| Monitor type | The kind of check: a website, a port, a DNS record or a ping. | – | [Checks and regions](https://upfour.io/docs/how/checks-and-regions#check-types) |
| URL to watch | The address up4 requests. A missing https:// is added for you. | – | [Watch a website](https://upfour.io/docs/watch-a-website.md) |
| Check every | How often up4 checks. Shorter intervals notice an outage sooner and cost more. | 3 minutes in the app; 1 minute through the API | [Checks and regions](https://upfour.io/docs/how/checks-and-regions#intervals) |
| Regions | The regions the checks run from. With several regions, up4 compares them before it alerts. | – | [Checks and regions](https://upfour.io/docs/how/checks-and-regions#regions) |
| Counts as down when | What counts as up: a successful answer, an exact status code, or a word that must or must not appear. | Any 2xx answer | [Check page content](https://upfour.io/docs/check-page-content.md) |
| Text to look for | The word or phrase to look for in the page. Capitals are ignored while Ignore case is on. | – | [Check page content](https://upfour.io/docs/check-page-content.md) |
| Expected status code | The status code the page must answer with, for example for a redirect you want to keep. | – | [Check page content](https://upfour.io/docs/check-page-content.md) |
| HTTP method | The method up4 sends with every check. A keyword check cannot use HEAD, because HEAD returns no page. | GET in the app; HEAD through the API when no method is sent | [Checks and regions](https://upfour.io/docs/how/checks-and-regions#http-checks) |
| Request timeout | How long up4 waits for an answer before the check counts as failed. | 30 seconds, at most 1 minute | [Checks and regions](https://upfour.io/docs/how/checks-and-regions#timeouts) |
| Request body | Data sent with POST, PUT and PATCH checks, up to 8 KB. | – | [Checks and regions](https://upfour.io/docs/how/checks-and-regions#http-checks) |
| Follow redirects | Whether up4 follows redirects to the final page. Off, the redirect itself is the answer. | On | [Checks and regions](https://upfour.io/docs/how/checks-and-regions#http-checks) |
| Keep cookies when redirecting | Keeps cookies set during a redirect chain, for sites that set a cookie before they show the page. | Off | [Checks and regions](https://upfour.io/docs/how/checks-and-regions#http-checks) |
| Verify the TLS certificate | Whether up4 rejects an expired, untrusted or mismatched certificate. Turn it off only for a test server. | On | [Checks and regions](https://upfour.io/docs/how/checks-and-regions#tls-certificates) |
| Certificate expiry warning | Warns you this many days before the certificate expires. Off by default. | Off | [Checks and regions](https://upfour.io/docs/how/checks-and-regions#tls-certificates) |
| Domain expiry warning | Warns you this many days before the domain registration expires. Off by default. | Off | [Checks and regions](https://upfour.io/docs/how/checks-and-regions#tls-certificates) |
| When should we alert you? | Right away alerts once checks confirm an outage. The quiet option skips short blips. | Right away | [When you get alerted](https://upfour.io/docs/how/when-you-get-alerted.md) |
| Alert plan | An alert plan pages people step by step until someone acknowledges, on top of the channels. | – | [Build an alert plan](https://upfour.io/docs/build-an-alert-plan.md) |
| Recovery period | How long the monitor must stay healthy before the outage counts as over. | 60 seconds in the form | [When you get alerted](https://upfour.io/docs/how/when-you-get-alerted.md) |
| Incident screenshots | Takes a screenshot of the page when an incident opens. Counts against a monthly allowance. | – | [Handle an incident](https://upfour.io/docs/handle-an-incident.md) |
| Host | The server up4 connects to. | – | [Check a server, port or DNS record](https://upfour.io/docs/check-server-port-dns.md) |
| Port | The port up4 connects to, from 1 to 65535. | – | [Check a server, port or DNS record](https://upfour.io/docs/check-server-port-dns.md) |
| DNS server | The DNS server up4 asks. Empty uses a public one. | – | [Check a server, port or DNS record](https://upfour.io/docs/check-server-port-dns.md) |
| Record type | The record type to look up: A, AAAA, CNAME, MX, NS or TXT. | A | [Check a server, port or DNS record](https://upfour.io/docs/check-server-port-dns.md) |
| Expected answer | A value the answer must contain. Empty only checks that the name resolves. | – | [Check a server, port or DNS record](https://upfour.io/docs/check-server-port-dns.md) |
| Extra confirmation time | seconds; 0 means no extra wait | 0, no extra wait | – |
| Ignore case | On by default: capitalization is ignored. | – | [Check page content](https://upfour.io/docs/check-page-content.md) |
| Headers | Sent with every check. Up to 20 headers; values are stored encrypted. | – | [Check page content](https://upfour.io/docs/check-page-content.md) |
| Username | User name for basic authentication. | – | [Check page content](https://upfour.io/docs/check-page-content.md) |
| Password | Password for basic authentication. Stored encrypted and never returned. | – | [Check page content](https://upfour.io/docs/check-page-content.md) |
| Proxy | Send the check through your proxy. The port goes into the proxy port field. | – | [Check page content](https://upfour.io/docs/check-page-content.md) |
| IP version | Applies to ping monitors only. | – | [Check a server, port or DNS record](https://upfour.io/docs/check-server-port-dns.md) |
| Domain to look up | The domain name up4 looks up. | – | [Check a server, port or DNS record](https://upfour.io/docs/check-server-port-dns.md) |
| Host name or IP address | For a ping monitor the host or IP address goes into the address field. | – | [Check a server, port or DNS record](https://upfour.io/docs/check-server-port-dns.md) |
## Alerting
| Field | What it does | Default | More |
| --- | --- | --- | --- |
| Name | – | – | – |
| Type | email, sms, voice, webhook, slack, telegram, msteams, discord, pagerduty, zapier, datadog, newrelic, jira, grafana, ntfy or pushover | – | – |
| Email address | – | – | – |
| Webhook URL | – | – | – |
| Signing secret | – | – | – |
| Slack Webhook URL | Slack, Microsoft Teams, Discord, Zapier and Grafana use this key for their URL | – | – |
| Bot Token | – | – | – |
| Chat ID | – | – | – |
| Routing Key | – | – | – |
| Send every notice on its own | – | – | – |
| Alert plan name | – | – | – |
| Wait for | seconds; from step 2 on at least 60 | – | – |
| Who should we alert? | a list of alert channel ids | – | – |
| How urgent is this alert? | high, voice, sms or low | – | – |
| Reminders after the last step | 0 to 8 | – | – |
| Name | – | – | – |
| Team members | user ids in rotation order | – | – |
| Rotation frequency | daily, weekly or custom | – | – |
| Handoff time | – | – | – |
| Handoff day | – | – | – |
| Timezone | – | – | – |
| Who covers | – | – | – |
| From | – | – | – |
| Until | – | – | – |
| Reason (optional) | – | – | – |
## Clients
| Field | What it does | Default | More |
| --- | --- | --- | --- |
| Client name | – | – | – |
| Primary domain | – | – | – |
| Starter template | – | – | – |
| Communication language | – | – | – |
| Let this client sign in | – | – | – |
| Pause their monitors and scheduled jobs | query parameter, true to pause | – | – |
| Portal view | – | – | – |
| Incidents | – | – | – |
| Reports | – | – | – |
| Service levels | – | – | – |
| Response time | – | – | – |
| Incident analytics | – | – | – |
| Downtime evidence | – | – | – |
| Report downloads | – | – | – |
## Scheduled jobs
| Field | What it does | Default | More |
| --- | --- | --- | --- |
| Name | – | – | – |
| Expect a check-in every | Whole seconds; the form turns seconds, minutes, hours or days into seconds. | – | – |
| with a grace period of | Whole seconds, zero or more. | – | – |
| Group | – | – | – |
| Client | – | – | – |
| Metadata | – | – | – |
## Incidents
| Field | What it does | Default | More |
| --- | --- | --- | --- |
| Brief description | – | – | – |
| In-depth description | – | – | – |
| Affected monitor (optional) | – | – | – |
| Severity | critical, warning or info | – | – |
| Post an update | – | – | – |
| Escalate to a specific person | the request also needs an Idempotency-Key header | – | – |
| Incident screenshots | a setting of the monitor, not of the incident | – | – |
## Maintenance windows
| Field | What it does | Default | More |
| --- | --- | --- | --- |
| From | HH:MM, in the window's time zone. | – | – |
| Until | – | – | – |
| Timezone | An IANA zone such as Europe/Berlin. | – | – |
| On these days | Three-letter day codes; an empty list means every day. | – | – |
| Title | Send the entry as a maintenance update with status scheduled. | – | – |
| Start date | One timestamp; the app joins start date and start time. | – | – |
| End date | One timestamp; the app joins end date and end time. | – | – |
| Repeat | none, weekly or monthly. | – | – |
| During the window | none keeps checking, pause_checks pauses the affected monitors. | – | – |
| Affected components | – | – | – |
| Notify subscribers | – | – | – |
## Playbooks
| Field | What it does | Default | More |
| --- | --- | --- | --- |
| Title | – | – | – |
| Description | – | – | – |
| Owner | – | – | – |
| Steps | a list of steps, each with a title and a description | – | – |
| Linked monitors | – | – | – |
## Reports
| Field | What it does | Default | More |
| --- | --- | --- | --- |
| Name | – | – | – |
| Report | – | – | – |
| Scope to client (optional) | – | – | – |
| Format | – | – | – |
| Recipients | – | – | – |
| Cadence | – | – | – |
| Day of month | – | – | – |
| Send at (hour) | – | – | – |
| Timezone | – | – | – |
| Report language | – | – | – |
## Status pages
| Field | What it does | Default | More |
| --- | --- | --- | --- |
| Company name | – | – | – |
| Public page slug | – | – | – |
| Structure | sections with their resources, in display order | – | – |
| Layout | an object with layout, ground and header colours | – | – |
| Announcement | – | – | – |
| How many days to display? | – | – | – |
| Default language | – | – | – |
| Reply-to address for status e-mails | – | – | – |
| Password | – | – | – |
| Custom CSS | – | – | – |
| Publish status page | a page created through the API starts unpublished unless you send true | – | – |
## Teams and members
| Field | What it does | Default | More |
| --- | --- | --- | --- |
| Email address | – | – | – |
| Role | – | – | – |
| Team | – | – | – |
| Team name | – | – | – |
A dash means the form preselects nothing, or the guide describes the value. Defaults are those of the form in the app; the API can differ where a row says so.
---
# Glossary
> The words up4 uses, each in one line: Company, Team, Client, monitor, check, scheduled job, incident, alert plan, grace mode, allowance and more.
Source: https://upfour.io/docs/reference/glossary
The words up4 uses, each in one line. Names in the app are the ones you see on screen.
## Accounts and access
- **Company:** The top-level account. It owns the monitors, members, billing and credit; everything else sits inside one Company.
- **Team:** A group of members inside a Company. A Team decides who can see and change what.
- **Client:** A customer of an agency. Clients keep monitors, scheduled jobs, status pages and reports apart. They exist once agency mode is switched on.
## Checking
- **Monitor:** One target that up4 checks on an interval: a website, a port, a DNS record or a ping.
- **Check:** One run of a monitor from one region. It ends as up or down and records how long the answer took.
- **Region:** A place checks run from: Europe, North America, Asia or Australia. See [checks and regions](https://upfour.io/docs/how/checks-and-regions#regions).
- **Interval:** The time between two checks of a monitor.
- **Keyword check:** A website check that also reads the page and looks for a word that must, or must not, appear.
- **Scheduled job:** A task that runs on your side and reports to up4\. up4 raises the alarm when the report stays away.
- **Check-in:** The short request a scheduled job sends to its up4 address to say it ran.
- **Grace period:** Extra time a scheduled job gets after its expected time before up4 counts the check-in as missing.
## States and timing
- **Up and down:** A monitor is **up** while checks succeed and **down** once they fail.
- **Degraded:** **degraded**: the target answers, but slower than expected. up4 only warns about it when slowdown alerts are on.
- **Pending:** **pending**: a monitor that has no result yet.
- **Paused:** Checks are stopped on purpose, so a paused monitor sends no alerts.
- **Confirmation:** up4 changes a monitor's state only after 3 matching results, so a single failed check does not alert you.
- **Confirmation period:** Optional extra time a failure must last before it counts as an outage. It applies on the way down only.
- **Recovery period:** How long a monitor must stay healthy before the outage counts as over.
- **Availability:** The share of checks that succeeded in a period, also called uptime.
- **Response time:** How long a check waited for the answer.
## Alerting
- **Alert channel:** A way up4 reaches you, such as email, SMS, a call, a chat app or a webhook.
- **Alert plan:** Steps with wait times and repeats that bring in people one after another until someone acknowledges.
- **Alert mode:** Per monitor: **Right away** alerts once an outage is confirmed; **Skip short blips** waits for a longer outage in total.
- **On-call rotation:** A schedule that says who is on call when. An alert plan can page whoever is on call.
- **Acknowledge:** **Acknowledge**: tell up4 you have seen an incident. It promises neither a takeover nor a fix.
## Incidents and status pages
- **Incident:** The recorded outage, from the first confirmed failure to the recovery, with its timeline.
- **Resolve:** **Resolve**: close an incident once the cause is fixed.
- **Playbook:** Reusable steps for fixing a known problem, shown on the incident.
- **Maintenance window:** A planned period in which up4 skips checks for a monitor, so planned work does not alert you.
- **Status page:** A public page that shows the state of the monitors you choose, plus your status reports.
- **Status report:** A message you post on a status page during an incident or maintenance.
## Credit and plans
- **Starting credit:** The credit a new Company starts with, €9. Checks use it up. When it is gone, monitoring pauses until you add credit or choose a plan.
- **Wallet:** Your prepaid balance. You top it up, and checks draw from it.
- **Grace mode:** After a first payment, an empty balance does not stop monitoring at once: for 7 up4 checks every 5 minutes at no charge, then pauses.
- **Allowance:** The usage a Team or Agency plan includes each month.
- **Add-on:** Extra capacity you can add to a plan. See [add-ons](https://upfour.io/docs/reference/limits#addons).
---
# Limits and allowances
> What each plan includes, add-on packs, protection limits, status page mail rules, request rates and the maximum size of imports. Look-up tables.
Source: https://upfour.io/docs/reference/limits
What each plan includes, what add-ons cost and where up4 stops runaway use. The numbers come from the product itself and can change; the terms are binding.
## What each plan includes
| | Starting credit | Pay as you go | Team | Agency |
| --- | --- | --- | --- | --- |
| Monitors | 50 | No plan limit | 100 | 500 |
| Scheduled jobs | 20 | No plan limit | 100 | 1,000 |
| Status pages | 3 | No plan limit | 10 | 500 |
| Alert channels | 20 | No plan limit | 50 | 100 |
| Regions per monitor | 4 | 4 | 4 | 4 |
| History kept, days | 62 | 62 | 90 | 365 |
| Team members | No limit | No limit | No limit | No limit |
| Custom status page domains | None | Metered by day | 1 | 10 |
| E-mail subscribers on status pages | 100 | 250 included, more metered | 1,000 | 1,500 |
| Incident screenshots a month | Metered | Metered | 500 | 2,500 |
| Add-ons | No | No | Yes | Yes |
Checks, check-ins and, on pay as you go, screenshots are metered; [what costs money](https://upfour.io/docs/how/what-costs-money.md) says how. Team includes usage worth €180 a month and Agency €600, both at list price.
After a first payment, pay as you go has no limit on the number of monitors, scheduled jobs, status pages and alert channels. A paid pay-as-you-go Company can have 10 published status pages without a business feature at once. The subscriber import for status pages waits for the first payment.
When a plan's check budget is used up, up4 blocks only new load: new monitors, shorter intervals and more regions. Running monitors keep their interval, and no overage is charged. [Credit and plans](https://upfour.io/docs/credit-and-plans.md).
## Add-ons
Add-ons raise one limit of a Team or Agency plan in fixed packs. Book them under **Add-ons**. Pay as you go and the starting credit do not book packs; they meter the same things instead. Only owners and administrators can book.
| Add-on | One pack | Per month, net |
| --- | --- | --- |
| **Custom domains** | 1 domain | €2 |
| **E-mail subscribers** | 1,000 subscribers | €5 |
| **Incident screenshots** | 1,000 screenshots a month | €5 |
| **Monitors** | 50 monitors | €4 |
| **Scheduled jobs** | 100 scheduled jobs | €4 |
| **Checks** | 10 million checks a month (list value €90) | €8 |
- Each kind takes up to 20 packs and is one line on the invoice.
- More takes effect at once. You pay the prorated amount for the rest of the billing period with your saved payment method after one confirmation. A reduction applies when the paid period ends and you can take it back until then. There is no refund.
- With a yearly plan a pack costs its yearly price, ten monthly prices for twelve months.
- Screenshot and check packs count for the UTC calendar month, prorated in the month you book them. Capacity packs for domains, subscribers, monitors and jobs are there in full at once.
- Over a limit, for example after reducing packs, nothing is deleted and running monitors keep running. Adding more of that kind waits until you are under the limit or book a pack.
- A declined card leaves the change pending until you pay the invoice. The plan keeps running and no grace mode starts.
- Packs end with the subscription. On a switch between Team and Agency the packs are adjusted to what the new plan does not already include.
- Status pages are not sold in packs. Agency has no price per page, only the plan limit above.
## Protection limits
A protection limit stops a runaway script, a loop or a typo from harming the service or other customers. It is not a price and does not cut what your plan includes. Normal use stays well below. When you reach one, that action is declined with a message that names the limit.
Select Request a higher limit in that message to ask for a higher one. It opens a support message with your Company and the limit filled in. Add a line on what you need it for.
### Tests and Check now
| | Starting credit | Pay as you go | Team | Agency |
| --- | --- | --- | --- | --- |
| Wait between two tests of one alert channel | 30 seconds | | | |
| Channel tests and test alerts per Company, a day | 100 | | | |
| Alert channels reached by one test alert | 10 | | | |
| Check now runs per Company, a day | 500 | | | |
| Check now runs at the same time | 3 | | | |
| Check now runs per Company, a minute | 10 | | | |
### Reports and storage
| | Starting credit | Pay as you go | Team | Agency |
| --- | --- | --- | --- | --- |
| Report schedules | 50 | 50 | 100 | 500 |
| Recipients across all schedules | 500 | 500 | 1,000 | 5,000 |
| Manual report runs per Company, a day | 20 | 20 | 20 | 100 |
| Attachments and report files together | 2 GiB | 2 GiB | 5 GiB | 25 GiB |
| Attachments per incident | 25 | | | |
| Views of one report share link, an hour | 60 | | | |
| Size of one attachment | 10 MB | | | |
| New share links expire after | 90 days, unless you choose to keep them | | | |
### Alert plans and alert floods
| | Starting credit | Pay as you go | Team | Agency |
| --- | --- | --- | --- | --- |
| Steps per Alert plan | 10 | | | |
| Targets per step | 50 | | | |
| Alert deliveries per Company and hour before further alerts arrive as one summary | 1,000 | 1,000 | 1,000 | 5,000 |
| Status changes of one scheduled job an hour before its alerts are bundled | 6 | | | |
### Integrations and invitations
| | Starting credit | Pay as you go | Team | Agency |
| --- | --- | --- | --- | --- |
| Webhook subscriptions | 50 | 1,000 | 50 | 1,000 |
| API keys | 100 | | | |
| External status sources | 50 | 50 | 50 | 500 |
| Webhook tests per Company, a day | 100 | | | |
| Webhook redeliveries per Company, a day | 100 | | | |
| Invitations sent per Company, a day | 25 | 100 | 100 | 100 |
| Wait before resending an invitation | 2 minutes | | | |
### Incident screenshots
| | Starting credit | Pay as you go | Team | Agency |
| --- | --- | --- | --- | --- |
| Capture attempts per Company, a day (successes and failures) | 100 | 100 | 100 | 500 |
| After repeated failures | 3 failed captures in a row pause screenshots of that monitor for 6 hours | | | |
## In grace mode
After a balance runs out, [grace mode](https://upfour.io/docs/credit-and-plans#running-out) keeps monitoring running at one check every 5 minutes for 7 days. A few actions are narrower in that time.
- Channel tests, test alerts and Check now are limited to 10 a day each.
- Attachments, manual report runs, AI features, webhook tests and redeliveries, subscriber imports and incident screenshots are switched off. Scheduled reports keep running.
- Check-ins of scheduled jobs share one pot of 288 stored check-ins per job and UTC day. A further check-in is answered as ignored, is neither stored nor billed, and still counts as a sign of life, so no false outage appears.
## Status page mail and subscribers
These rules keep mail to your subscribers calm under load. Nothing is dropped silently: the status page always shows the current state, and a mail that cannot be sent within 24 hours expires.
| Interim updates per subscription and incident | one per 30 minutes, carrying the newest state |
| --- | --- |
| Notifying entries per page | 10 an hour, in a burst up to 5 |
| Mails to one subscription in 24 hours before the rest goes out as one summary | 20 |
| Confirmation mail for the same address and page | at most every 2 minutes and 3 times in 24 hours |
| Open confirmations of one address across all pages | 5 |
| New recipients per Company and hour | 100 on the starting credit, 1,000 after a first payment; above it the mail goes out in a later hour |
| Subscriber import | up to 10,000 rows and 2 MiB, one at a time per Company |
## Request rates
A request over a rate limit is answered with status 429\. The API adds a `Retry-After` header. Developers find the details under [rate limits in the API docs](https://upfour.io/docs/api#rate-limits).
| Who or what | Per minute | Burst |
| --- | --- | --- |
| One API key or browser session | 1,200 | 300 |
| One IP address, all other requests | 3,000 | 300 |
| Check-ins of one scheduled job, per IP address | 120 | 20 |
| Sign-in and second factor, per IP address | 10 | 10 |
| Sign-up, e-mail sign-in link and password reset, per IP address | 5 | 5 |
| Status page subscribe, per IP address | 10 | 5 |
| Check now, per Company | 10 | 10 |
## Fixed maximums
| Wait between two steps of an Alert plan, at least | 1 minute |
| --- | --- |
| Repeats of an Alert plan, at most | 8 |
| Monitor import (paste URLs, file or API) | up to 500 rows and 2 MB per import |
| Request timeout of a monitor | default 30 seconds, at most 1 minute |
| Shortest interval of a monitor that uses POST, PUT, PATCH or DELETE | 1 minute |
| Shortest expected interval of a scheduled job | 30 seconds |
The shortest check interval of a plan and the regions a monitor can use are shown in the monitor form; they depend on your plan. [Watch a website](https://upfour.io/docs/watch-a-website.md).
---
# Keyboard shortcuts
> Every keyboard shortcut the up4 app handles: the command palette, the Company and client switcher, list selection, the timeline and editors.
Source: https://upfour.io/docs/reference/shortcuts
The shortcuts the up4 app handles. On a Mac use ⌘, elsewhere Ctrl.
## Command palette
| Keys | What it does |
| --- | --- |
| ⌘+K or Ctrl+K | Open the command palette, or close it again. Works while you type in a field. |
| / | Open the command palette when no text field has focus. |
| ↑ or ↓ | Move through the results. |
| ↵ | Open the highlighted result or run the highlighted action. |
| ⇥ or Shift+⇥ | While you search, switch the filter between all results, monitors, scheduled jobs, incidents and status pages. Shift goes back. |
| Esc | Close the command palette. |
## Anywhere in the app
| Keys | What it does |
| --- | --- |
| ⌘+J or Ctrl+J | Open the switcher for Company, all clients or one client. Does not fire while you type in a field. |
| Esc | Close the open dialog. |
## Lists
| Keys | What it does |
| --- | --- |
| Shift+click | In a list with checkboxes, select every row between the last row you clicked and this one. |
| ⌘+click or Ctrl+click | While a selection is open, add one row to it or remove it. Without a selection the click opens the row in a new tab. |
## Monitor timeline
| Keys | What it does |
| --- | --- |
| ← or → | Move the monitor timeline left or right while the chart has focus. |
| + or − | Zoom the monitor timeline in or out while the chart has focus. |
| Esc | Step back out of a zoomed timeline. A dialog, menu or text field that has focus keeps the key. |
## Forms and editors
| Keys | What it does |
| --- | --- |
| ⌘+↵ or Ctrl+↵ | On the import page, preview the pasted addresses. |
| ↑ or ↓ | In the status page editor, move a section or a resource up or down while its drag handle has focus. |
## Pause and resume from the palette
Type `pause` or `resume` and part of a monitor's name into the command palette. It lists the matching monitors, each with that action. You need at least three characters, and members with the **Viewer** role do not get these actions.
## Key hints that do nothing
Two key hints on screen are not shortcuts yet. The / in the search box of a list does not jump into that box; the key opens the command palette, as in the table. The ⌘⇧R next to resetting a saved view is a label only.
---
# Status page CSS
> The classes, attributes and variables a status page's own CSS can rely on, with the cascade rules and three tested examples.
Source: https://upfour.io/docs/reference/status-page-css
The hooks your own CSS can rely on across releases. Everything not listed here may change without notice.
Enter your CSS in **Custom CSS** under **Advanced**. Use the editor wherever it has a control: logo, accent colour, header colour for light and dark, background and theme are set there, and the editor derives readable text colours from them. CSS is for what the editor does not offer. How to create the page is in [Publish a status page](https://upfour.io/docs/publish-a-status-page.md).
## How it is applied
Your CSS sits in a style element inside the page, after the layout's own stylesheet, so at equal specificity your rule wins. Nothing scopes it for you: selectors reach the whole page document, so start them with `.sp`. The layouts' own rules are plain and class-prefixed (`.sp .sp-…`), so write yours the same way, not shorter. Dark mode is the class `dark` on the document element: write `.dark .sp …` for it.
CSS written before the layouts arrived (October 2026) targets markup that no longer exists and has to be rewritten against these hooks.
## Attributes on the root
The element `.sp` carries these attributes, and all values are stable. Status elements carry `data-s`.
| Attribute | Values | What it tells you |
| --- | --- | --- |
| `data-layout` | `essential`, `brand`, `overview` | The layout the page uses. |
| `data-surface` | `open`, `cards` | Open paper with hairlines (Essential) or cards (Brand, Overview). |
| `data-state` | `ok`, `warn`, `down`, `idle` | The overall state of the page. |
| `data-ground` | `paper`, `white`, `cool` | The chosen background. |
| `data-head` | `brand` | Present only when a header colour is set for the current theme. |
| `data-tv` | – | Present (empty) in the TV view. |
| `data-s` | `up`, `ok`, `degraded`, `warn`, `down`, `maintenance`, `stale`, `idle` | The state of a status element such as a service row or a message. |
## Blocks you can target
Only these blocks are documented. Their inner structure is not.
| Class | What it is | Layouts |
| --- | --- | --- |
| `.sp-head` | Header band: logo or name, language, notify button. | all |
| `.sp-logo` | Your logo image. | all |
| `.sp-ident-name` | The company name when there is no logo. | all |
| `.sp-btn, .sp-btn-head, .sp-btn-accent` | Buttons. The head variant sits in the header, the accent variant uses the accent colour. | all; head variant: Essential, Overview |
| `.sp-state` | The answer to "is everything up?": headline, mark and meta line. | all |
| `.sp-counts` | Counts per state in the answer strip. | Overview |
| `.sp-msg` | An open incident or a running maintenance message. | all |
| `.sp-note` | The announcement. | all |
| `.sp-maint` | One planned maintenance entry. | all |
| `.sp-card` | The panel around the planned maintenance entries. | Brand, Overview |
| `.sp-group, .sp-group-head, .sp-group-sum` | A group of services, its title and its sum. | all; sum: Overview |
| `.sp-svc` | One service row. | all |
| `.sp-svc-name` | The service name. | all |
| `.sp-svc-word` | The state in words. | all (Overview hides it for services that are up) |
| `.sp-svc-uptime` | The uptime figure, or the latest response time in the response-time view. | all |
| `.sp-svc-bar` | The uptime bar. | all |
| `.sp-svc-note` | Explanation, source and freshness of a row. | all |
| `.sp-svc-ext` | The "External" chip. | all |
| `.sp-switch, .sp-range` | The uptime and response-time switch, and the 30, 60 and 90 day switch. | all; Overview has no range switch |
| `.sp-past, .sp-cal` | The history block, collapsed until opened, and its incident calendar. | all |
| `.sp-sub` | The subscribe panel. | all |
| `.sp-foot` | The footer. | all |
## Variables you may override
All are custom properties on `.sp`. Defaults are given as light, then dark. Variables marked as set by the editor are replaced by the editor's choices. When you change a background, change the text on it too: nothing re-checks contrast for CSS.
| Variable | Meaning | Default | Set by the editor |
| --- | --- | --- | --- |
| `--sp-bg` | Page ground. | Paper #FAF9F5 · #17181A; white #FFFFFF · #0F1011; cool #F3F4F6 · #14161A | No |
| `--sp-surface` | Cards and panels. | #FFFFFF · #1F2023 | No |
| `--sp-ink` | Text. | #141415 · #EEEBE3 | No |
| `--sp-ink-2, --sp-rule, --sp-rule-2, --sp-sunk` | Secondary text, hairlines, strong hairlines and sunk areas. Each is a mix of the text colour into the ground and follows it automatically. | derived | No |
| `--sp-accent` | Accent fill, used for buttons. | #28479E · #7A9BFF | Yes |
| `--sp-on-accent` | Text on the accent. | #FFFFFF · #101112 | Yes |
| `--sp-accent-ink` | Accent as link and focus text. | #28479E · #7A9BFF | Yes |
| `--sp-head` | Header surface. | the page ground | Yes |
| `--sp-on-head` | Text on the header. | the text colour | Yes |
| `--sp-on-head-2` | Secondary text on the header. | derived | Yes |
| `--sp-head-rule` | Hairlines in the header. | derived | No |
You can read but not change `--sp-ok`, `--sp-warn`, `--sp-warn-fill`, `--sp-down`, `--sp-idle`. Status colours are fixed on purpose: green, amber and red mean the same on every page, and the layouts' contrast was checked only with the defaults.
## When your variable seems to be ignored
- The editor sets some variables as an inline style on `.sp`: the accent ones when an accent colour is set, the header ones when a header colour is set. A plain `.sp` rule loses to an inline style. Either leave that colour unset in the editor, declare the variable on an inner element as in the first example, or add `!important`, which beats an inline value.
- Dark mode redefines the colour variables with `.dark .sp`, which is more specific than `.sp`. For a dark value write `.dark .sp` or use `!important`.
- Derived variables follow your change only when you declare the base variable on the same element where they are computed, which is `.sp`. A variable you redeclare on an inner element does not re-derive the others: set them too.
- The logo file follows the editor's header colour and the theme, not your CSS. If your CSS makes the header dark, upload a logo that works on it, or set the header colour in the editor, which also picks the right logo file.
```css
.sp { --sp-accent: #B3261E !important; --sp-on-accent: #FFFFFF !important; --sp-accent-ink: #B3261E !important; }
```
## Examples
All three ran against the current stylesheet at 1440 and 375 px, light and dark, in all three layouts: header colours, no horizontal overflow.
### A navy header in both themes
Declare the variables on the header itself: that beats both the inline style and the stylesheet. Text, secondary text and hairline colours are set with it, because they are not re-derived there.
```css
.sp .sp-head { --sp-head: #14304F; --sp-on-head: #FFFFFF; --sp-on-head-2: #C5D0DE; --sp-head-rule: #3B5576; }
.dark .sp .sp-head { --sp-head: #0E2238; }
```
### Hide the uptime figure
The bars and words stay. In the response-time view the same element carries the latest response time, so that is hidden too.
```css
.sp .sp-svc-uptime { display: none; }
```
### Tighter corners on the cards
Brand and Overview draw their radii as plain lengths, so override the card blocks.
```
.sp[data-surface="cards"] :is(.sp-group, .sp-msg, .sp-note, .sp-card, .sp-past, .sp-sub, .sp-state) { border-radius: 4px; }
```
## What is not a contract
- Element nesting and tag names inside the blocks above. A span may become a div.
- Any `sp-*` class or `--sp-*` variable not listed, for example the layout width, the radius and shadow values, and every part of a service row, message, history, calendar or subscribe block not named above.
- Pixel measures, spacing, radii and type sizes. There is no radius variable.
- The order and presence of blocks, and which layout shows which part.
- The thumbnails and sample data in the editor.
## What up4 does not do here
- No script. Custom JavaScript is rejected, and the page's content security policy allows scripts from the page's own address only.
- up4 checks only the size (at most 64 KiB), valid UTF-8, no NUL byte and no closing style tag. It does not rewrite, strip or parse your CSS.
- The browser limits the rest. An `@import` or `@font-face` from another host is blocked, so no web-font services: embed the font as a data address or skip it. Images load from secure addresses and data addresses.
- The CSS applies to one status page only. It cannot reach the app, other pages or the banner on your own website.
- The password and e-mail-code gate, the subscription confirmed view and the unsubscribe view show the page's brand but never load your CSS: they are shown to people who may not be allowed to see the page.
- CSS cannot add, remove or reorder blocks, and cannot turn one layout into another. Hiding a block with `display: none` hides it for everyone, screen-reader users included.
[Per API PUT /v1/status-pages/{pageID}](https://upfour.io/docs/api/status-pages#put_status_pages_pageID)
| In the app | API field |
| --- | --- |
| Custom CSS | `custom_css` |
[Full reference](https://upfour.io/docs/api/status-pages#put_status_pages_pageID)
---
# How we document
> The rules behind the up4 docs: two areas for two kinds of readers, labels and prices taken from the product, every task walked through in the real app before a release, and an API reference generated from the code.
Source: https://upfour.io/docs/how-we-document
Documentation is only useful if you can rely on it. These are the rules the up4 team follows, and the checks that hold us to them.
## Two areas, two kinds of readers
The [guide](https://upfour.io/docs) is for people who use the app. It starts with a task, such as [watching a website](https://upfour.io/docs/watch-a-website.md), uses the words you see on the screen and ends with what you see when it worked.
The [developer docs](https://upfour.io/docs/api.md) are for people and programs that call the API. They start with the contract: authentication, request and response shapes, errors. The two areas meet only in a folded "Per API" box at the end of a task page.
## Facts come from the product
We don't type what the product already knows:
- **Labels.** Every button, field and menu name on a guide page is read from the app's own texts when the docs are built, in English and in German. If a label in the app changes, the page changes with it. If a label disappears, the docs build fails.
- **Prices.** Cost examples are calculated with the same formula as the estimate in the app, not written by hand.
- **Timings.** Values such as how many results confirm an outage are exported from the code that makes the decision, and a test keeps both equal. The interactive timeline on [When you get alerted](https://upfour.io/docs/how/when-you-get-alerted.md) runs on these values.
Where the product has no fixed number, for example how long an email takes to arrive, we explain what it depends on instead of promising one.
## Every task is walked through
Each task page has a script that does what the page describes, step by step, in a real running copy of up4 with an example company. It uses the labels the page names and takes the screenshots you see, once in English and once in German.
A release checks that these walkthroughs passed for the current guide pages and app texts. If a page or the app changed since the last successful run, the release stops until the walkthroughs pass again. A page cannot quietly describe a screen that no longer exists.
## The API reference comes from the code
- Request and response schemas are generated from the types each route actually uses. A public route without a declared type fails the build.
- Response examples are recorded from test runs against the API and anonymized, not written by hand.
- The [API changelog](https://upfour.io/docs/api/changelog.md) is generated from the difference between two versions of the specification.
## How we write
- Headings name the task. Steps are numbered, with at most seven in a row.
- Short sentences in plain language, no marketing words.
- Every task page says what up4 does not do there. A limit you learn from the docs is better than one you find in production.
- The guide is written in English and German, each by itself, not translated sentence by sentence. The German pages address you with "du" and use no gender forms.
- Pages about moving from another tool compare only what we checked in that tool's current product or public docs.
## For tools and agents
Every page is also available as Markdown: add `.md` to its address, or use "Copy page" at the top. [llms.txt](https://upfour.io/llms.txt) lists the pages for language models, separately for the guide and the developer docs.
## Tell us when a page is wrong
At the end of each page we ask whether it helped. We count yes and no per page, without cookies. With a no you can add one sentence about what was missing, which reaches the up4 team. A page that collects no answers gets rewritten.
## What up4 does not do here
- Pages show no verification date. The walkthroughs protect releases; they are not a public badge.
- Screenshots show example data from the test company, never customer data.
- The developer docs are in English. The quickstart and the basics also exist in German.
---
# Import monitors from a file
> Import up to 500 websites from a CSV file or a URL list into up4, with clients, intervals, tags and alert settings. Review every row before anything is created.
Source: https://upfour.io/docs/import
Afterwards your websites from a CSV file or a list of addresses run as up4 monitors, with their Clients, intervals and alert settings. Up to 500 rows per import, reviewed row by row first.
- **Who:** Any role except **Viewer**
- **Time:** About ten minutes
- **Cost:** About €0.39 a month from your credit
You need a list with one address per line, or a CSV file with a header row, and access to the Clients you import for. The amount is for a website checked every minute from one region; each extra region adds the same again. The preview shows the total for your import.
**In up4:** Monitoring › New monitor › Batch · paste · [Open in up4](https://app.upfour.io/monitors/new/batch)
## Prepare the file
Either format works. The import creates new monitors. It does not bring over past checks, incidents, status pages or subscribers, so keep the old tool running until you have seen the new checks and alerts work.
- **URL list.** One address per line. Blank lines and lines starting with # are ignored.
- **CSV or TSV.** A header row, then one website per row. Commas, semicolons and tabs work. Put a value that contains the delimiter in double quotes, and write a quote inside a quoted value twice. Excel files must be saved as CSV first. YAML and JSON are not accepted. The file can be up to 2 MB.
[Download the CSV template](https://upfour.io/downloads/website-import.csv), replace the examples and keep the header row:
```
name,url,client,interval,tags
Main website,https://example.com,Lakeside,1m,production
"Shop, English",https://example.org/shop,Verde,5m,"production, shop"
Agency website,https://example.net,Company,1m,internal
```
## Choose the columns
up4 maps a column by its header automatically. Capitals, spaces and hyphens do not matter, so _Client Name_ works like _client_name_. A header up4 does not know is mapped by hand in the next step. Empty cells take the shared default you choose there; a value in a row wins over the default.
| Header in your file | Shown in up4 as | What to enter |
| --- | --- | --- |
| url also: target, website, address | **URL / target** | The address to check. A bare domain gets https://. This column is required. |
| name also: friendly_name, monitor_name | **Name** | Display name. Optional; the preview shows the name up4 generates. |
| client also: client_name, customer, kunde | **Client name** | An existing Client. Company (also company-level) assigns no Client. A column with the Client ID, named client_id, works too. |
| monitor_group_name also: group | **Group name** | An existing group of this row’s Client. A column named monitor_group_id takes the ID. |
| interval_seconds also: interval | **Interval (seconds or 1m / 5m)** | Whole seconds or a duration: 60, 60s, 1m, 1h. A value below your plan’s shortest interval is refused in the preview. |
| regions also: region | **Regions (eu \| us \| asia \| au)** | eu, us, asia or au, separated by \| or a comma. Only regions with a live checker are accepted. |
| tags also: tag | **Tags** | Free text such as production, shop. Quote the cell if it contains your delimiter. |
| keyword | **Required keyword** | Text the response must contain. The check reads the page with GET. |
| keyword_case_insensitive | **Case-insensitive keyword** | true or false; yes, no, 1 and 0 also work. |
| alert_plan_name also: alert | **Alert plan name** | An existing Alert plan of this row’s Client. A column named escalation_policy_id takes the ID. |
| alert_channel_names also: channels | **Channel names (separated by \|)** | Existing Alert channels, for example Agency email\|Support Slack. A column named notification_channel_ids takes IDs. |
| monitor_type | **Monitor type** | http, ping, tcp or dns. Leave it empty for a website. |
| expected_status_code | **Expected HTTP status** | A whole number such as 200\. The HTTP method has its own column, http_method. |
| follow_redirects | **Follow redirects** | true or false; yes, no, 1 and 0 also work. |
| confirmation_period | **Confirmation period (seconds)** | Whole seconds of extra wait before a failure alerts. The column for the way back is recovery_period. 0 adds no extra wait. |
| tcp_host | **TCP host** | For TCP monitors, such as db.example.com. The port goes in tcp_port. |
| dns_query | **DNS name** | For DNS monitors, the name to look up. The record type goes in dns_type, the expected answer in dns_expected. |
| state | **State (PAUSED starts paused)** | PAUSED creates the monitor paused. Leave it empty otherwise. |
Every other setting of the monitor form has a column too. Open **Map columns** to see the full list. A file from **Export monitors (CSV)** imports again as it is, also in another up4 account. Its id column is ignored. Passwords, request headers and proxy settings are not exported.
Tags are saved as text under the metadata key tags. They do not create groups, and the monitor list has no tag filter. Use Clients and groups to organize the list. Client, group, Alert plan and Alert channel names must match existing ones, ignoring capitals. Use the ID columns if two share a name. Importing a channel name assigns an existing channel; it never creates a channel or copies credentials.
## Steps
### 1. [Add your file](https://upfour.io/docs/import#add)
Select **Choose CSV file** or paste your list into the field. A file you choose is read as CSV. For a pasted list, up4 detects the format from the header; if it guesses wrong, set **Format**.
[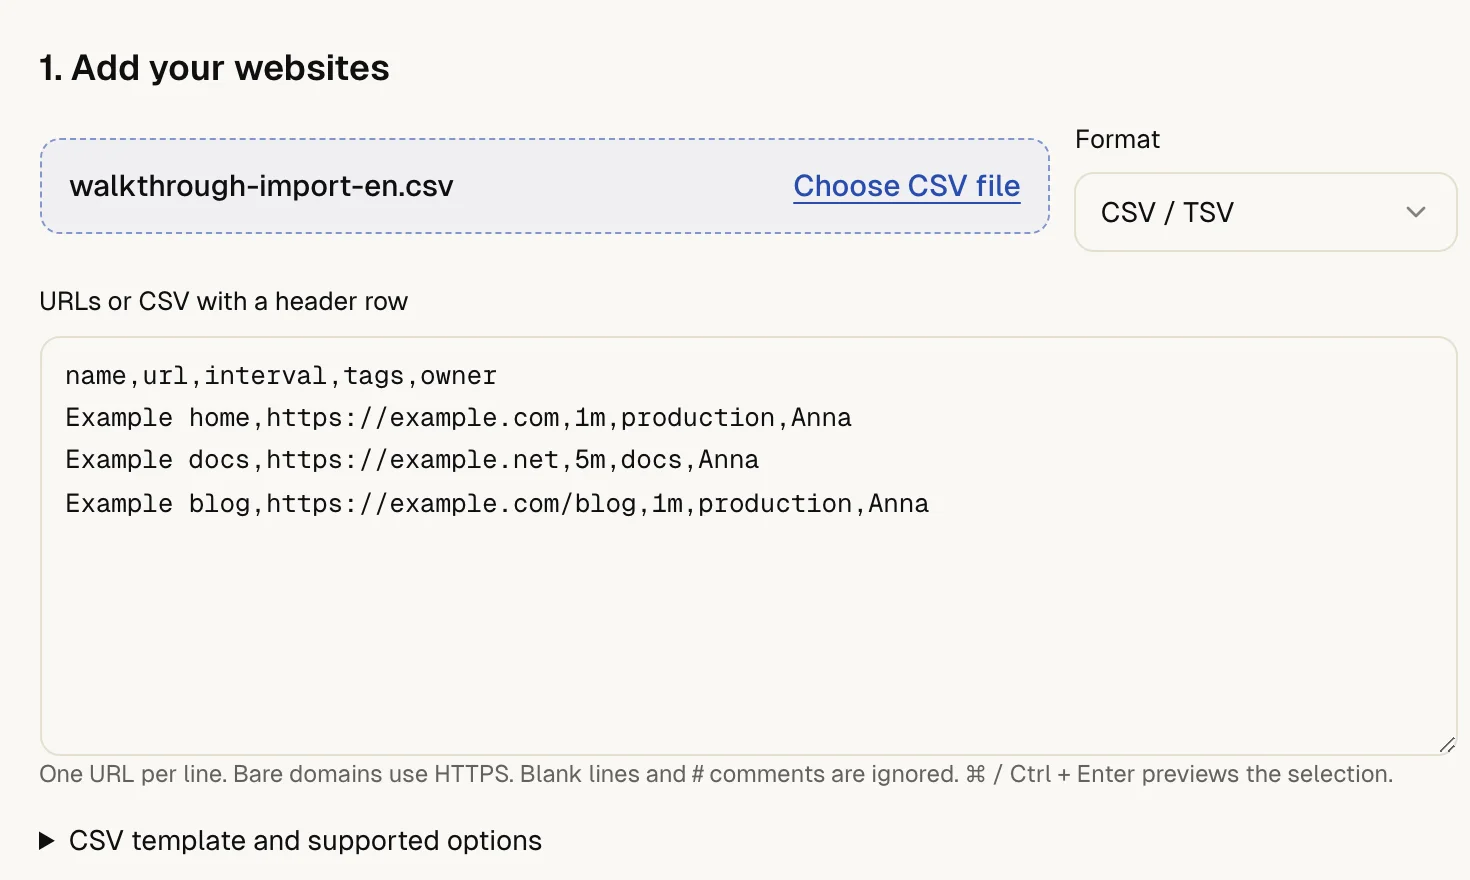](https://upfour.io/docs/images/walk/en/import-add.webp)
### 2. [Map the columns](https://upfour.io/docs/import#map)
Check **Map columns**. Every column with data must be mapped to a field or set to **Ignore this column**. An ignored column is not imported.
[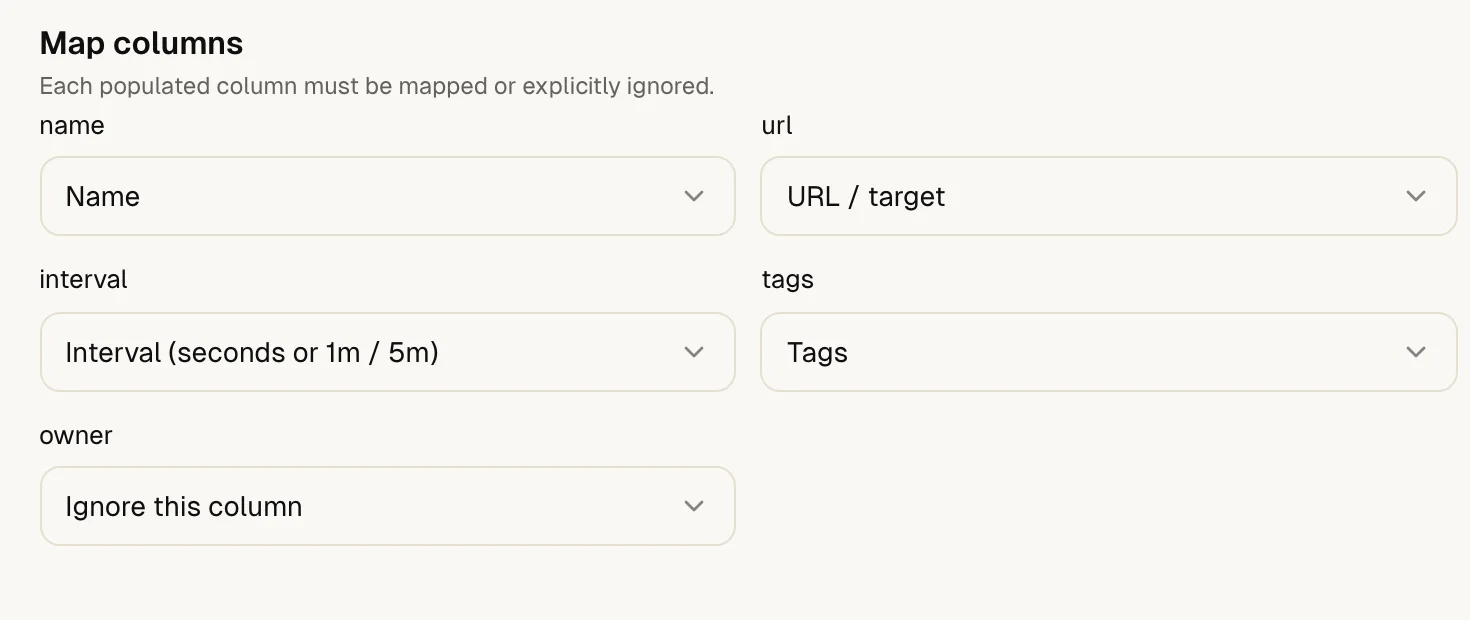](https://upfour.io/docs/images/walk/en/import-map.webp)
### 3. [Choose shared defaults](https://upfour.io/docs/import#defaults)
Under **2\. Choose shared defaults**, set the interval, group and regions that apply to rows that do not set their own, and who gets alerted. With Clients turned on, the Client is a default too. For several Clients, put the Client on each row. A region marked unavailable has no healthy checker right now.
[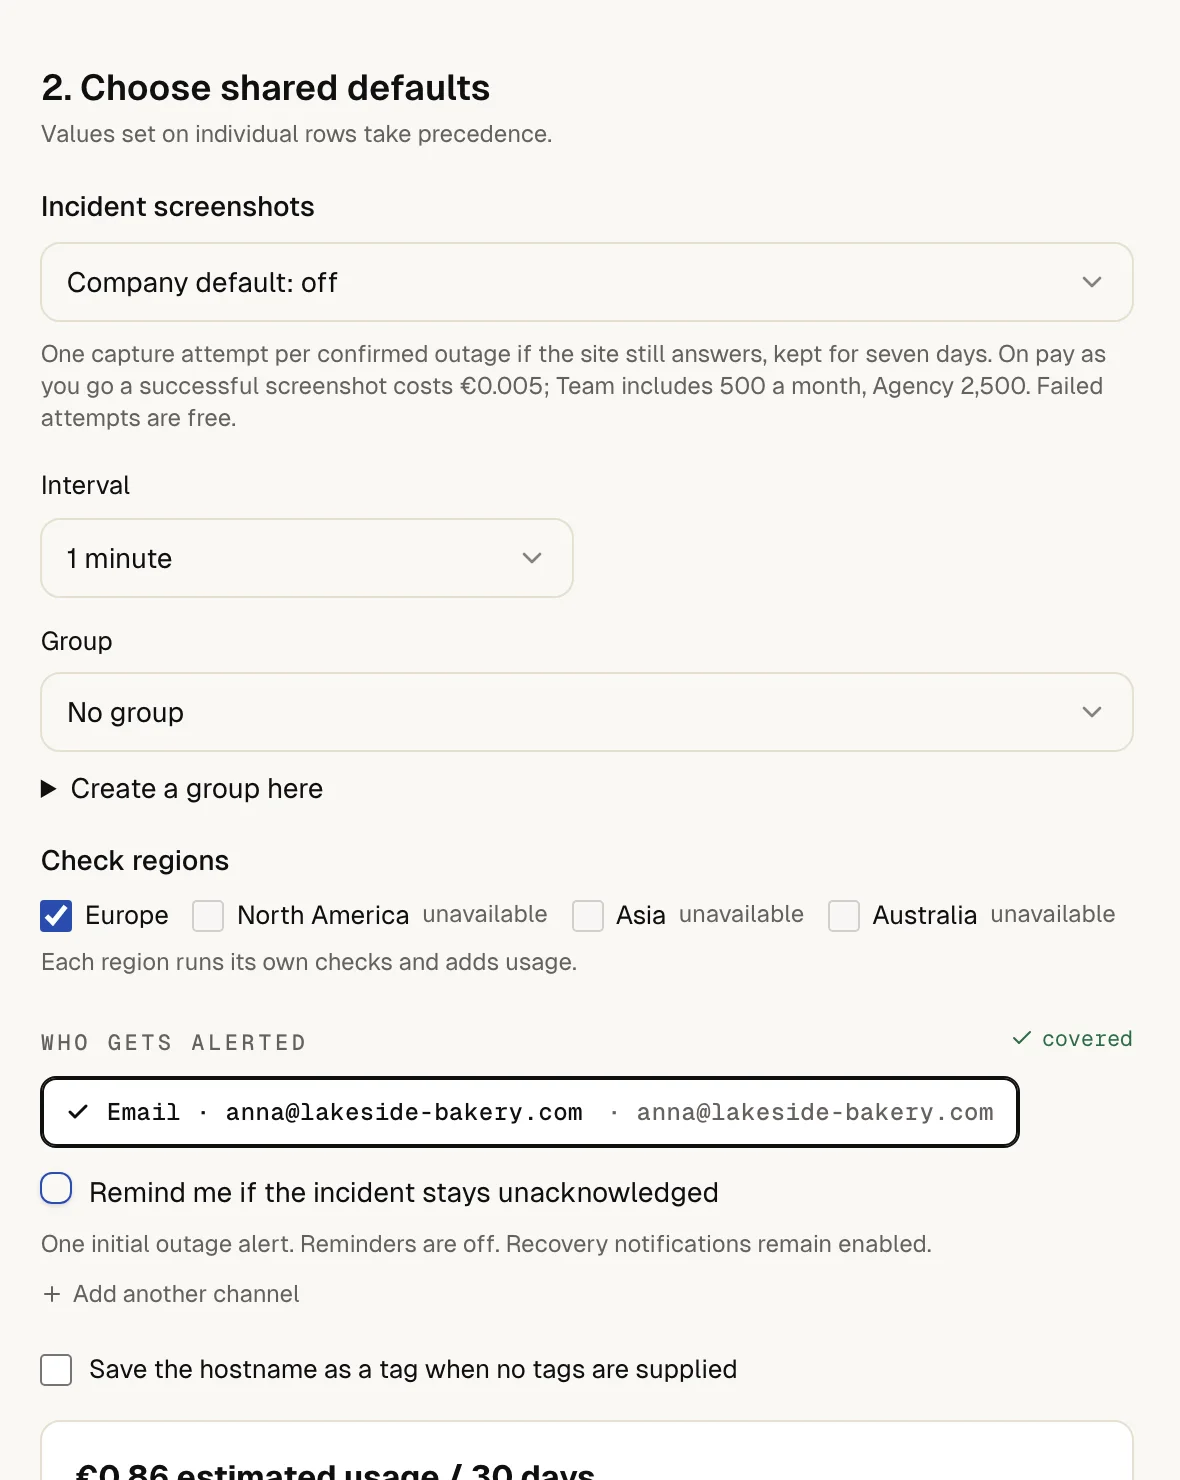](https://upfour.io/docs/images/walk/en/import-defaults.webp)
### 4. [Preview the import](https://upfour.io/docs/import#preview)
Select **Preview import**. Nothing is created yet. up4 checks every row, shows an estimate of the usage for 30 days and the number of monitors against your plan's limit.
[](https://upfour.io/docs/images/walk/en/import-preview.webp)
### 5. [Correct the rows](https://upfour.io/docs/import#review)
Uncheck a row to leave it out, or select **Edit** to fix it. After every change, select **Preview import** again: the create button only works on a current preview. For missing Clients, up4 offers to create them. A website that already exists with the same check settings is skipped and stays as it is. Tick **Create even if this target already exists (intentional duplicate)** only for a second monitor you want on purpose.
[](https://upfour.io/docs/images/walk/en/import-review.webp)
### 6. [Create the monitors](https://upfour.io/docs/import#create)
To look over the setup before checks start, tick **Create paused for setup review**. That changes the import, so select **Preview import** once more. Then select the create button, which names the number of monitors. The monitors and their settings are saved together: one row error stops the whole batch, and nothing is created.
[](https://upfour.io/docs/images/walk/en/import-create.webp)
## How you know it worked
up4 reports how many monitors it created, for example **2 monitors created · 0 duplicates skipped**. Select **View imported monitors** to see exactly these monitors, and **Test alert delivery** to send a test through an alert channel.
Running monitors show pending until their first check. **Recent imports (1)** lists past imports; **Open receipt** shows what an import saved.
## If something is off
Your CSV appears as a URL list, or the columns are mixed up.
Set **Format** to CSV, keep the header row and check quotes and delimiters. Every row needs as many cells as the header.
A Client, group, Alert plan or channel is not found.
Create it first or correct the name. Check that you have access to that Client.
The connection dropped while creating.
Stay in the same tab and select **Retrieve import result**. It returns the original result without creating the monitors twice. If the tab is closed, check **Recent imports (1)** and the monitor list before you import again.
## What up4 does not do here
- An import takes 1 to 500 rows and a file up to 2 MB.
- Your plan has a limit for monitors, and paused monitors count towards it. The preview shows how many you have and the limit.
- Each region runs its own checks and adds usage: three regions use three times the checks of one.
- The draft stays in your browser tab only while the tab lives. Keep your original file.
- Scheduled jobs are not imported. [Create them one by one](https://upfour.io/docs/watch-a-scheduled-job.md).
- Moving from another tool? The pages under [moving to up4](https://upfour.io/docs/moving/uptimerobot.md) map that tool's words to up4's.
[Per API POST /v1/monitors/batch/dry-run](https://upfour.io/docs/api/monitors#post_monitors_batch_dry_run)
The API takes structured rows, not raw CSV: each row has a source line and its fields, and tags go under the metadata of that row. Use a key that may write monitors and reach the Clients involved. Validate 1 to 500 rows with this call, at most 2 MB per request. Then send the unchanged request with its returned preview ID to `POST /v1/monitors/batch` and a unique `Idempotency-Key`. After a lost response, repeat that exact request and key: the first success returns 201, a replay 200, and different input with the same key 409\. `GET /v1/monitors/batch/history` lists receipts. See the [monitors reference](https://upfour.io/docs/api/monitors.md).
[Full reference](https://upfour.io/docs/api/monitors#post_monitors_batch_dry_run)
---
# Move from UptimeRobot to up4
> Match UptimeRobot’s terms to up4’s, bring your monitors over with the CSV import, see what does not carry over and run both tools side by side before you switch alerts.
Source: https://upfour.io/docs/moving/uptimerobot
You will have your UptimeRobot monitors running in up4 while UptimeRobot keeps running, so you can compare both before you switch your alerts.
- **Who:** Anyone who can create monitors in your Company
- **Time:** One sitting, then 48 to 72 hours side by side
You need your UptimeRobot login or API token and the people or channels that should receive alerts. In that one sitting you move a first batch.
## Match UptimeRobot’s words to up4’s
| UptimeRobot | up4 | What to know |
| --- | --- | --- |
| Monitor (HTTP, Keyword, Ping, Port) | **Monitors** | up4 has HTTP, ping, TCP and DNS checks. A keyword is a setting on an HTTP monitor. |
| Heartbeat monitor | **Scheduled jobs** | Your job checks in with up4 instead of the other way round. |
| Notification channel | **Alert channels** | You connect each channel again. |
| Maintenance Window | **Maintenance window** | A setting on each monitor. |
| Status Page | **Status pages** | You build it again in up4. |
| Tags | **Tags** | Imported as text in the monitor’s metadata. |
| Location | **Check regions** | Europe, North America, Asia and Australia. |
## Export your monitors and import them
UptimeRobot’s help center lists bulk actions for monitors; none of them exports the list. It describes a bulk upload with a downloadable template, and the [UptimeRobot API](https://uptimerobot.com/api/v3) lists monitors with **GET /monitors**. So you either call the API or copy your monitors into a file yourself.
**In up4:** Monitoring › Paste many URLs · [Open in up4](https://app.upfour.io/monitors/new/batch)
## Steps
### 1. Collect your monitors
List them through the API, or copy them from your dashboard. You need one row per monitor with its address, name and interval.
### 2. Save them as a CSV file
Keep a header row. Commas, semicolons and tabs all work; save as UTF-8\. UptimeRobot’s help names the template columns Type, URL/IP, Interval, Friendly Name, the keyword columns, Port and Tags. Check the header text in your own template.
```
Friendly Name,URL/IP,Interval,Tags
Main website,https://example.com,300,production
```
### 3. Open Import websites
Choose **Choose CSV file** or paste the file. up4 accepts up to 500 rows and 2 MB at a time.
### 4. Check Map columns
up4 recognizes some headers by themselves. Every other column shows **Choose field…** until you pick a field or **Ignore this column**.
| UptimeRobot column | In up4 |
| --- | --- |
| Friendly Name | Recognized automatically as **Name**. |
| Interval | Recognized automatically; seconds are fine. |
| Tags | Recognized automatically as **Tags**. |
| URL/IP | Not recognized because of the slash. Choose **URL / target**. |
| Keyword value | Choose **Required keyword**. |
| Type, keyword type, Port | Choose **Ignore this column**, then add TCP, ping or DNS monitors under **Advanced setup**. |
### 5. Choose Preview import, then create
The preview creates nothing. Read each row, fix or exclude errors, and tick **Create paused for setup review** if you want to look first. Existing targets are skipped as duplicates.
## How you know it worked
**View imported monitors** lists exactly the monitors you created. A monitor reads as pending until its first check result arrives.
## See what does not carry over
- **History.** Check results, uptime figures and incidents stay in UptimeRobot. up4 starts measuring with its first check.
- **Notification channels.** Connect each channel once in up4\. The import only assigns channels that already exist.
- **Heartbeat monitors.** The import creates monitors only. Create each **Scheduled jobs** entry and put its new ping URL into your job.
- **Status pages.** Build them again. If you hold a list of subscriber addresses, **Upload previous subscribers** takes a CSV, TSV or TXT file with one address per line, up to 10,000 addresses. It is available after your first top-up or with a subscription, and up4 invites each address.
- **Maintenance Windows.** Set them again on the monitors.
## What up4 does not do here
up4 does not read your UptimeRobot account and has no one-click migration. You bring the file; up4 shows a preview before it creates anything.
## Expect these differences
- **Confirmation.** up4 does not alert on one failed check. A change of state needs 3 consistent observations: the first differing check plus 2 instant re-checks. Read your UptimeRobot settings before you compare alert timing.
- **Intervals.** UptimeRobot’s bulk-upload template lists 60 to 86,400 seconds. up4 accepts intervals from 10 seconds.
- **Price per check.** Every check type costs €9 per million checks. One monitor checked every minute from one region comes to €0.39 a month. Each extra region repeats the checks. See [What costs money](https://upfour.io/docs/how/what-costs-money.md).
## Run both tools side by side
1. Pilot three to five websites that matter, with one alert channel.
2. Leave UptimeRobot running. 48 to 72 hours is a rule of thumb, not a requirement.
3. Import the rest of your list.
4. Send a test alert per channel and confirm it arrived. Then turn off the alerts in UptimeRobot; its bulk actions include **Pause and Start**.
The [switching overview](https://upfour.io/switch) has the same plan in short.
## Take your monitors back out
Open **Monitor tools** in the monitor list and choose **Export monitors (CSV)**. The file imports again into this or another up4 account. Passwords, request headers and proxy settings are not included. To use the file elsewhere, keep the name, address and interval columns and rename them to that tool’s template.
## If something is off
- The preview button stays disabled: every column must be mapped or set to **Ignore this column**, and each field only once.
- A row shows an interval error: use whole seconds, or 60s, 5m or 1h.
- More fixes are in [the import guide](https://upfour.io/docs/import#troubleshooting).
---
# Move from Better Stack to up4
> Match Better Stack’s terms to up4’s, bring your monitors over with the CSV import, see what does not carry over and run both tools side by side before you switch alerts.
Source: https://upfour.io/docs/moving/better-stack
You will have your Better Stack monitors running in up4 while Better Stack keeps running, so you can compare both before you switch your alerts.
- **Who:** Anyone who can create monitors in your Company
- **Time:** One sitting, then 48 to 72 hours side by side
You need a Better Stack API token with read access and the people or channels that should receive alerts. In that one sitting you move a first batch.
## Match Better Stack’s words to up4’s
| Better Stack | up4 | What to know |
| --- | --- | --- |
| Monitor | **Monitors** | up4 has HTTP, ping, TCP and DNS checks. Better Stack’s UDP, SMTP, POP, IMAP and Playwright monitors have no counterpart. |
| Heartbeat | **Scheduled jobs** | Your job checks in with up4 at a URL. |
| Escalation policy | **Alert plans** | Who is told, in which order, after which wait. |
| On-call calendar | **On-call rotations** | Built again in up4. |
| Integration (Slack, Microsoft Teams, Zapier, webhooks) | **Alert channels** | You connect each one again. |
| Status page | **Status pages** | You build it again in up4. |
| Incident | **Incidents** | up4 opens its own incidents from its own checks. |
## Export your monitors and import them
Better Stack’s documentation describes importing monitors into Better Stack. We found no export of the monitor list in the dashboard documentation. The documented route out is the [Monitors API](https://betterstack.com/docs/uptime/api/list-all-existing-monitors): **GET /api/v2/monitors** with a Bearer token, returned in pages. Turn that response into a CSV file.
**In up4:** Monitoring › Paste many URLs · [Open in up4](https://app.upfour.io/monitors/new/batch)
## Steps
### 1. List your monitors through the API
Follow the pages of the response until its next link is empty. Keep the name, address, check frequency, required keyword and regions of each monitor.
### 2. Write the CSV file with up4’s column names
Named like this, the columns are recognized without any mapping. Better Stack’s check frequency is in seconds, which up4 accepts as it is.
```
pronounceable_name → name
url → url
check_frequency → interval
required_keyword → keyword
regions (us, eu, as, au) → regions (eu|us|asia|au)
```
Do not name a column **pronounceable_name**: in up4 that name sets the **Spoken name**, not the display name. Do not keep Better Stack’s **monitor_type** column either. Its values differ from up4’s, so set it to **Ignore this column**.
### 3. Open Import websites
Choose **Choose CSV file** or paste the file. up4 accepts up to 500 rows and 2 MB at a time. Under **Map columns**, every column needs a field or **Ignore this column**.
### 4. Choose Preview import, then create
The preview creates nothing. Read each row, fix or exclude errors, and tick **Create paused for setup review** if you want to look first.
## How you know it worked
**View imported monitors** lists exactly the monitors you created. A monitor reads as pending until its first check result arrives.
## See what does not carry over
- **History.** Check results, uptime figures and incidents stay in Better Stack. up4 starts measuring with its first check.
- **Escalation policies and on-call calendars.** Create an **Alert plans** entry and an **On-call rotations** entry in up4, then assign them to the monitors.
- **Integrations.** Connect each channel once in up4\. The import only assigns channels that already exist.
- **Heartbeats.** The import creates monitors only. Create each **Scheduled jobs** entry and swap the URL in your job. Both services accept **/fail** at the end of the URL to report a failed run; up4 also accepts an exit code there.
```
https://incidents.betterstack.com/api/v1/heartbeat/
https://app.upfour.io/v1/heartbeat/
```
- **Status pages.** Build them again.
## What up4 does not do here
up4 does not read your Better Stack account and has no one-click migration. You bring the file; up4 shows a preview before it creates anything.
## Expect these differences
- **Confirmation.** up4 does not alert on one failed check. A change of state needs 3 consistent observations: the first differing check plus 2 instant re-checks. Read your Better Stack settings before you compare alert timing.
- **Job timing.** Better Stack’s “Expect a heartbeat every” and “grace period” become **Expect a check-in every** and **with a grace period of**.
- **Regions.** Better Stack names its Asia region **as**; up4 writes **asia** in a CSV file.
- **Price per check.** Every check type costs €9 per million checks. One monitor checked every minute from one region comes to €0.39 a month. Each extra region repeats the checks. See [What costs money](https://upfour.io/docs/how/what-costs-money.md).
## Run both tools side by side
1. Pilot three to five websites that matter, with one alert channel.
2. Leave Better Stack running. 48 to 72 hours is a rule of thumb, not a requirement.
3. Import the rest of your list.
4. Send a test alert per channel and confirm it arrived. Then turn off the alerts in Better Stack.
The [switching overview](https://upfour.io/switch) has the same plan in short.
## Take your monitors back out
Open **Monitor tools** in the monitor list and choose **Export monitors (CSV)**. The file imports again into this or another up4 account. Passwords, request headers and proxy settings are not included. For Better Stack, use the import described in its documentation, which takes one URL per line.
## If something is off
- The preview button stays disabled: every column must be mapped or set to **Ignore this column**, and each field only once.
- A region shows as unavailable: it has no healthy checker right now. Choose another region.
- More fixes are in [the import guide](https://upfour.io/docs/import#troubleshooting).
---
# Move from Pingdom to up4
> Match Pingdom’s terms to up4’s, bring your uptime checks over with the CSV import, see what does not carry over and run both tools side by side before you switch alerts.
Source: https://upfour.io/docs/moving/pingdom
You will have your Pingdom checks running in up4 while Pingdom keeps running, so you can compare both before you switch your alerts.
- **Who:** Anyone who can create monitors in your Company
- **Time:** One sitting, then 48 to 72 hours side by side
You need a Pingdom API token with read access and the people or channels that should receive alerts. In that one sitting you move a first batch.
## Match Pingdom’s words to up4’s
| Pingdom | up4 | What to know |
| --- | --- | --- |
| Uptime check | **Monitors** | up4 has HTTP, ping, TCP and DNS checks. Pingdom’s custom HTTP, UDP, SMTP, POP3 and IMAP checks have no counterpart. |
| Resolution | **Interval (seconds or 1m / 5m)** | Pingdom counts in minutes. up4 reads seconds, or a unit such as 5m. |
| Contact | **Alert channels** | You connect each address or number again. |
| Integration (Slack, PagerDuty) | **Alert channels** | You connect each one again. |
| Alerting settings | **Alert plans** | Who is told, in which order, after which wait. |
| Maintenance window | **Maintenance window** | A setting on each monitor, with a time of day, a time zone and weekdays. |
| Public status page | **Status pages** | You build it again in up4. |
| Tags | **Tags** | Imported as text in the monitor’s metadata. |
## Export your checks and import them
We found no export of the check list in Pingdom’s documentation. The documented route out is the [Pingdom API](https://docs.pingdom.com/api): **GET /checks** with a Bearer token returns an overview of all checks. Turn that response into a CSV file.
**In up4:** Monitoring › Paste many URLs · [Open in up4](https://app.upfour.io/monitors/new/batch)
## Steps
### 1. List your checks through the API
Ask for the tags too. The overview returns up to 25,000 checks; use the limit and offset options for more. Keep the name, hostname, type, resolution, status and tags of each check.
### 2. Write the CSV file with up4’s column names
Named like this, the columns are recognized without any mapping. Pingdom’s type names for HTTP, ping, TCP and DNS checks are the ones up4 uses, in lowercase.
```
name → name
hostname → url
type → monitor_type (http, ping, tcp, dns)
resolution (minutes) → interval (write 5m, not 5)
tags → tags
status "paused" → state (PAUSED, otherwise empty)
```
Write the resolution with a unit. A bare number counts as seconds, so 5 would mean five seconds. Leave out checks of any other type.
### 3. Add what a TCP or DNS row needs
A TCP row needs **TCP host** and **TCP port** columns; the port is in the detailed description of the check. A DNS row needs **DNS name**, and Pingdom’s name server and expected IP fit **DNS server** and **DNS expected answer**. For an HTTP check, Pingdom’s should-contain text fits **Required keyword**. Leave cells empty where a row does not need them.
### 4. Open Import websites
Choose **Choose CSV file** or paste the file. up4 accepts up to 500 rows and 2 MB at a time. Under **Map columns**, every column needs a field or **Ignore this column**.
### 5. Choose Preview import, then create
The preview creates nothing. Read each row, fix or exclude errors, and tick **Create paused for setup review** if you want to look first.
## How you know it worked
**View imported monitors** lists exactly the monitors you created. A monitor reads as pending until its first check result arrives.
## See what does not carry over
- **History.** Check results, uptime figures and outages stay in Pingdom. up4 starts measuring with its first check.
- **Contacts and integrations.** Connect each one once as an **Alert channels** entry. The import only assigns channels that already exist.
- **Alerting settings.** Build an **Alert plans** entry for who is told and when, then assign it to the monitors.
- **Maintenance windows.** Set them again on the monitors.
- **Public status pages.** Build them again.
- **Other check types.** Custom HTTP, UDP, SMTP, POP3 and IMAP checks have no counterpart in up4.
## What up4 does not do here
up4 does not read your Pingdom account and has no one-click migration. You bring the file; up4 shows a preview before it creates anything.
## Expect these differences
- **Confirmation.** up4 does not alert on one failed check. A change of state needs 3 consistent observations: the first differing check plus 2 instant re-checks. Read your Pingdom alerting settings before you compare alert timing.
- **Check interval.** Pingdom’s resolution is whole minutes. up4 accepts intervals from 10 seconds.
- **Web addresses.** A bare hostname on an HTTP row becomes an https address, and the preview warns you. Check it before you create the monitor.
- **Price per check.** Every check type costs €9 per million checks. One monitor checked every minute from one region comes to €0.39 a month. Each extra region repeats the checks. See [What costs money](https://upfour.io/docs/how/what-costs-money.md).
## Run both tools side by side
1. Pilot three to five checks that matter, with one alert channel.
2. Leave Pingdom running. 48 to 72 hours is a rule of thumb, not a requirement.
3. Import the rest of your list.
4. Send a test alert per channel and confirm it arrived. Then turn off the alerts in Pingdom.
The [switching overview](https://upfour.io/switch) has the same plan in short.
## Take your monitors back out
Open **Monitor tools** in the monitor list and choose **Export monitors (CSV)**. The file imports again into this or another up4 account. Passwords, request headers and proxy settings are not included. For Pingdom, keep the name, address, type and interval, and create the checks through its API: **POST /checks** takes a name, a host and a type.
## If something is off
- The preview button stays disabled: every column must be mapped or set to **Ignore this column**, and each field only once.
- A row reports a problem with the interval: write whole seconds or a unit such as 60s, 5m or 1h.
- A TCP row is rejected: it needs both a TCP host and a TCP port.
- More fixes are in [Troubleshooting](https://upfour.io/docs/troubleshooting.md).
---
# Move from StatusCake to up4
> Match StatusCake’s terms to up4’s, bring your uptime checks over with the CSV import, see what does not carry over and run both tools side by side before you switch alerts.
Source: https://upfour.io/docs/moving/statuscake
You will have your StatusCake checks running in up4 while StatusCake keeps running, so you can compare both before you switch your alerts.
- **Who:** Anyone who can create monitors in your Company
- **Time:** One sitting, then 48 to 72 hours side by side
You need a StatusCake API token and the people or channels that should receive alerts. In that one sitting you move a first batch.
## Match StatusCake’s words to up4’s
| StatusCake | up4 | What to know |
| --- | --- | --- |
| Uptime check | **Monitors** | up4 has HTTP, ping, TCP and DNS checks. HEAD and HTTP checks both become HTTP monitors. SMTP and SSH checks have no counterpart. |
| Check rate | **Interval (seconds or 1m / 5m)** | StatusCake counts in seconds, which up4 reads as they are. |
| Heartbeat check | **Scheduled jobs** | Your job checks in with up4 at a URL. |
| Contact group | **Alert channels** | You connect each recipient again. An **Alert plans** entry decides who is told, in which order. |
| Maintenance window | **Maintenance window** | A setting on each monitor, with a time of day, a time zone and weekdays. |
| Status page | **Status pages** | You build it again in up4. |
| Tags | **Tags** | Imported as text in the monitor’s metadata. |
## Export your checks and import them
We found no export of the check list in StatusCake’s documentation. The documented route out is the [StatusCake API](https://developers.statuscake.com/): **GET /uptime** with a Bearer token returns all uptime checks, in pages. Turn that response into a CSV file.
**In up4:** Monitoring › Paste many URLs · [Open in up4](https://app.upfour.io/monitors/new/batch)
## Steps
### 1. List your checks through the API
Follow the pages until you have every check. Keep the name, website URL, test type, check rate, paused flag and tags of each one.
### 2. Write the CSV file with up4’s column names
Named like this, the columns are recognized without any mapping. StatusCake writes its test types in capitals; write them in lowercase, and write HEAD and HTTP both as http.
```
name → name
website_url → url
test_type → monitor_type (http, ping, tcp, dns)
check_rate → interval (seconds, as they are)
tags → tags
paused → state (PAUSED, otherwise empty)
```
A check rate of 0 is not an interval in up4: choose one yourself. Leave out SMTP and SSH checks.
### 3. Add what a TCP, DNS or content row needs
A TCP row needs **TCP host** and **TCP port** columns; the port is in the detailed description of the check. A DNS row needs **DNS name**, and StatusCake’s DNS server fits **DNS server**. For an HTTP check, its search string fits **Required keyword**. Leave cells empty where a row does not need them.
### 4. Open Import websites
Choose **Choose CSV file** or paste the file. up4 accepts up to 500 rows and 2 MB at a time. Under **Map columns**, every column needs a field or **Ignore this column**.
### 5. Choose Preview import, then create
The preview creates nothing. Read each row, fix or exclude errors, and tick **Create paused for setup review** if you want to look first.
## How you know it worked
**View imported monitors** lists exactly the monitors you created. A monitor reads as pending until its first check result arrives.
## See what does not carry over
- **History.** Check results, uptime figures and outages stay in StatusCake. up4 starts measuring with its first check.
- **Contact groups.** Connect each recipient once as an **Alert channels** entry. The import only assigns channels that already exist.
- **Heartbeat checks.** The import creates monitors only. Create each **Scheduled jobs** entry and swap the URL in your job. StatusCake’s heartbeat period, the time since the last ping before a check counts as down, becomes **Expect a check-in every**; add a **with a grace period of** if your job’s run time varies.
- **Maintenance windows.** Set them again on the monitors.
- **Status pages.** Build them again.
- **Page speed and server monitoring.** up4 has no counterpart for these check types.
## What up4 does not do here
up4 does not read your StatusCake account and has no one-click migration. You bring the file; up4 shows a preview before it creates anything.
## Expect these differences
- **Confirmation.** up4 does not alert on one failed check. A change of state needs 3 consistent observations: the first differing check plus 2 instant re-checks. Read your StatusCake settings before you compare alert timing.
- **Check interval.** StatusCake offers a fixed list of check rates. up4 accepts any interval from 10 seconds.
- **Web addresses.** A bare hostname on an HTTP row becomes an https address, and the preview warns you. Check it before you create the monitor.
- **Price per check.** Every check type costs €9 per million checks. One monitor checked every minute from one region comes to €0.39 a month. Each extra region repeats the checks. See [What costs money](https://upfour.io/docs/how/what-costs-money.md).
## Run both tools side by side
1. Pilot three to five checks that matter, with one alert channel.
2. Leave StatusCake running. 48 to 72 hours is a rule of thumb, not a requirement.
3. Import the rest of your list.
4. Send a test alert per channel and confirm it arrived. Then turn off the alerts in StatusCake.
The [switching overview](https://upfour.io/switch) has the same plan in short.
## Take your monitors back out
Open **Monitor tools** in the monitor list and choose **Export monitors (CSV)**. The file imports again into this or another up4 account. Passwords, request headers and proxy settings are not included. For StatusCake, keep the name, address, type and interval, and create the checks in its dashboard or through its API (**POST /uptime**).
## If something is off
- The preview button stays disabled: every column must be mapped or set to **Ignore this column**, and each field only once.
- A row reports a problem with the interval: write whole seconds or a unit such as 60s, 5m or 1h.
- A TCP row is rejected: it needs both a TCP host and a TCP port.
- More fixes are in [Troubleshooting](https://upfour.io/docs/troubleshooting.md).
---
# Move from Cronitor to up4
> Match Cronitor’s terms to up4’s, bring your website checks over with the CSV import, recreate jobs and heartbeats as scheduled jobs and run both tools side by side before you switch alerts.
Source: https://upfour.io/docs/moving/cronitor
You will have your Cronitor website checks and your jobs running in up4 while Cronitor keeps running, so you can compare both before you switch your alerts.
- **Who:** Anyone who can create monitors and scheduled jobs
- **Time:** One sitting, then 48 to 72 hours side by side
You need a Cronitor API key that can read monitors, access to the code or crontab that calls your jobs’ ping URLs, and the people or channels that should receive alerts. In that one sitting you move a first batch.
## Match Cronitor’s words to up4’s
| Cronitor | up4 | What to know |
| --- | --- | --- |
| Check monitor (website, HTTP, TCP) | **Monitors** | up4 has HTTP, ping, TCP and DNS checks. Cronitor’s UDP and browser checks have no counterpart. |
| Job and heartbeat monitor | **Scheduled jobs** | Your job checks in with up4 at a URL. See below. |
| Site monitor | **Not available** | Cronitor’s site monitors cover web analytics. up4 has no counterpart. |
| Notification list or integration | **Alert channels** | You connect each one again. |
| Environment | **Not available** | up4 has no environments. Create one scheduled job per environment. |
## Export your checks and import them
The [Cronitor Monitor API](https://cronitor.io/docs/monitor-api) lists your monitors with **GET /api/monitors**. You sign in with HTTP basic auth: the API key is the user name and the password stays empty. We found no export of the monitor list in Cronitor’s documentation, so turn the response into a CSV file. This step covers the website checks. Jobs and heartbeats follow in the next section.
**In up4:** Monitoring › Paste many URLs · [Open in up4](https://app.upfour.io/monitors/new/batch)
## Steps
### 1. List your check monitors through the API
Filter by type check and follow the pages. Keep the name, the request URL, the platform, the schedule and the paused flag of each monitor.
### 2. Write the CSV file with up4’s column names
Named like this, the columns are recognized without any mapping. Cronitor writes a schedule as text, such as every 2 minutes. Write the same length with a unit.
```
name → name
request.url → url
platform (http, tcp) → monitor_type (http or tcp)
schedule → interval (every 2 minutes → 2m)
paused → state (PAUSED, otherwise empty)
```
A TCP row needs **TCP host** and **TCP port** columns instead of a URL. Leave out UDP and browser checks.
### 3. Open Import websites
Choose **Choose CSV file** or paste the file. up4 accepts up to 500 rows and 2 MB at a time. Under **Map columns**, every column needs a field or **Ignore this column**.
### 4. Choose Preview import, then create
The preview creates nothing. Read each row, fix or exclude errors, and tick **Create paused for setup review** if you want to look first.
## How you know it worked
**View imported monitors** lists exactly the monitors you created. A monitor reads as pending until its first check result arrives.
## Move jobs and heartbeats
The import creates website checks only. Create each job and heartbeat by hand as a **Scheduled jobs** entry. Cronitor’s settings fit up4’s like this.
| Cronitor | up4 | What to know |
| --- | --- | --- |
| Interval schedule, such as every 5 minutes | **Expect a check-in every** | Pick the same length and unit. |
| Cron expression or time of day | **Expect a check-in every** | up4 has no cron expressions. Choose the time between runs, for example one day for a nightly job. If the job skips days, choose an interval that covers the longest gap. |
| Grace seconds | **with a grace period of** | The extra time before silence counts as missed. The default is about a fifth of the daily cadence. |
## Steps
### 1. Create the scheduled job
Open **Scheduled jobs**, add a new job, name it and set the interval and the grace period. The minimum interval is 30 seconds.
### 2. Swap the URL in your job
Replace the Cronitor telemetry call with the ping URL of the new job. up4 accepts GET, POST and HEAD. Add **/fail**, or an exit code from 1 to 255, to report a failed run; 0 is a success.
```
https://cronitor.link/p//?state=complete
https://app.upfour.io/v1/heartbeat/
https://app.upfour.io/v1/heartbeat//fail
```
up4 has no start signal. Every request counts as a check-in, so send one when the job finishes and drop the call that reports the start. Where Cronitor takes a status code, up4 takes the exit code at the end of the URL.
### 3. Send the first check-in
up4 does not alert before a job has checked in once. Run the job or call the URL by hand after you create it.
## See what does not carry over
- **History.** Check results, run history and incidents stay in Cronitor. up4 starts measuring with its first check or check-in.
- **Notifications.** Connect each list or integration once as an **Alert channels** entry. The import only assigns channels that already exist.
- **Assertions and request details.** Cronitor’s assertions, headers and bodies are not read. Set what you need on each monitor after the import.
- **Telemetry and run states.** up4 stores check-ins, not run, complete or tick states.
- **Site monitors and environments.** There is no counterpart.
## What up4 does not do here
up4 does not read your Cronitor account and has no one-click migration. You bring the file; up4 shows a preview before it creates anything.
## Expect these differences
- **Confirmation.** up4 does not alert on one failed check. A change of state needs 3 consistent observations: the first differing check plus 2 instant re-checks. Read your Cronitor failure tolerance before you compare alert timing.
- **Unknown ping URLs.** In Cronitor a call for an unknown monitor key creates a monitor. In up4 the job must exist first, because its URL comes with it.
- **Price per check.** Every check type costs €9 per million checks. One monitor checked every minute from one region comes to €0.39 a month. Accepted check-ins from jobs cost €3 per million. See [What costs money](https://upfour.io/docs/how/what-costs-money.md).
## Run both tools side by side
1. Pilot three to five checks and one job that matter, with one alert channel.
2. Leave Cronitor running. For a job, call both URLs from the same script. 48 to 72 hours is a rule of thumb, not a requirement.
3. Import the rest of your list and recreate the other jobs.
4. Send a test alert per channel and confirm it arrived. Then turn off the alerts in Cronitor.
The [switching overview](https://upfour.io/switch) has the same plan in short.
## Take your monitors back out
Open **Monitor tools** in the monitor list and choose **Export monitors (CSV)**. The file imports again into this or another up4 account. Passwords, request headers and proxy settings are not included. Scheduled jobs are not part of that file: note each name, interval and grace period before you leave.
## If something is off
- The preview button stays disabled: every column must be mapped or set to **Ignore this column**, and each field only once.
- A row reports a problem with the interval: write whole seconds or a unit such as 60s, 5m or 1h.
- A job never alerts although it is silent: it has not checked in yet. Call its URL once.
- More fixes are in [Troubleshooting](https://upfour.io/docs/troubleshooting.md).